Advertisements
Looking to develop a website but not sure where to begin? Fear not! Here, you can master the art of how to create homepage in WordPress using the Gutenberg editor.
The homepage acts as the central hub of a website, containing vital information and navigation elements for users.
In this WordPress tutorial, we also offer a series of articles focused on learning Gutenberg, and you can find the article links for each segment below in the subheadings.
Get ready to embark on a comprehensive journey of building your website’s Homepage with Gutenberg, covering essential elements like the header, footer, slider, logo, list post, and gallery. Let’s dive in!
Advertisements
A. Introduction to Gutenberg WordPress
Before delving into the Gutenberg WordPress tutorial, it is crucial to grasp the concept of Gutenberg. Gutenberg is the latest version of the WordPress editor, replacing the Classic Editor.
The fundamental distinction between Gutenberg and the Classic Editor lies in the implementation of the Block feature. Blocks represent individual elements of content that serve various purposes, ranging from simple paragraphs and headings to images, buttons, and more.
With the Block feature, adding, moving, arranging, and deleting content becomes remarkably straightforward, streamlining the page and post creation process.
Gutenberg has become the default editor since WordPress version 5.0 and above, revolutionizing the way content is managed. The visual difference between the Classic Editor and Gutenberg is demonstrated in the image below.

The different UI appearance between Classic Editor (Left) and Gutenberg Editor (Right).
One particularly noteworthy Gutenberg plugin that enhances website creation is Gutentor. To delve deeper into Gutenberg and Gutentor, you can explore more here.
B. Utilizing the Gutenberg Block Editor
When utilizing the Gutenberg WordPress editor to construct a fundamental homepage, it is essential to focus on three key aspects to avoid confusion with other WordPress features.
Advertisements
1. Build the Header, Footer, and Pages
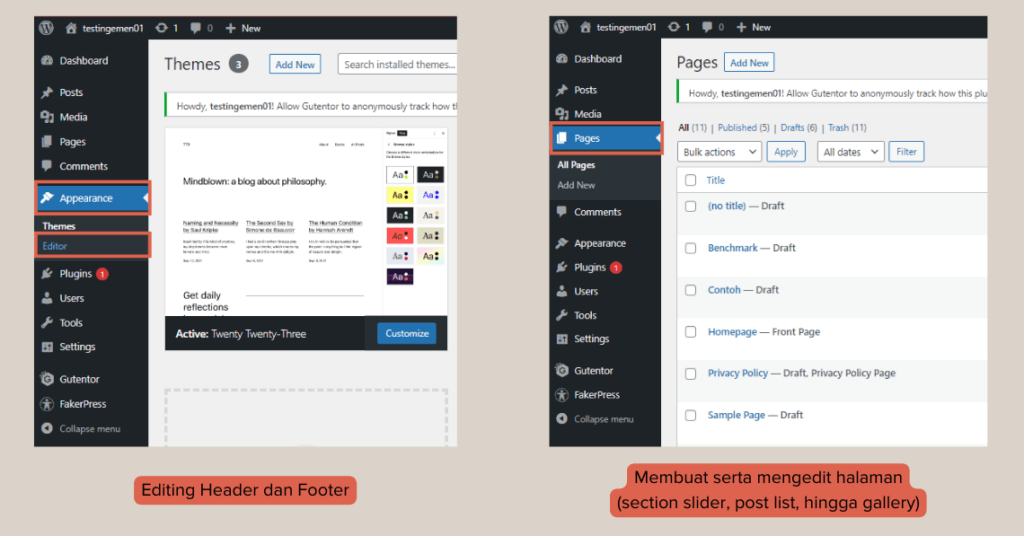
Creating the Homepage involves using two primary menus in WP Admin: (1) crafting and editing the Header and Footer in the Appearance > Editor menu, and (2) generating and editing pages via the Pages menu.
For the purpose of this Homepage creation tutorial, you can set aside other menus on the WP Admin home page. While you may briefly encounter sections such as Posts, Settings, and Plugins, your interaction with them will be minimal.
2. Add Blocks
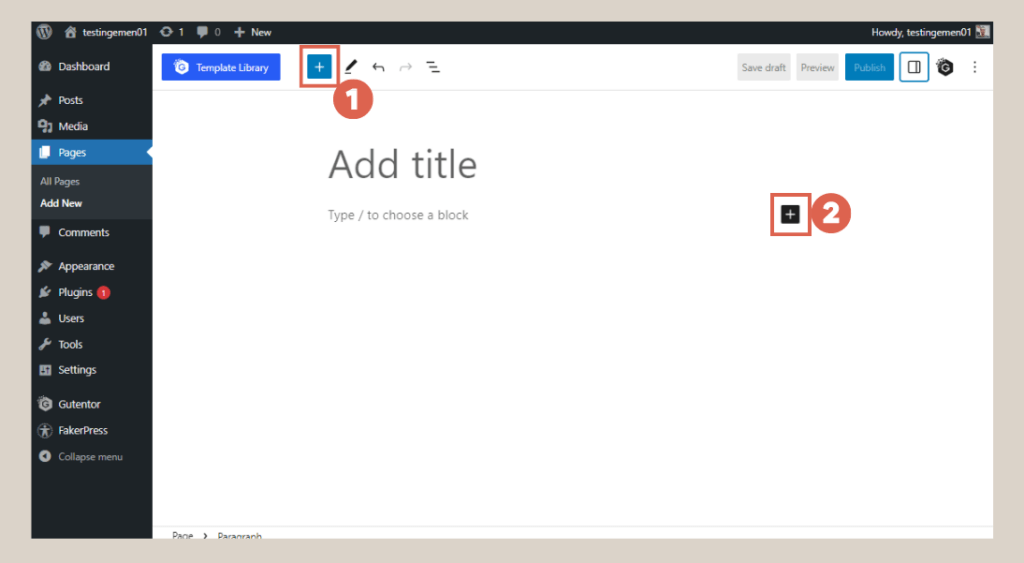
Upon initiating the page creation process, the Gutenberg editor’s main page already contains two default blocks: the title and the paragraph. If you wish to add images or other elements, you must incorporate additional blocks.
To insert a new block, there are two methods available: (1) click [+] on the top toolbar, or (2) click [+] on the editor area, as illustrated in the image below.
Advertisements
3. Modify Block Structure through List View
The List View function can be accessed by clicking on number 1. Alternatively, you can use the Shift + Alt + O shortcut to display or hide the List View.
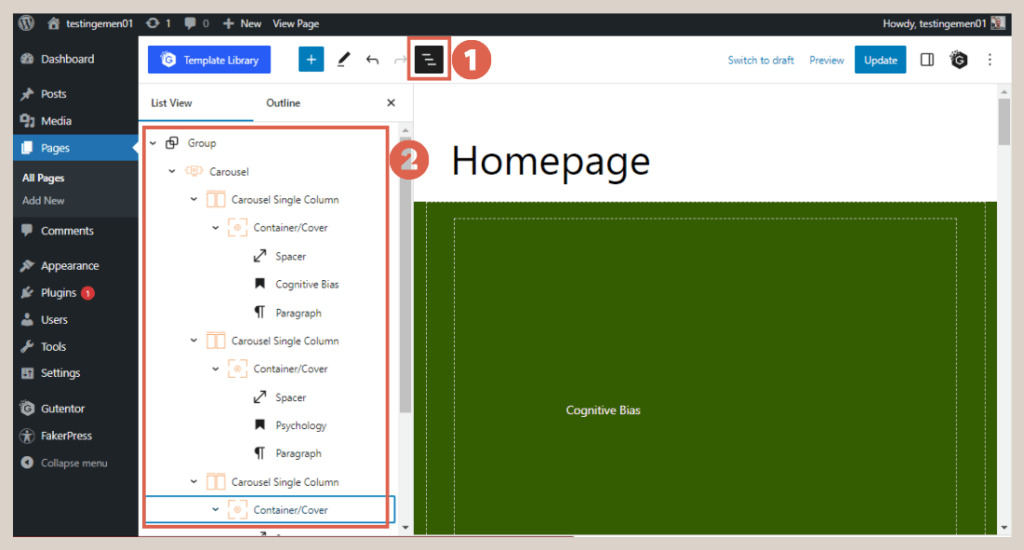
This feature proves highly beneficial when dealing with a substantial number of blocks, as depicted in number 2. It enables effortless dragging and dropping of created blocks, eliminating the need for direct manipulation within the editor page.
Advertisements
4. Editing Blocks via Settings
As one might anticipate, the Settings feature serves to customize colors, sizes, and other variations required for each block. To access this feature, simply click on the Settings button (number 1).
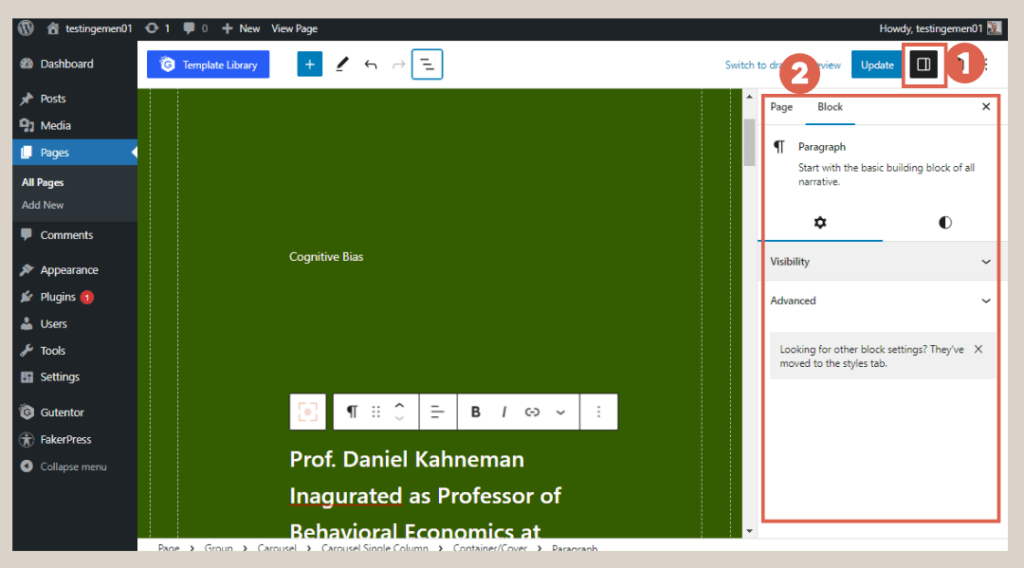
The appearance and options presented within the Settings section (number 2) may differ based on the block type. For instance, the Paragraph block offers choices for text color and size, while the Row block contains Layout settings.
You will frequently utilize the Settings section to address the question of how to create a homepage in WordPress, especially when fine-tuning the blocks.
Advertisements
C. How to Create Homepage in WordPress with Gutenberg Editor
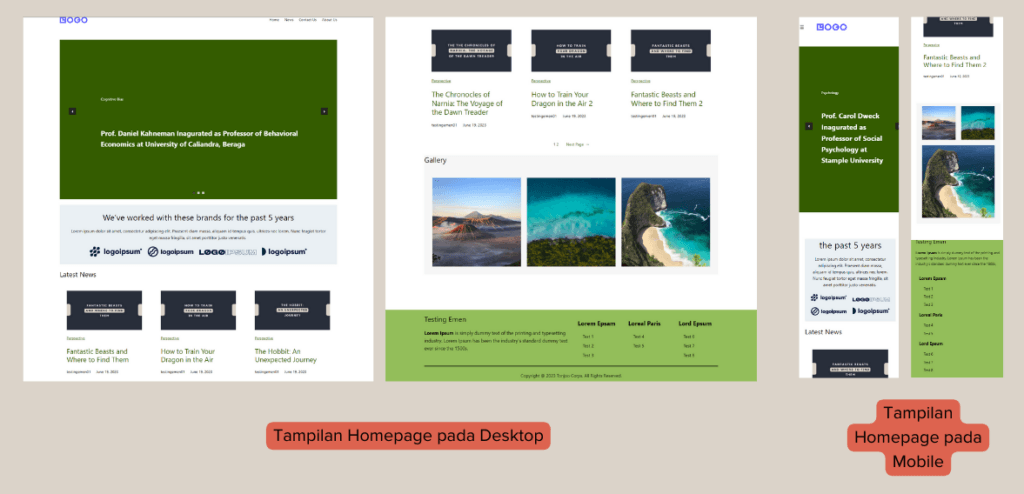
Having grasped the concept of using blocks, you are now well-prepared to embark on the Homepage creation process. The Homepage you will be crafting consists of the components illustrated in the image below:

Without any delay, let’s delve into the tutorial detailing the step-by-step process of creating a Homepage using Gutenberg WordPress!
This comprehensive tutorial also covers setting up responsive features to ensure the Homepage’s mobile-friendliness. For the guide on making the Homepage responsive, please refer to the separate article, which includes a link for your convenience.
1. Build Header
Baca Juga
As you start on building your homepage using Gutenberg WordPress, the initial step involves creating the header section.
The header plays a pivotal role in presenting the website’s identity and primary navigation elements, such as the logo and navigation buttons for essential pages like home and about.
Typically located at the top of the website, the header sets the tone for the overall design.
Before commencing the header creation process, ensure you have installed the Gutentor and FakerPress plugins. While these plugins do not directly create the header, they will prove valuable for subsequent steps in this tutorial.
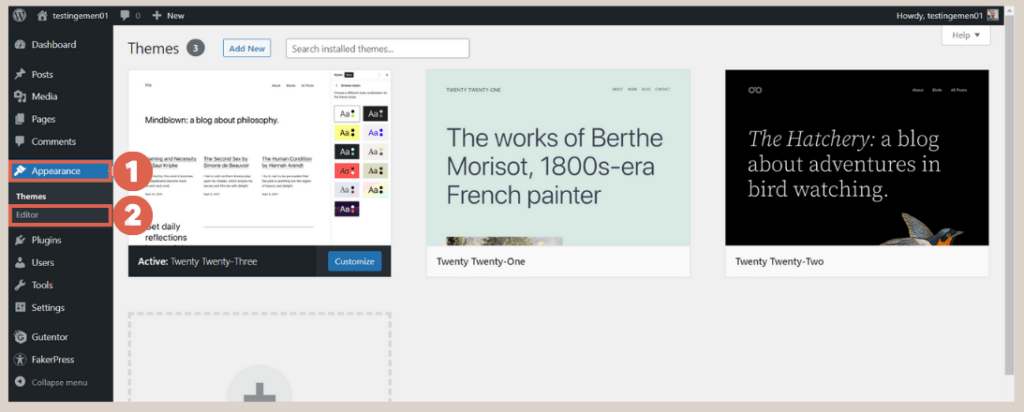
To begin crafting the header, access the WP Admin panel and navigate to the Appearance section > click on Editor.
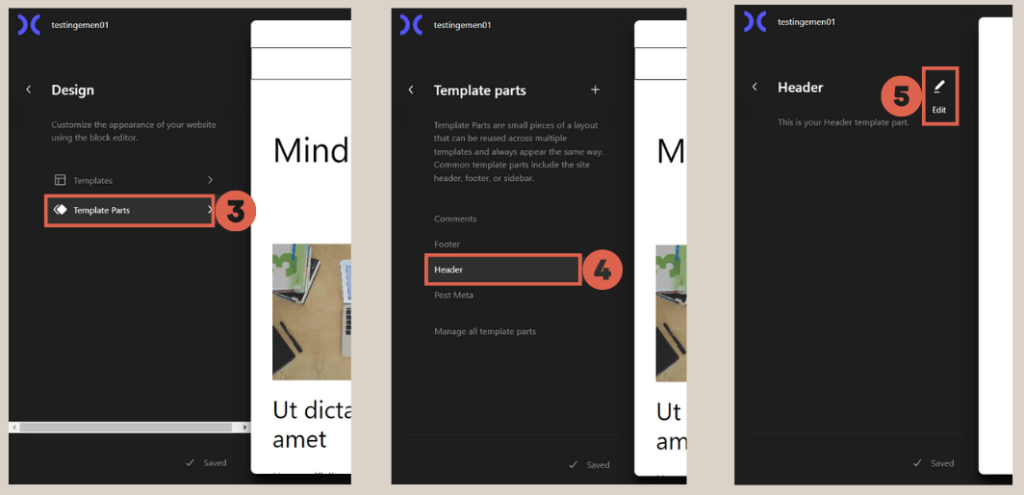
Then, proceed to select Template Parts and choose Header. Click on the Edit icon to commence the customization process.
For comprehensive step-by-step guidance on crafting the header, you can find detailed instructions here.
2. Create Footer
Much like the header, the footer serves as a consistent element throughout the website, maintaining its appearance and functionality across all pages.
In the footer section, essential information is typically included, such as contact details, company description, copywriting statements, and links to various pages on the website.
To create the footer, you can follow a process similar to the one used for the header: Access WP Admin, click on Appearance, then select Editor. From there, choose Template Parts, followed by Footer > finally, click on the Edit icon.
For comprehensive step-by-step instructions on crafting the footer, you can refer to this detailed guide. Once you have successfully created the footer, be sure to learn about making the header and footer responsive for users accessing the website via mobile. This information can also be found in a separate article.
3. Build Slider Section
The slider serves as a visually engaging element on your website, displaying a series of images or other content that can be manually or automatically scrolled through.
Utilizing this feature can effectively capture visitors’ attention and offer a glimpse of what your website has to offer.
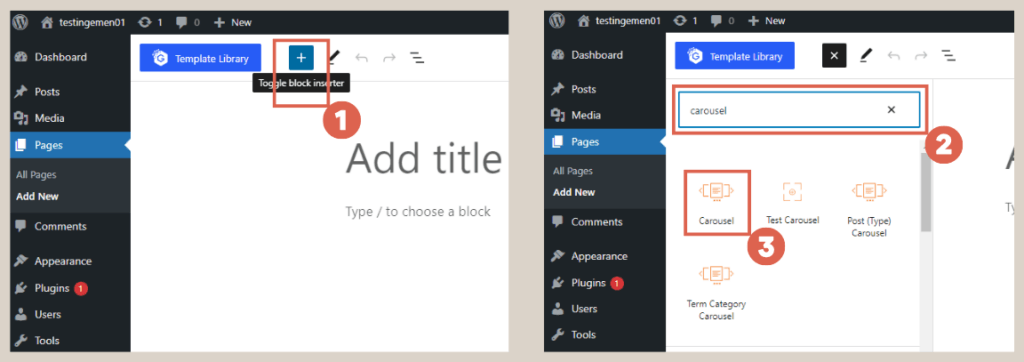
To begin creating the slider section, access WP Admin and click on Pages. From there, select Add New, and click on the [+] symbol. In the search box, type carousel, then choose the Carousel block.
For a more detailed step-by-step guide on creating the Slider section, you can refer to this comprehensive tutorial. Additionally, to ensure responsiveness for mobile users, be sure to follow the tutorial on how to create a responsive slider.
4. Create Client/Partner Logo Display
The client or partner logo section is a valuable component of your website, showcasing logos from brands or companies that you collaborate with. It serves to enhance credibility and highlight your experience and connections.
Position this section just below the Slider section and utilize the Image block to insert the logos.
For more comprehensive instructions on creating the client/partner logo display, you can find detailed guidance here. To ensure its mobile-friendly performance, follow the tutorial on creating a responsive client logo section.
5. Include List Post Section
The list post section proves useful for presenting a compilation of published posts or articles, which can be sorted by latest, most read, or trending content.
To incorporate the list post section, add the Query Loop block beneath the client logo section. For a thorough step-by-step guide on creating this section, refer to this article.
6. Craft Gallery Section
True to its name, the Gallery section showcases multiple images on your website page. You can seamlessly add this section using the Gallery Widget block, which is available through Gutentor.
For a detailed tutorial on creating the Gallery section, you can consult this guide. Afterward, read the tutorial on how to make both the list post and gallery sections responsive. If you’ve followed these steps, you have successfully learned how to create a homepage in WordPress using Gutenberg.
Conclusion
That concludes the tutorial on building a homepage in WordPress using the Gutenberg editor. While this homepage creation process is relatively straightforward and limited in functionality, for more advanced website features like those on Hello Health and Hipwee, you can rely on the expertise of the Tonjoo team—a proficient web developer handling projects from corporate to startup websites.
Let’s discuss your desired website vision via Contact Tonjoo, and together, we’ll bring it to fruition!
Last Updated on July 18, 2024 by Tonjoostudio Team

Advertisements