
Advertisements
Once you’ve got the fundamentals of using the Gutenberg WordPress block editor, your next step is to delve into how to create header on WordPress using Gutenberg.
The website header is a crucial component situated at the topmost part of a web page. It remains static across all pages of the website, maintaining consistent branding and navigation.
In this beginner-friendly tutorial on crafting a basic website page, you will be guided on how to make a website header, as outlined below:
Advertisements
Step 1: Preparing to Create a Website Page
Before diving into the process of crafting a header using Gutenberg, there are essential preparatory steps to undertake, comprising both basic and advanced preparations.
a. Basic Preparation
The following are the fundamental preparations necessary before commencing the creation of a website page with the Gutenberg WordPress editor:
- Download the latest version of WordPress and install it on your localhost. You can use localhost such as WampServer, XAMPP, or LocalWP. We recommend you to use LocalWP.

- Utilize the WordPress theme Twenty Twenty-Three, which comes pre-installed in WordPress version 6.2.

- Download, install, and activate the Gutentor and FakerPress plugins. If you need guidance on installing WordPress plugins, a detailed guide is available to assist you.

Advertisements
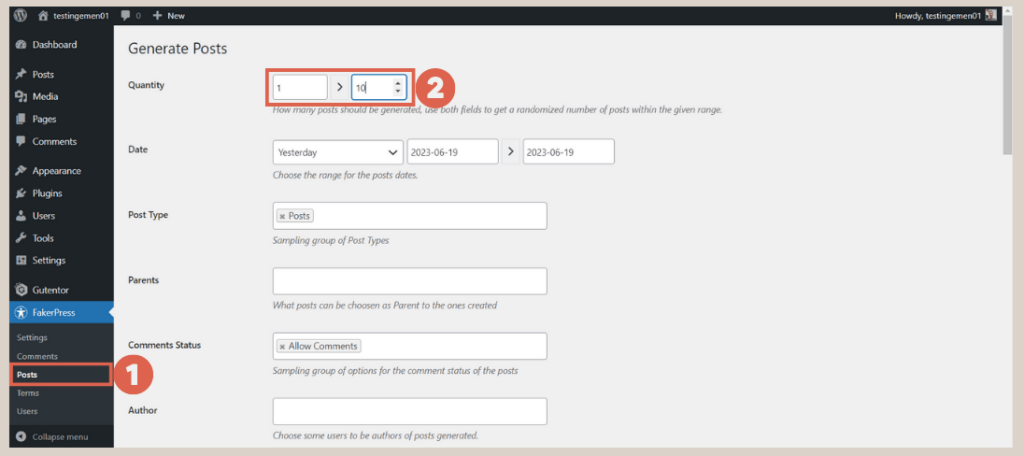
b. Advanced Preparation: Generating FakerPress
FakerPress is a valuable tool for effortlessly creating dummy blog posts for testing purposes, with the added advantage of easy cleanup. Here’s how to generate FakerPress:
- Navigate to Posts > Enter a desired value between 1 and 10 in the Quantity section.

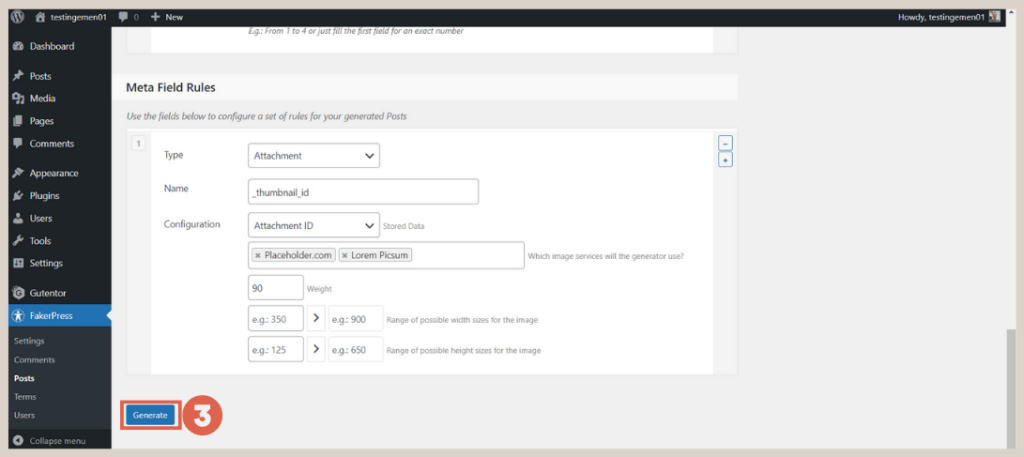
- Scroll down and click on Generate.

- The dummy posts will now appear in the Posts section.
Once you’ve completed the necessary preparations, you can proceed with creating the header.
Step 2: Crafting the Header
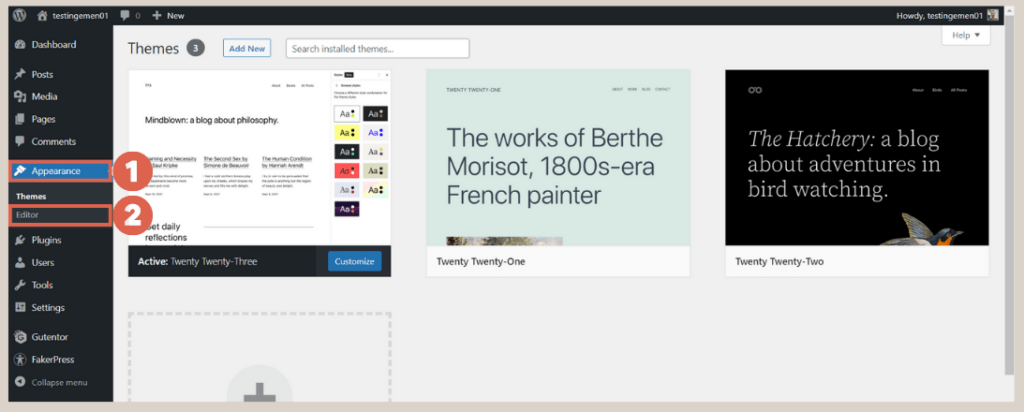
The header is an integral part of a website page positioned at the top, typically containing a logo and navigation menu. Follow these steps to create a header using the Gutenberg editor in WordPress:
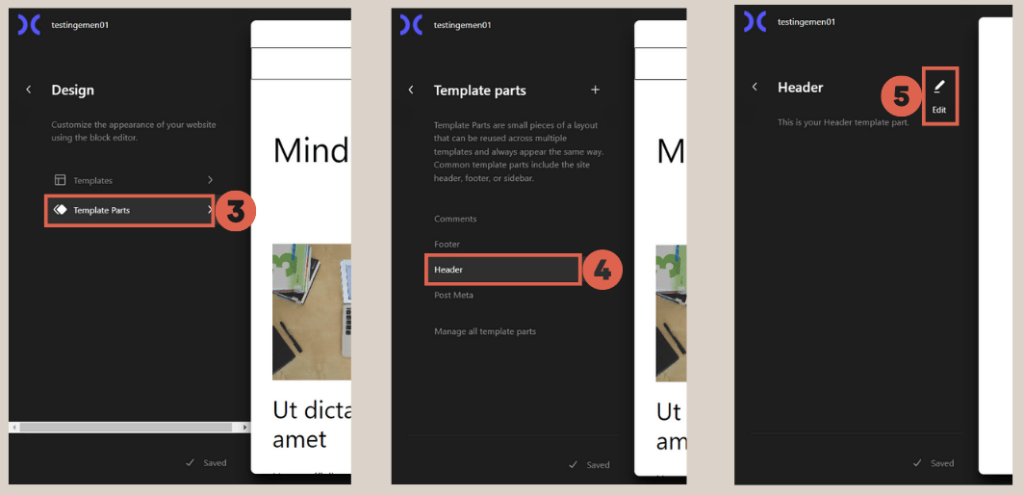
- Click on the Appearance menu in the left sidebar > select the Editor option.

- Choose Template Parts > click on Header > click on the Edit icon.

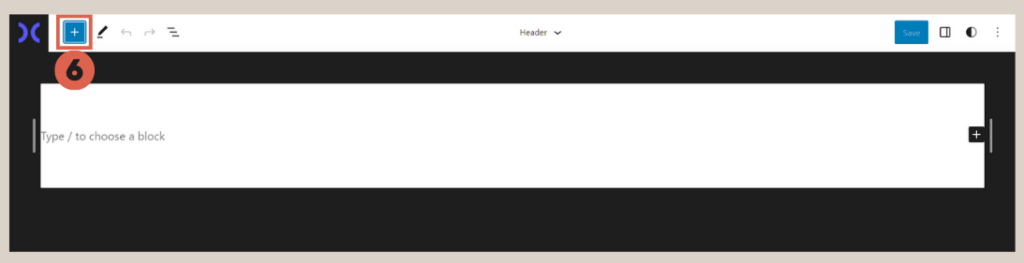
- Click [+] to add block features.

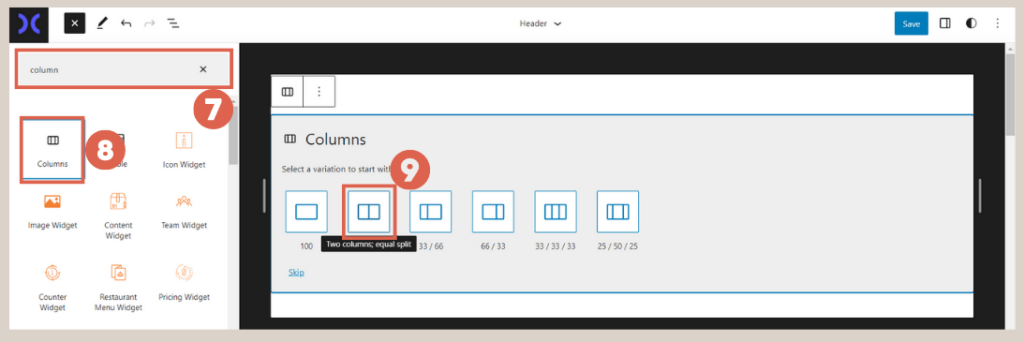
- Type columns in the search box > choose the Columns block > select the Two columns equal split option.

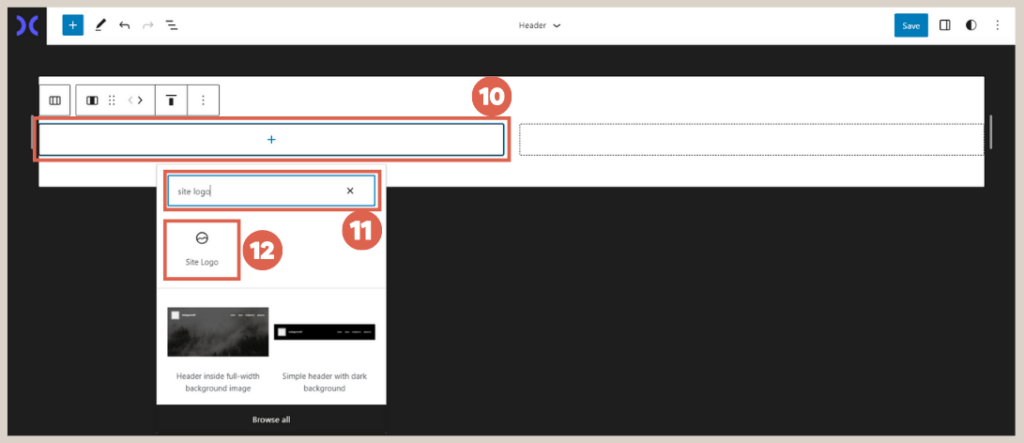
- In the left column, click [+] > type site logo > select Site Logo to add the logo to the website.

- Click Upload logo. To match this tutorial, you can download the logo provided here or you can use your own.

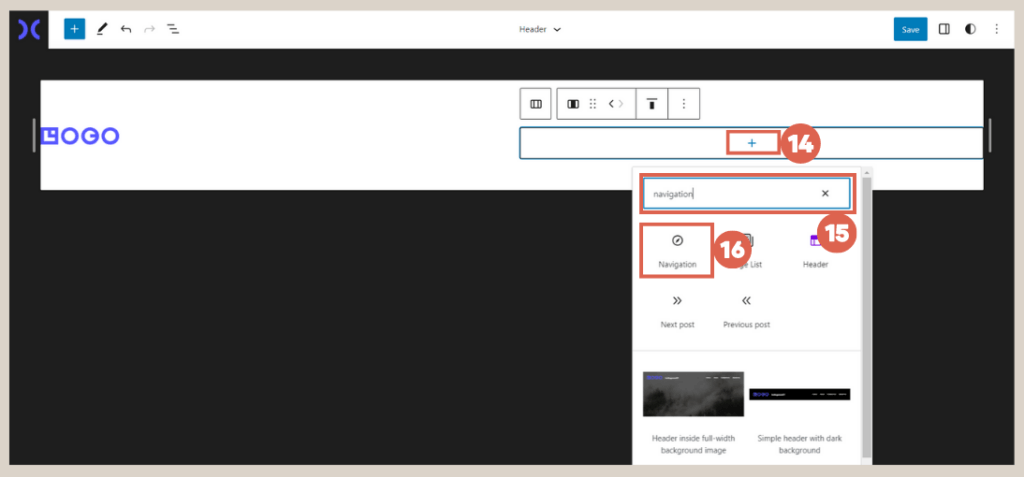
- On the right-hand column, click [+] > type navigation in the search box > click Navigation.

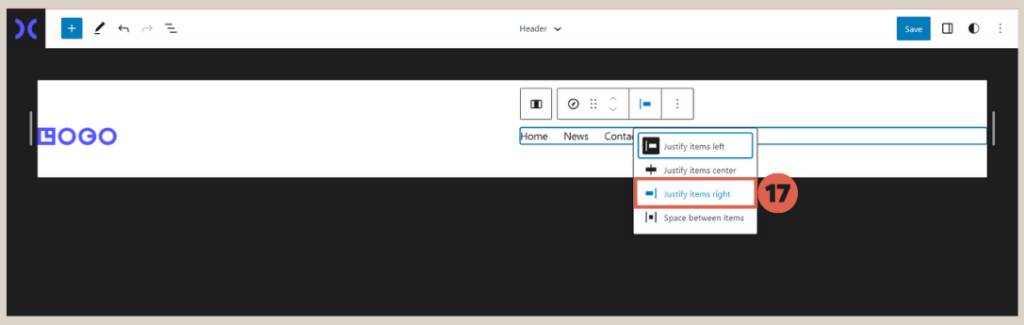
- Align it to the right by selecting Justify items right.


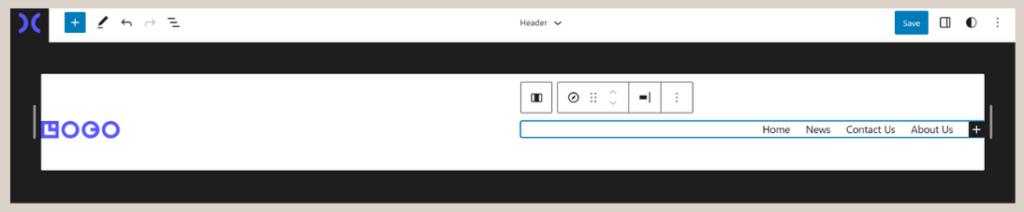
The final result will be a complete header with the logo and navigation menu as shown bellow:
Advertisements
Step 3: Customizing the Header
Baca Juga
Moving on, you’ll need to make basic adjustments to the header you created, which involve combining the right and left columns of the header and resizing it.
When performing the following editing steps, ensure that the header column containing the logo and navigation is either clicked on or in a selected state. Once done, here’s how to customize it:
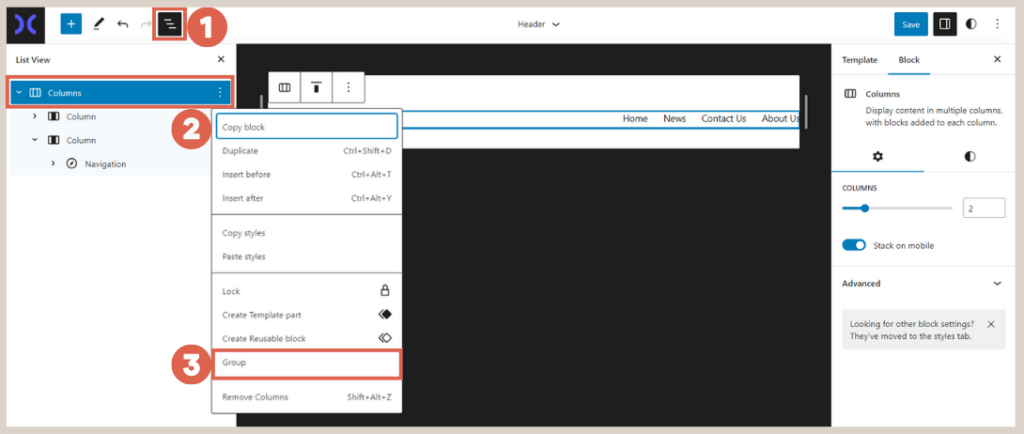
- Click on List view > click the three dots on the topmost Columns > select Group to merge the right and left columns.

- Click Settings on the right > in the WIDE section, enter a value of 1200 > then click Save.

- Done! The logo and navigation columns have now been merged into one, and the size has been adjusted accordingly.

Advertisements
Step 4: Adding and Removing Navigation
The next stage is to learn how to add and delete navigation menus after you’ve finished customizing. This is crucial in case you need to add any missing menus or get rid of any that aren’t being used.
Advertisements
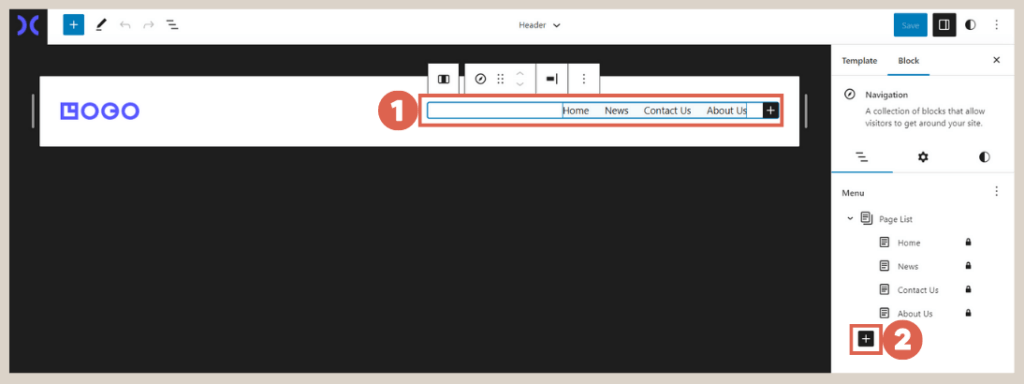
a. Adding Navigation
Here’s a guide on how to add a navigation menu to the header:
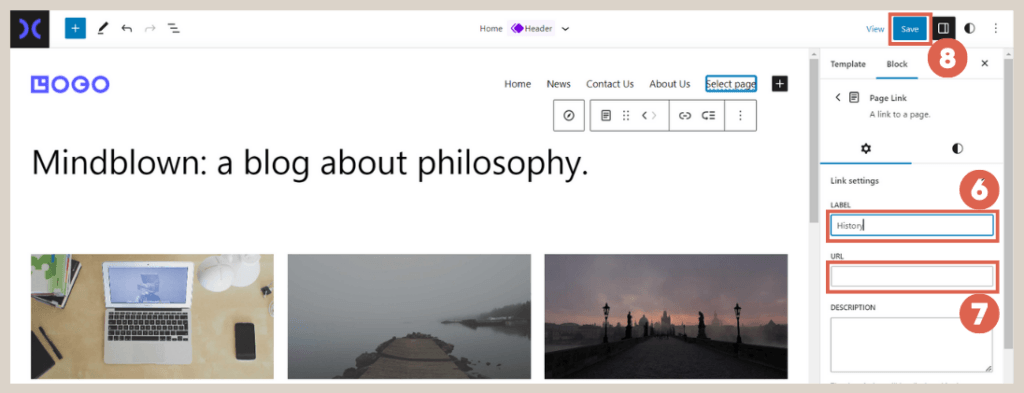
- Click on the Navigation column.

- In the Settings section, click on [+] to add Navigation.
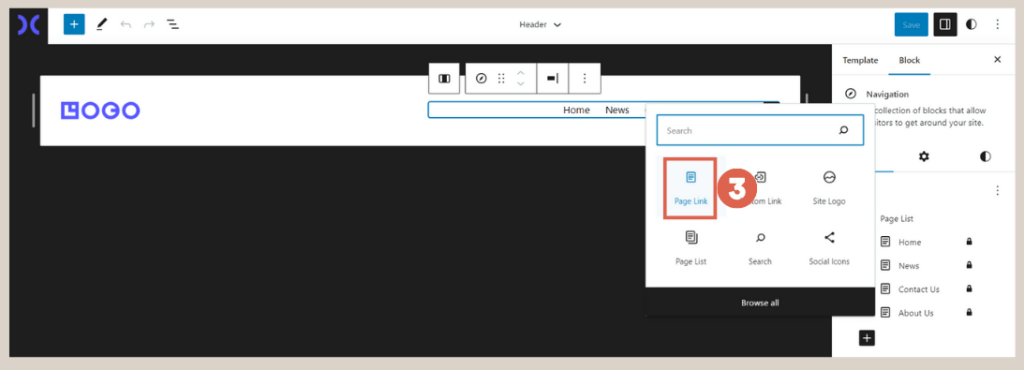
- Choose Page link.

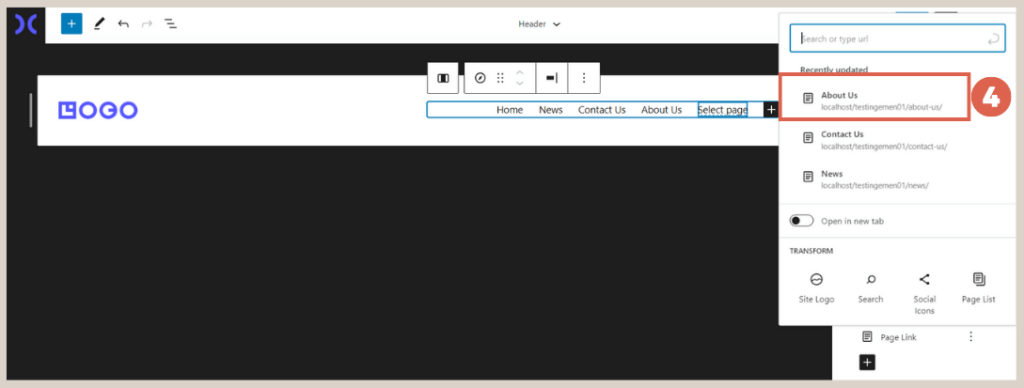
- Select the desired page to include in the navigation.

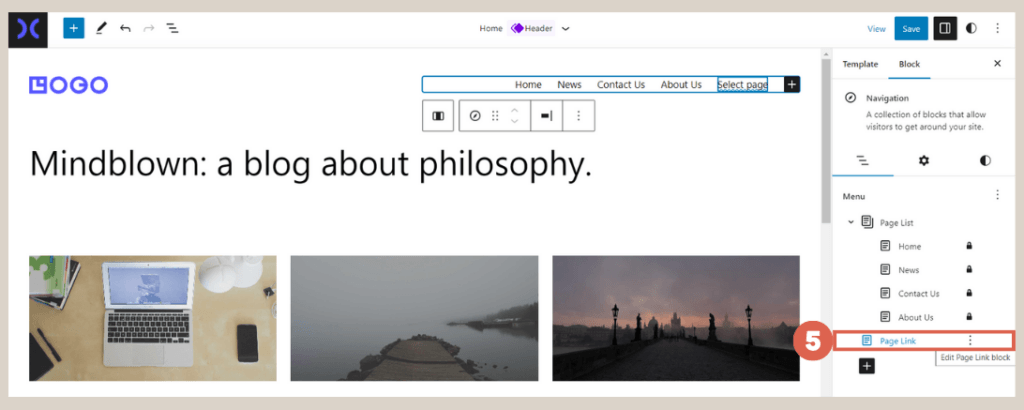
- Click on the created Navigation.

- Enter the navigation’s Label and URL, then click on Save.

b. Deleting Navigation
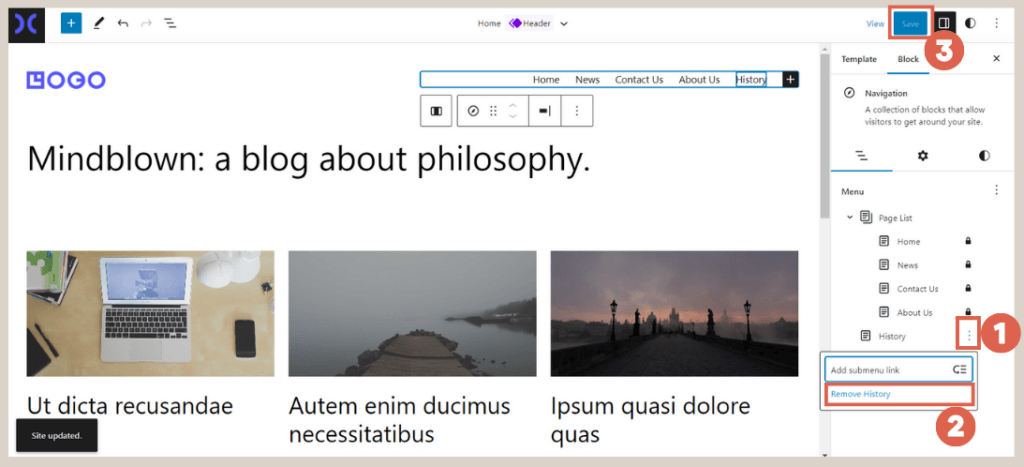
Here’s how to remove a navigation menu from the Header:
- Click on the Three Dots for the navigation menu you wish to delete.

- Choose the Remove option.
- Click on Save, and you’re done. The navigation menu has been successfully removed.
Ready to Create Header using Gutenberg?
That sums up the tutorial on how to create header using the Gutenberg WordPress editor. In this initial stage of page creation, we focused on designing the header.
In the next stage, you will proceed to create the footer for your website. However, building a website with Gutenberg may take time, especially if you desire a site with complex features similar to Hipwee and Astra International.
You may rely on Tonjoo Team, a reputable software company with experience building websites for start-ups and the government, to assist with sophisticated website creation. Please contact us if you want to discuss anything more!
Last Updated on July 18, 2024 by Tonjoostudio Team

Advertisements