Advertisements
The previous WordPress Gutenberg tutorial on creating a post section was successfully covered. Now, it’s time to proceed with how to create Gallery section on the homepage.
The Gallery section on the homepage is designed to display multiple images, capturing the attention of visitors and potentially increasing user engagement on the website.
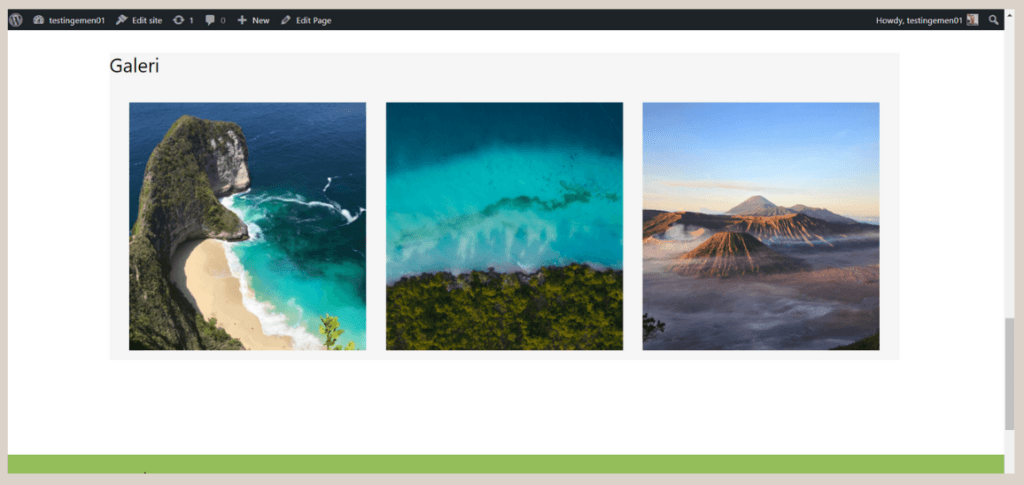
Upon completion of this tutorial, the final result of the gallery section will look like the image below:
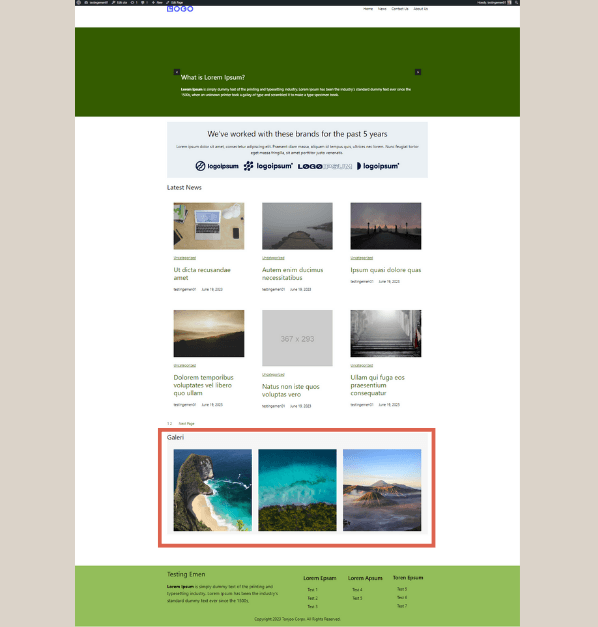
Final result of Gallery section on Homepage. Created using Gutenberg Editor, WordPress.
If you’re prepared, follow the steps below to create the gallery section, which can be divided into two main parts: (1) adding the Gallery Widget and (2) making simple adjustments.
Advertisements
How to Create Gallery Section on WordPress
To learn how to create gallery section, there are two steps; (1) adding Gallery Widget and (2) organizing it.
Step 1: Add the Gallery Widget and Upload Images
To create this section, we will utilize the Gallery Widget block, which is a feature of Gutentor, the plugin you installed earlier when creating the header.
To get started, access the Home page through WP Admin > go to the Pages menu > select the page that you have already filled with the header, footer, slider, and list of posts. Then, follow the steps on gallery section in website below:
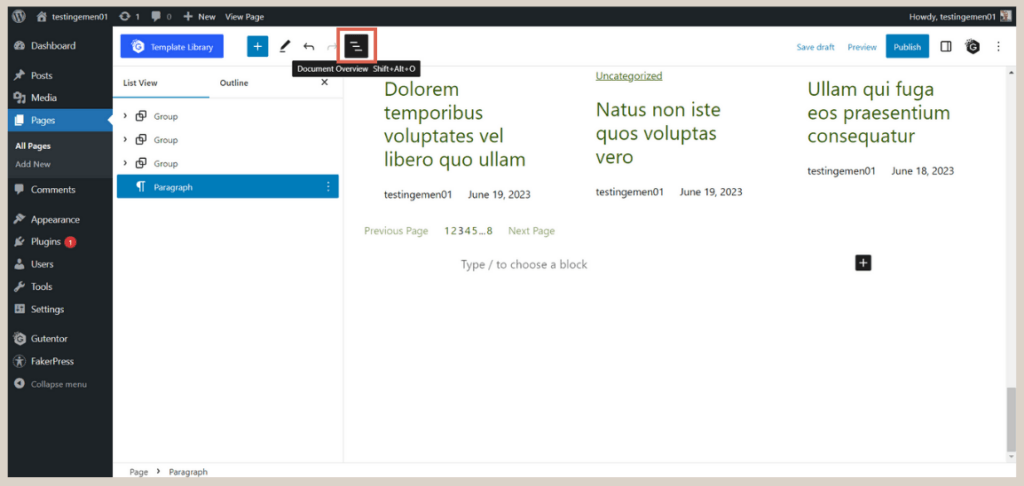
- Open the List View to easily manage the blocks.

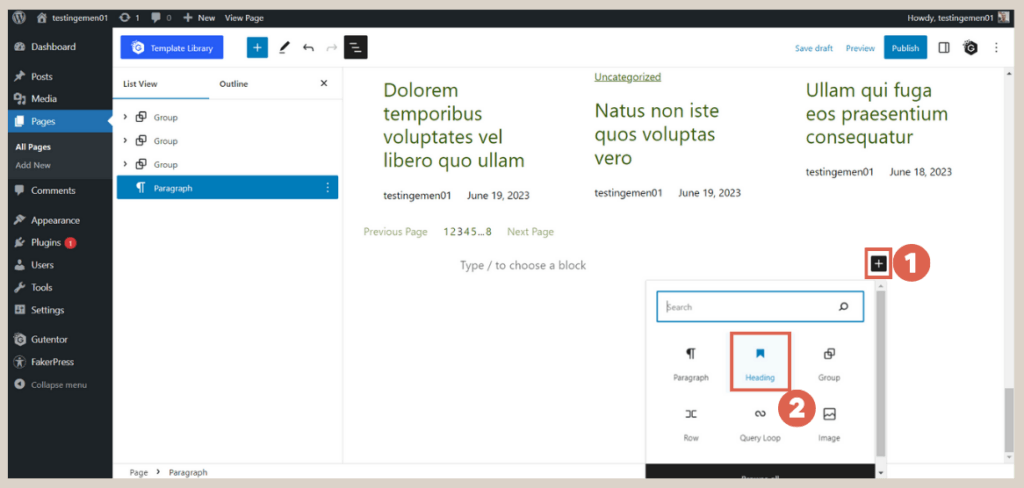
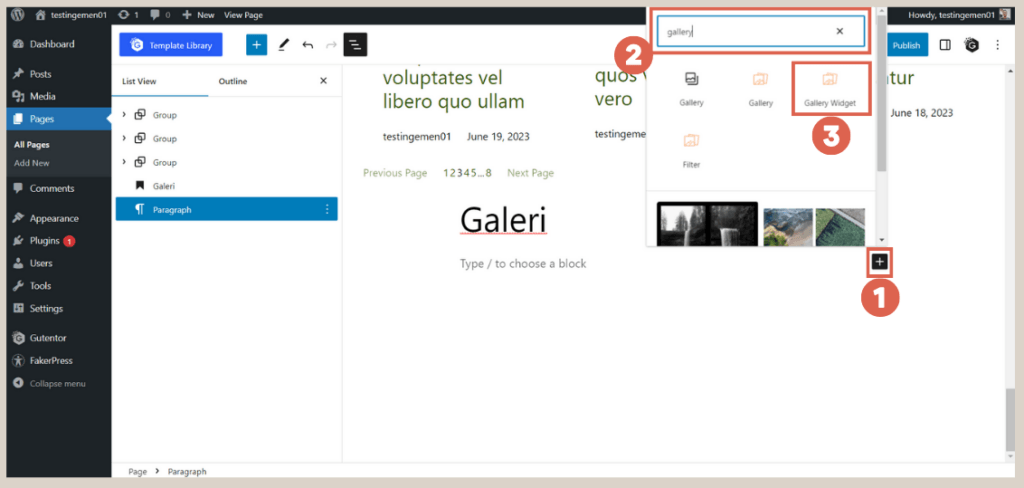
- Click at the bottom of the editor area, then click [+] > select Heading to create a title for the gallery. Fill in the heading as desired. In this case, we will use the heading Galeri.

- Click below the Galeri heading, then click [+] > type gallery in the search box > select the Gallery Widget block.
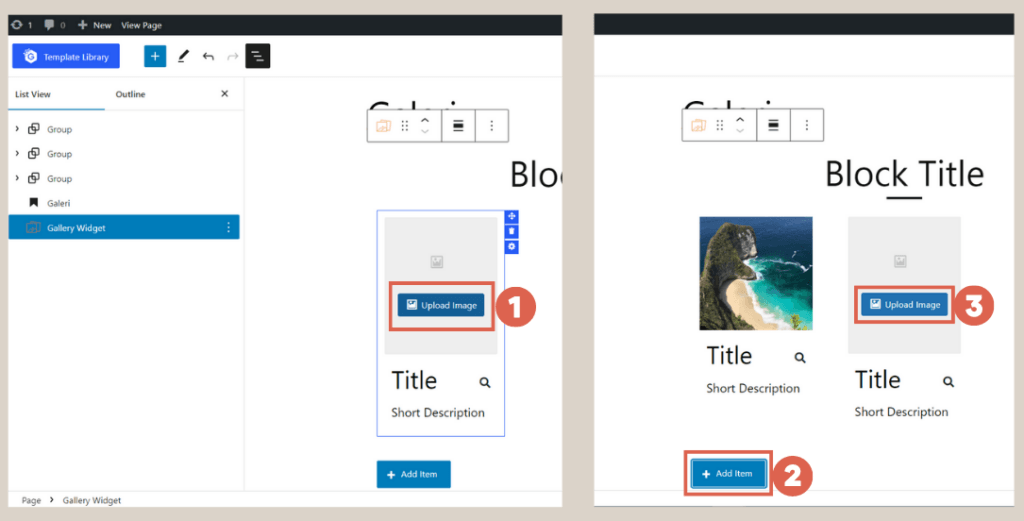
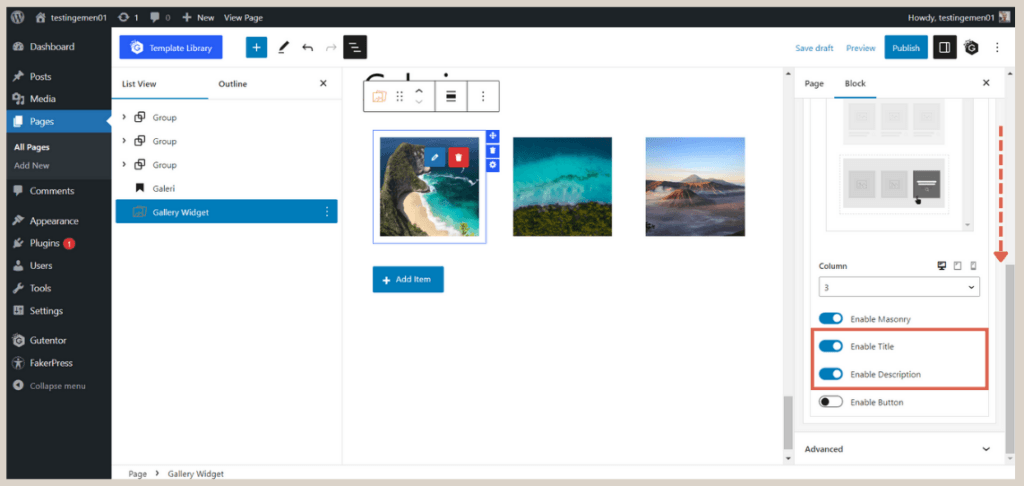
- Next, add images by clicking Upload Image. You can use the provided images here. To add more images, click Add Item > then click Upload Image. Add as many images as needed.

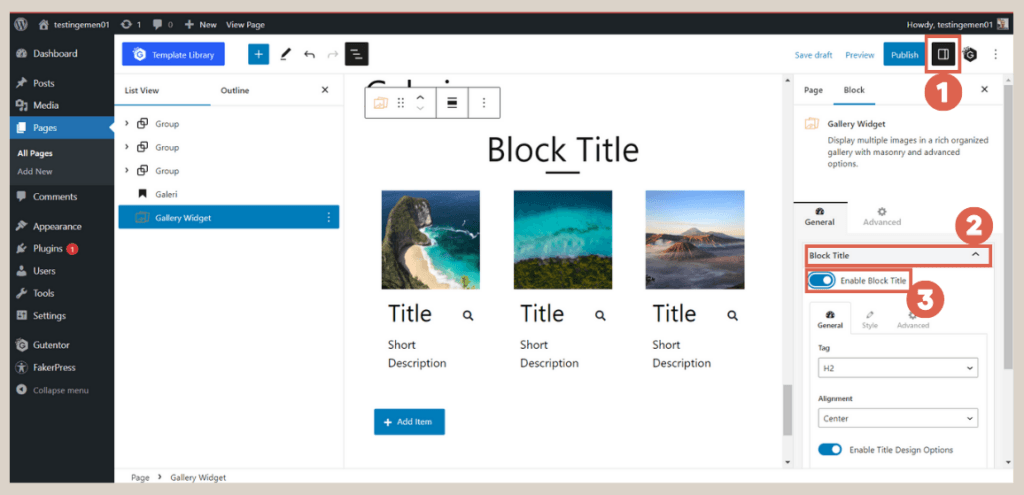
- Open the Settings in the top right corner > click Block Title > disable the Enable Block Title toggle. This step is necessary to remove the default block title.

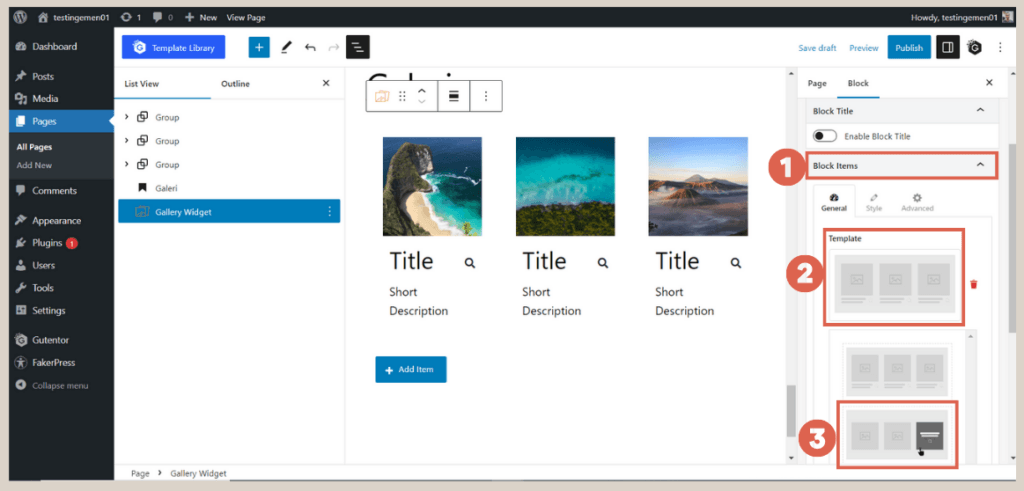
- Scroll down and click Block Items > click Template > select one of the available gallery templates.

- Scroll down again. Disable the Enable Title and Enable Description toggles.
At this point, you have successfully added the Gallery to your landing page or homepage. However, if you preview it on the front-end, the appearance may not be optimal yet. Therefore, you need to organize the Gallery to make it look tidy.
Baca Juga
Advertisements
Step 2: Organize the Gallery
Organizing the Gallery section is crucial to ensure its visual coherence with the blocks above it. Additionally, we will add a background color to distinguish the Gallery section from others. Here’s how:
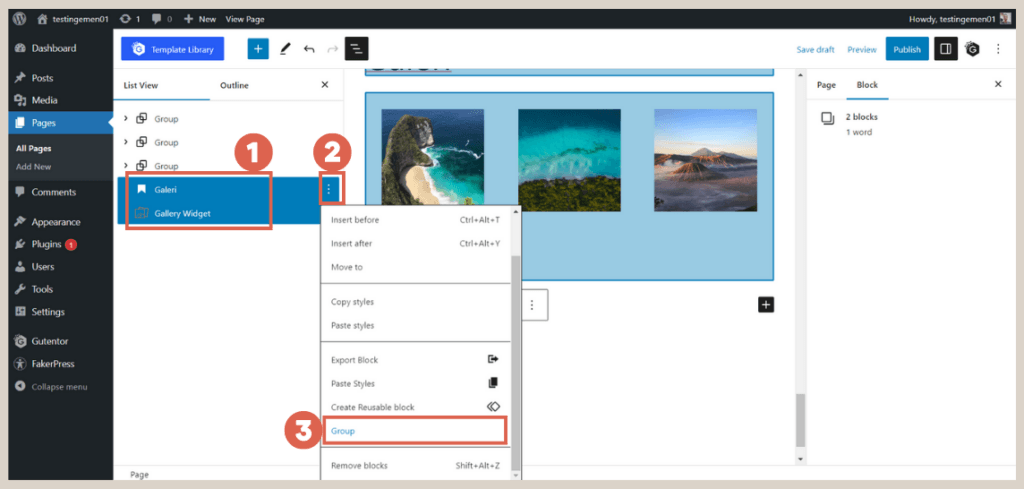
- In the List View, select the Heading and Gallery Widget blocks > click the three dots > choose Group. Grouping the entire Gallery block makes it easier to manage.

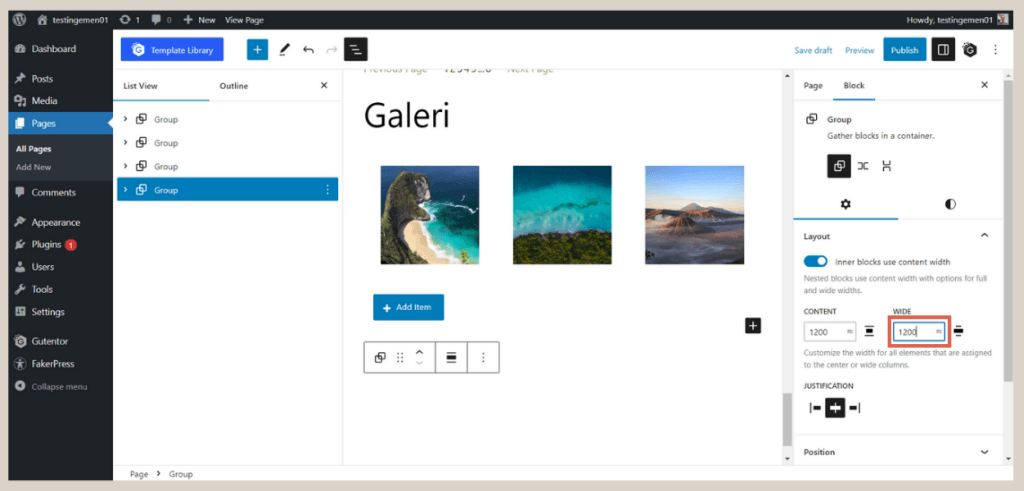
- Next, set the width of the Gallery to 1200.
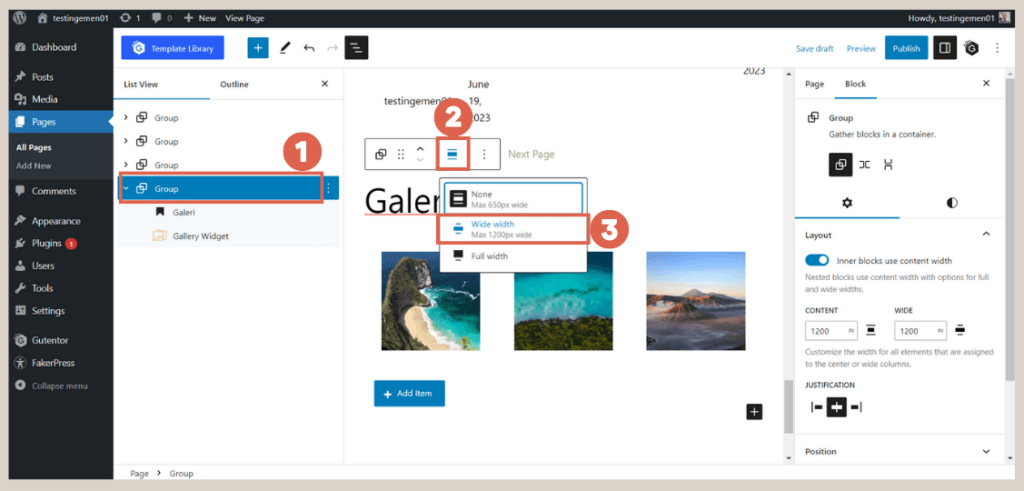
- Click on the GroupGallery > select the width setting on the toolbar > choose Wide width.
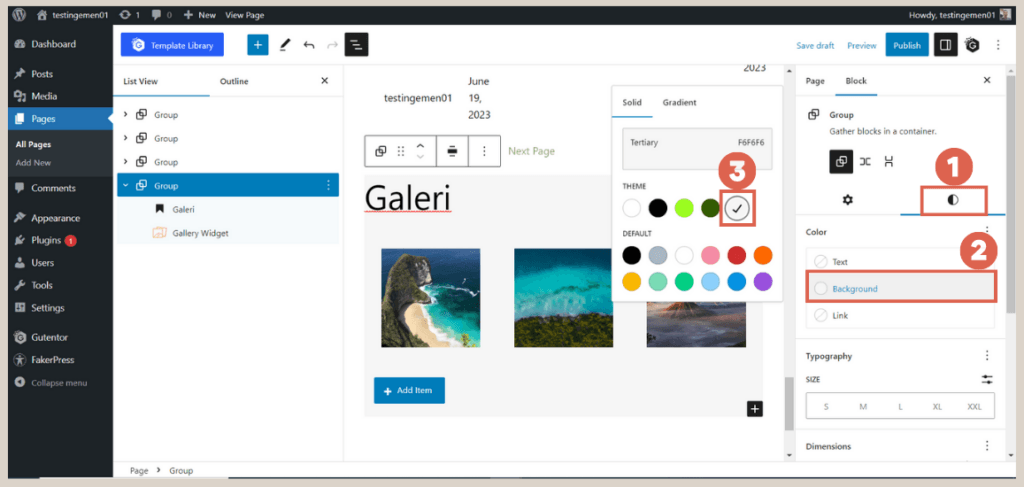
- Add a background color by clicking Style > click Background > select the desired color. In this case, we will use the color with the code F6F6F6.

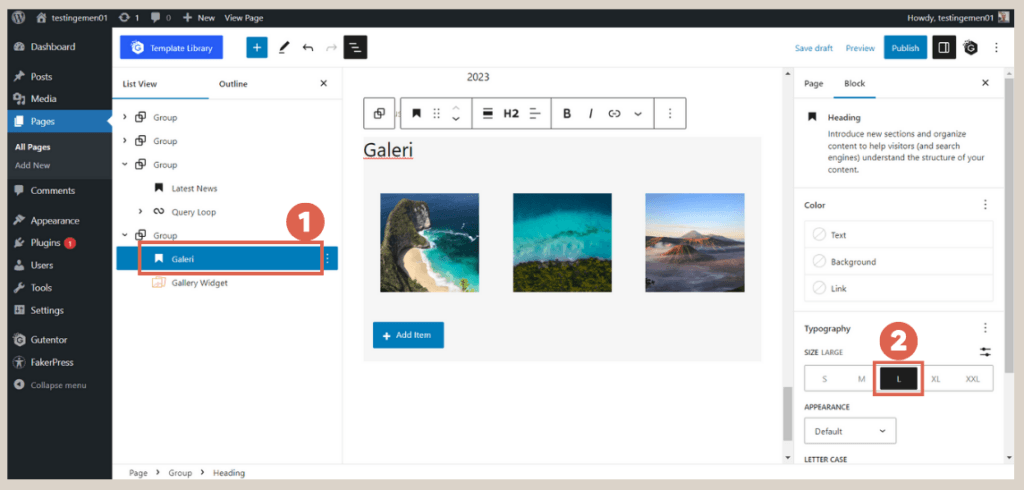
- Adjust the text size of the title by clicking on the Heading block > in the Typography section, choose size L (Large). You can also select a size according to your preferences.

- Done! You can save the draft and preview to see the final result. Here’s how it appears on the front-end.

Conclusion
That wraps up the tutorial on how to create Gallery section on the homepage using the Gutenberg WordPress editor along with the comprehensive block plugin, Gutentor.
If you have successfully completed this stage, the next step is to ensure that the homepage is mobile-friendly by making the header and footer responsive.
Creating a website can be a time-consuming process, but don’t let it deter you from pursuing your business goals and the need for a well-functioning website.
If you prefer to save time and ensure a professionally developed website, you can entrust the website development to Tonjoo Team, a proficient software development team with experience in handling projects for both startups and multinational companies.
Feel free to get in touch with us to discuss further and create a website that perfectly suits your business needs!
Last Updated on July 18, 2024 by Tonjoostudio Team

Advertisements