Advertisements
If you have completed the creation of the partner logo section, the next part you need to learn is how to create post list on your Homepage using WordPress’s Gutenberg editor.
The post section is an integral part of the homepage that displays a selection of specific blog posts that have been published. It can consist of the latest blog posts, most popular posts, or trending articles.
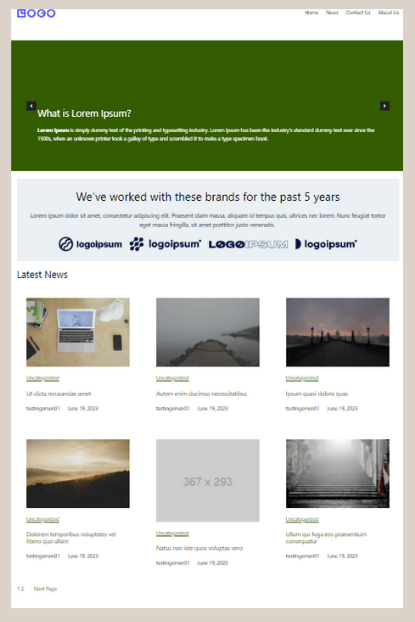
In this tutorial, we refer to this section as Latest News, but you are free to name it according to your preferences, as demonstrated in the final result image of the post section below.
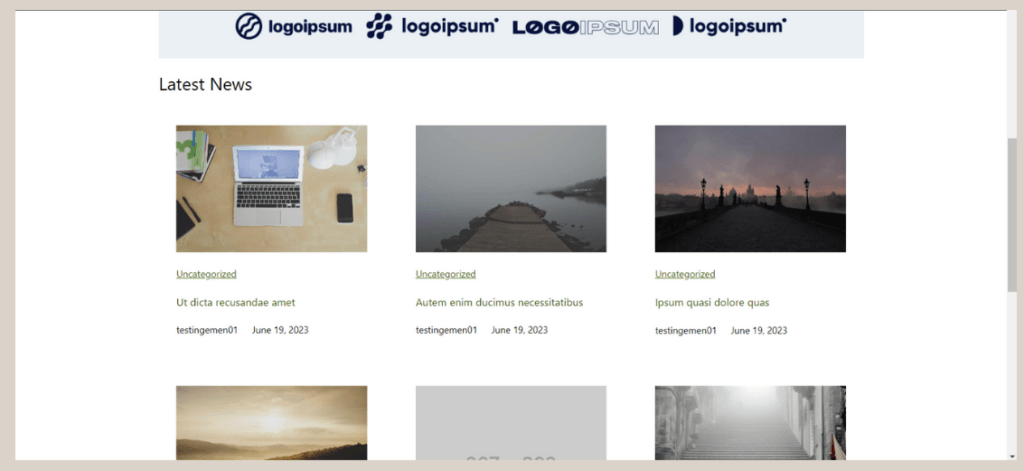
Final result of post list on Homepage created using Gutenberg editor.
So, how do you create a post section in WordPress using the Gutenberg editor? Below are the three essential steps that you need to follow!
Advertisements
How to Create Post List on Homepage
The first step to create post list section on homepage is setting up query loop. The second is to include the posts into query loop. And the last one, you need do setting here and there.
Step 1: Set Up a Query Loop
To initiate the creation of a post section, you will first need to establish a Query Loop, which is a block that showcases posts with customizable parameters.
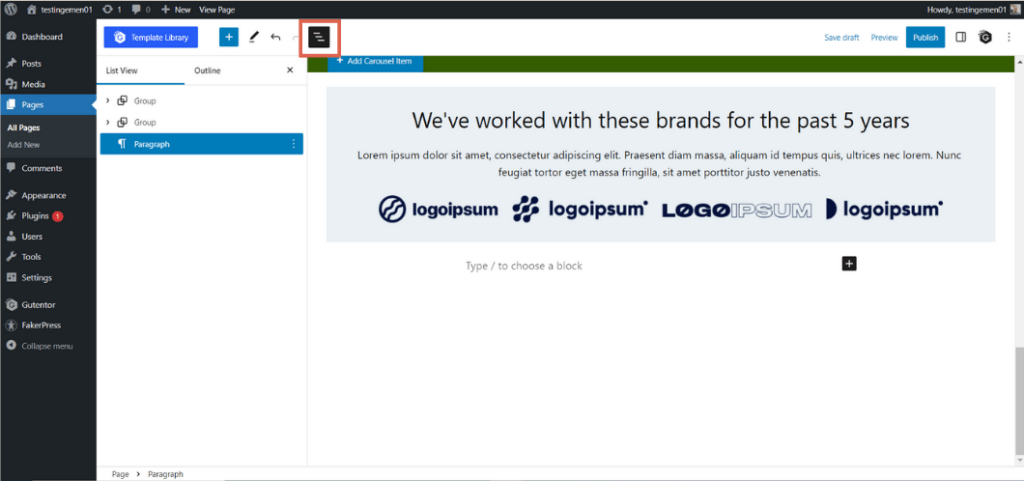
Begin by opening the Homepage where you have already added the Header, Footer, Slider, and Partner Logo. Then, proceed to the bottom section and click anywhere to bring up the Paragraph block. Follow the steps below:
- Open the List View tab for better block arrangement.

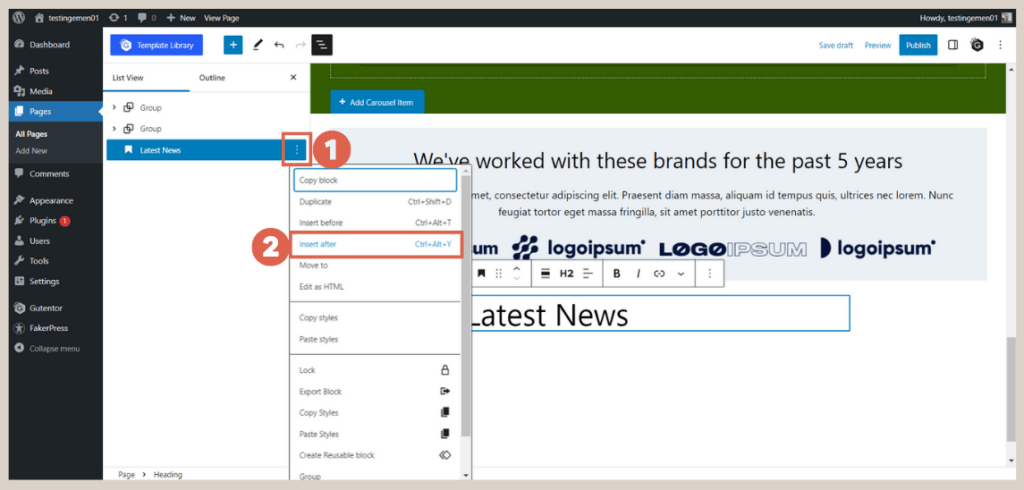
- Click at the bottom, then click [+] > select the Heading block. Now, provide the heading text. For instance, we will use Latest News as the heading.

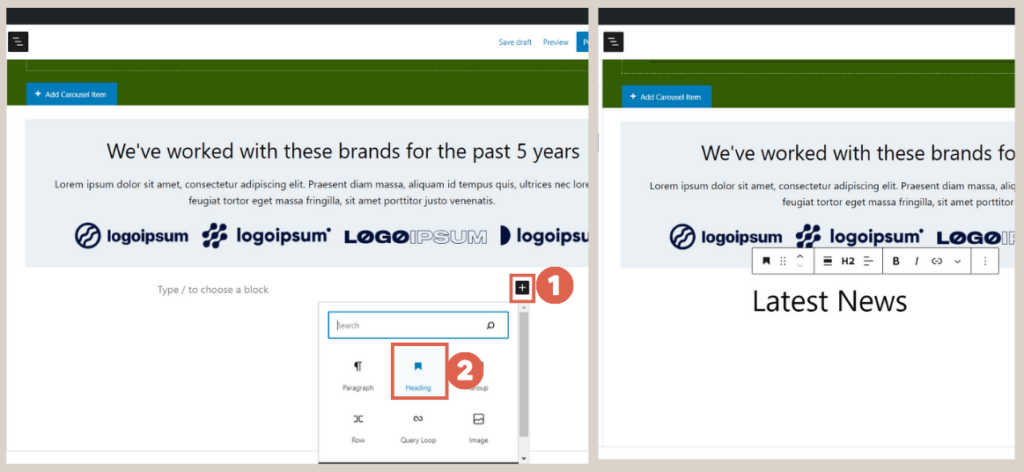
- Within the List View section, click on the three dots of the heading block > choose the option Insert after.

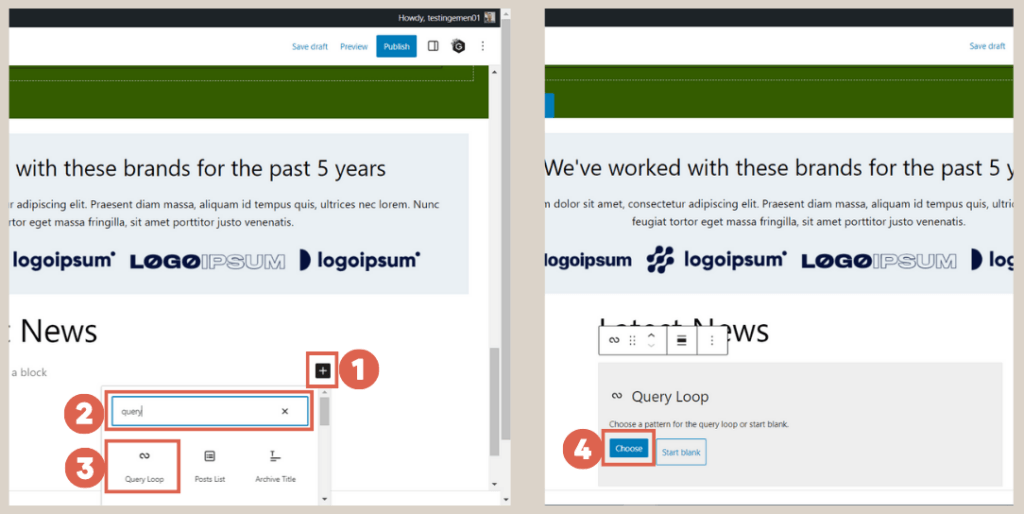
- In the newly added block, click [+] > type query in the search box > select Query Loop > within the Query Loop block, click Choose.

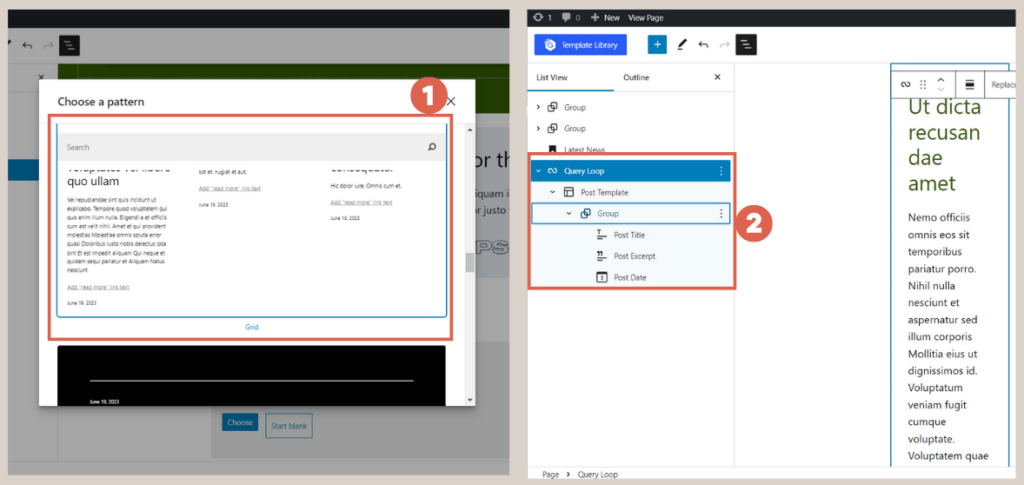
- Next, select one of the patterns available in the Choose a pattern section. Opt for the Grid pattern. Subsequently, you will notice the appearance of the Post Template block within the Query Loop block.

Advertisements
Step 2: Include Posts in the Query Loop
During this stage, you will incorporate the published posts into the query loop. Since you already generated dummy posts using the FakerPress plugin when creating the header earlier, you won’t need to create new posts.
To add the posts to the query loop and configure simple settings, we will utilize the following blocks: (1) Post Featured Image block, (2) Categories block, (3) Post Author block, and (4) Post Date block. Follow the steps below:
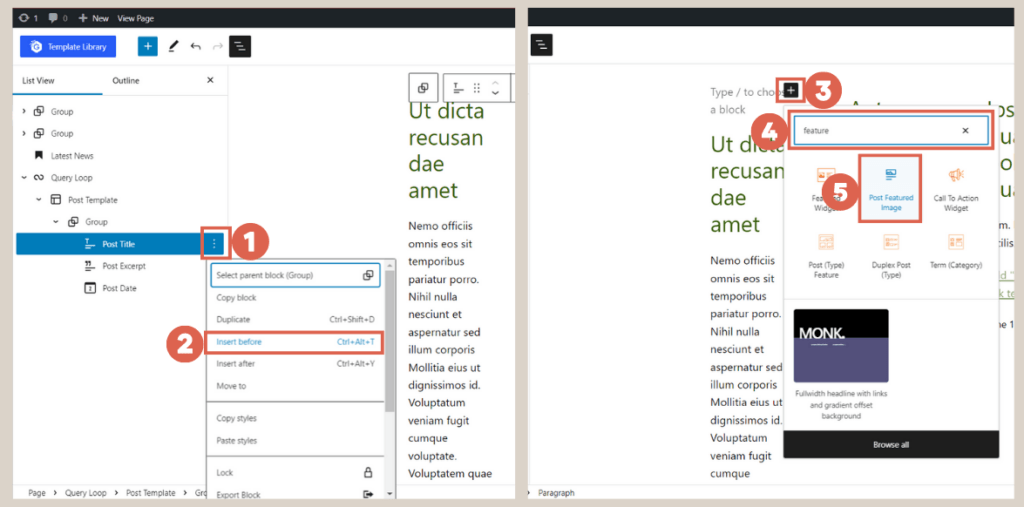
- Click on the Post Title block and select Insert before by clicking the three dots > click [+] > type feature in the search box > select the Post Featured Image block.

- Click on the three dots of the Post Featured Image block > choose Insert after. The Paragraph block will automatically appear below the Post Featured Image block.
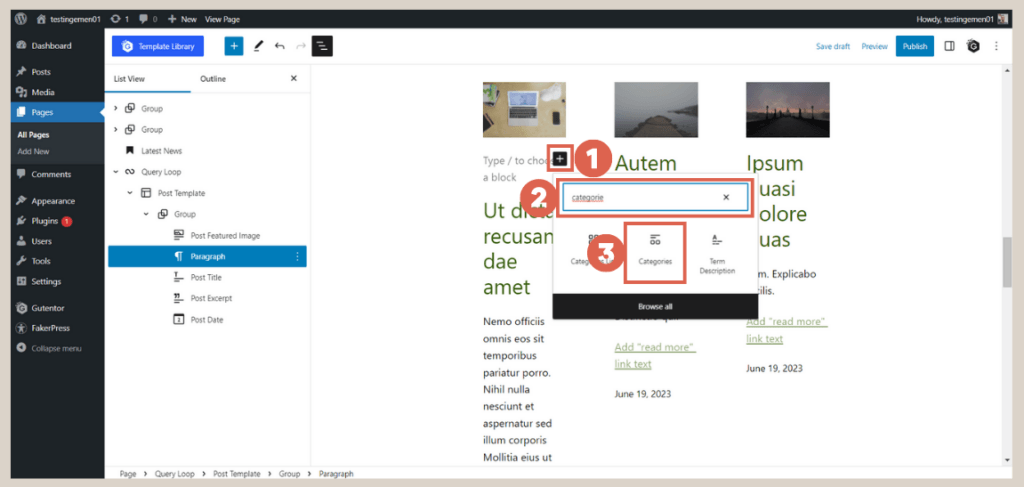
- Click [+] > type categories in the search box > select the Categories block.

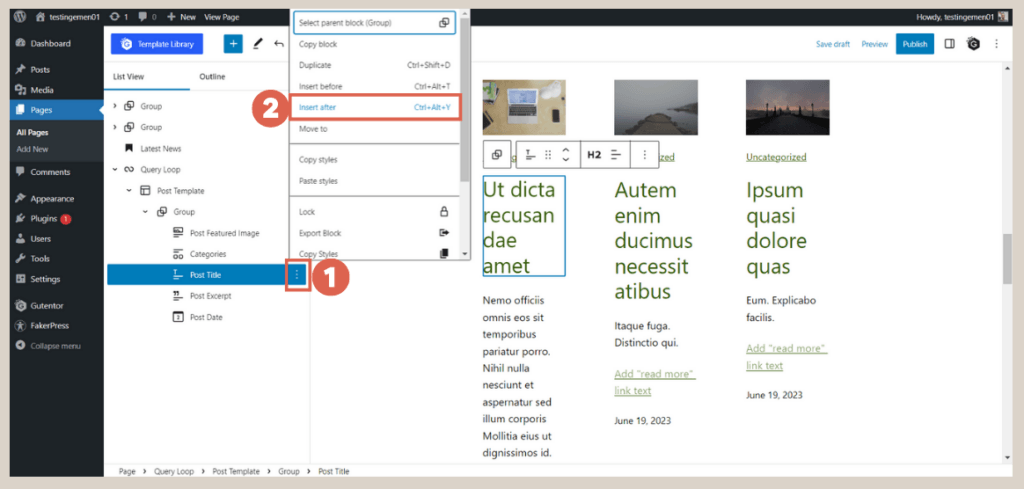
- Click on the Post Title block > click the three dots > choose Insert After.

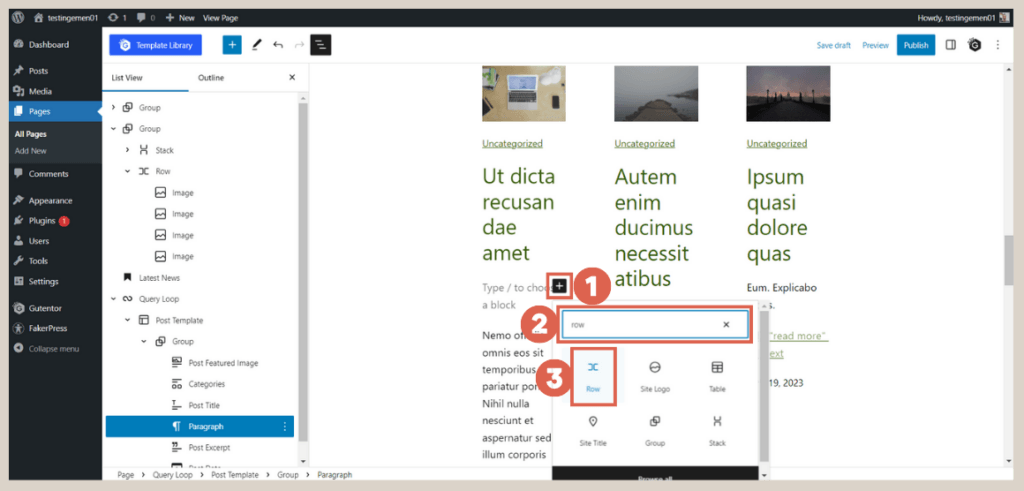
- Click [+] > type row in the search box > select the Row block to add two blocks side by side.

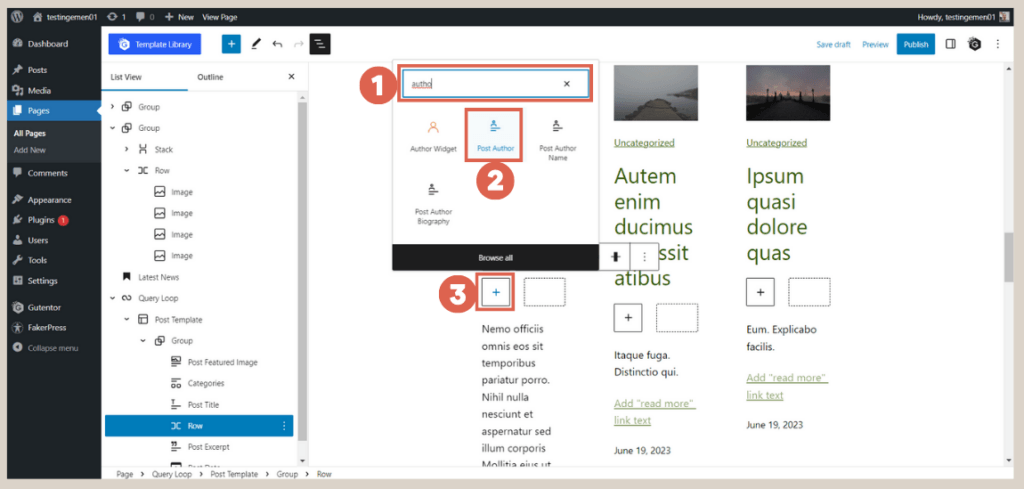
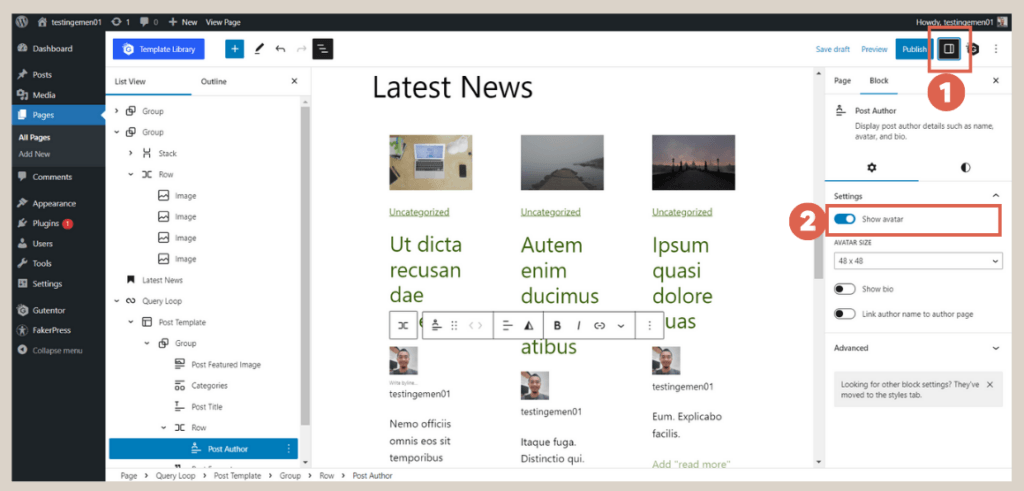
- In the first row, click [+] > type author in the search box > select the Post Author block.
- Remove the author’s photo by clicking on Settings > then deactivate the Show avatar toggle.
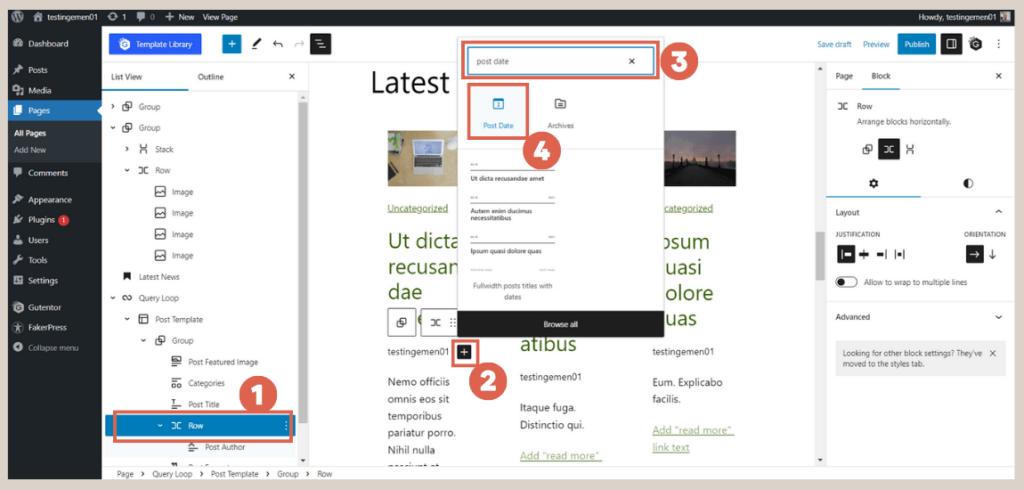
- Next, click on the Row block > click [+] > type post date in the search box > select the Post Date block.
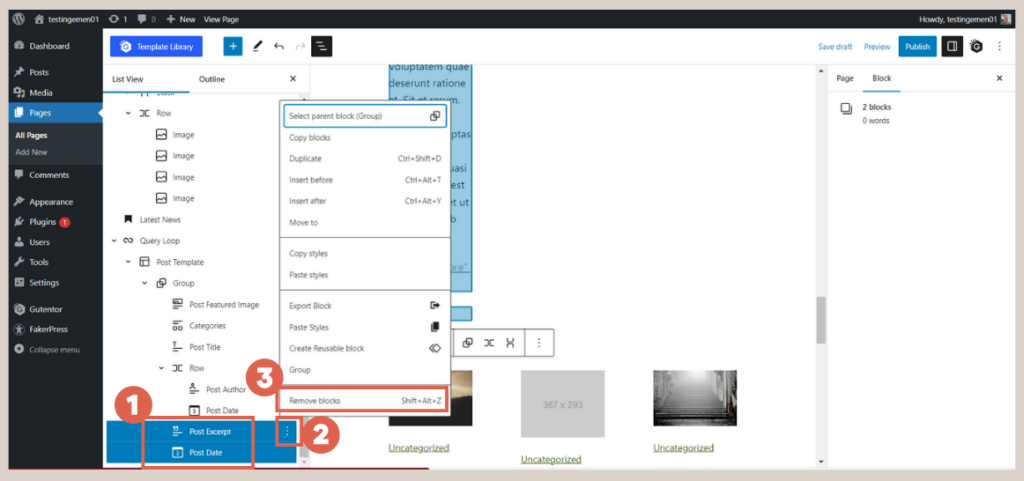
- Remove the Post Excerpt and Post Date blocks by clicking on the three dots > selecting Remove blocks. Both of these blocks are default blocks from the previously selected pattern.

Baca Juga
Step 3: Finalize Post List Settings
During this step, we will perform some adjustments to the completed post section to enhance its organization. Additionally, we will add pagination to enable users to navigate easily through other posts. Follow these steps:
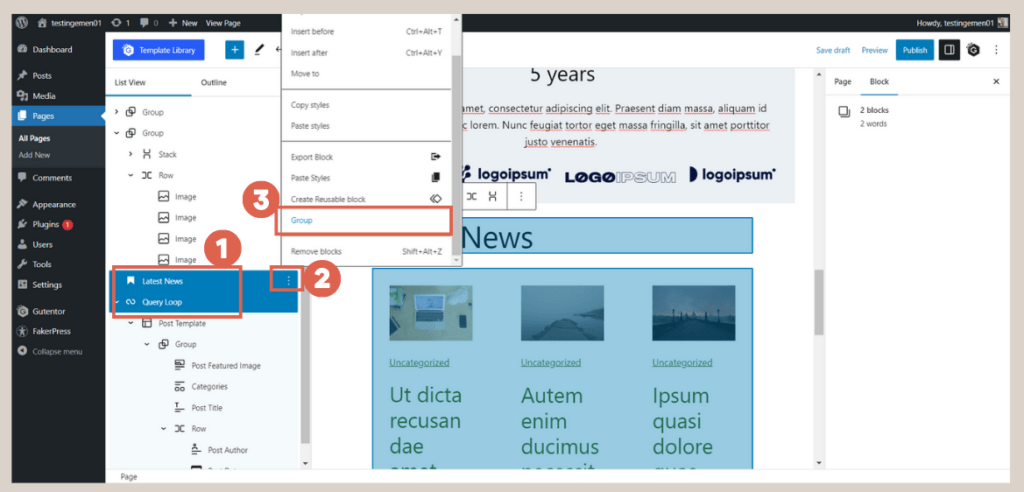
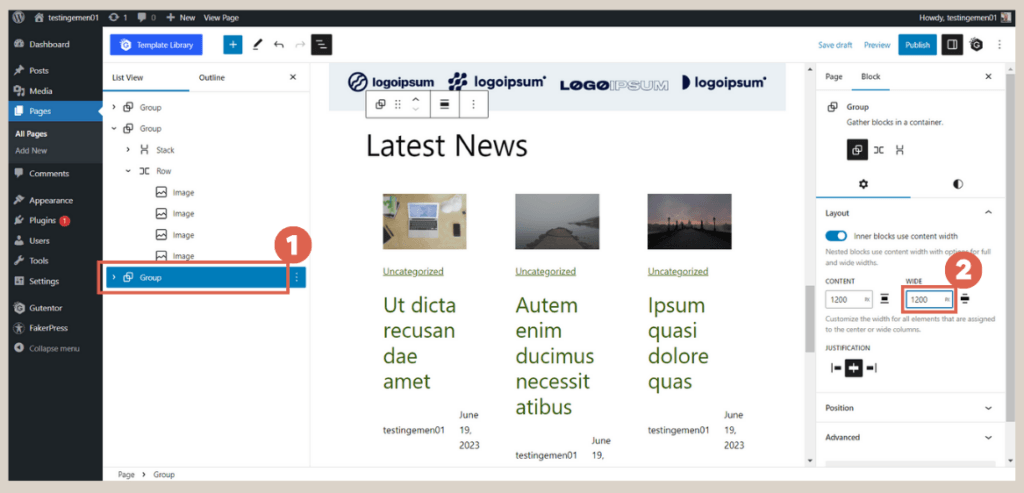
- Combine the Heading and Query loop blocks by clicking on the three dots > choose the Group option. This simplifies the settings process.

- Click on the Group block containing the Query Loop and change its layout to “Wide” with a size of 1200.

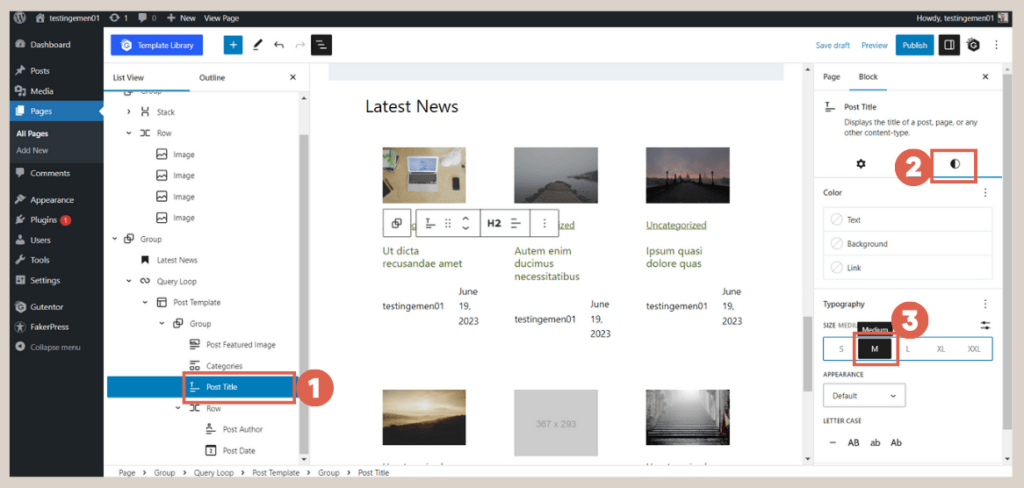
- Next, open the Query Loop block and select the Post Title. In the Settings, click on Style, and under Typography, choose the size M (Medium). You can also select a size that suits your preferences.

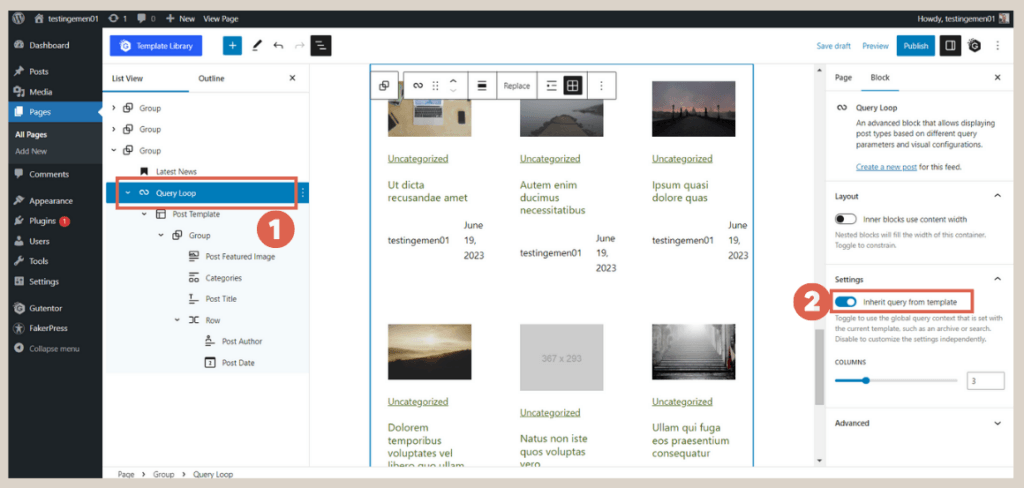
- Click on the Query Loop block and in the Settings, deactivate the Inherit query from template toggle. If this toggle is still active, the posts will not be displayed on the Homepage.
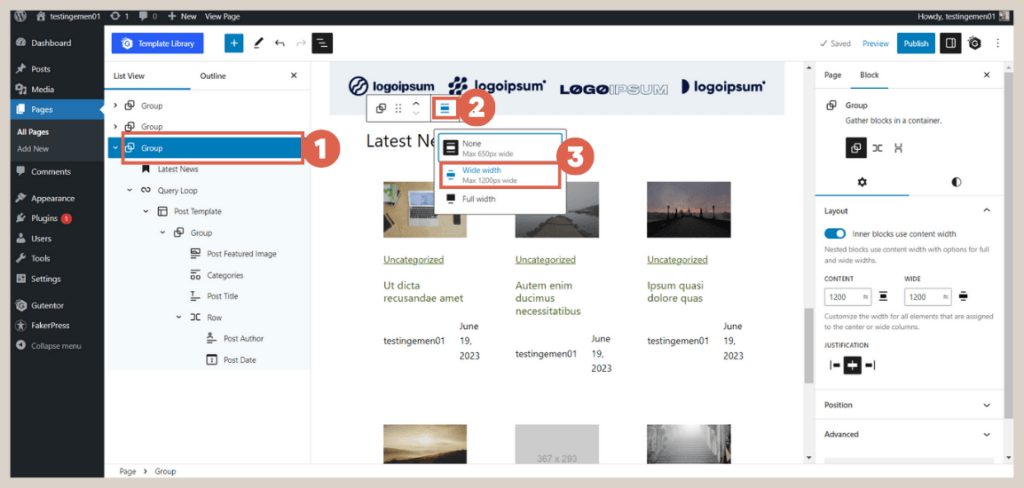
- Click on the Group block containing the Query Loop > adjust the block width using the toolbar by selecting Wide width with the previously set size.
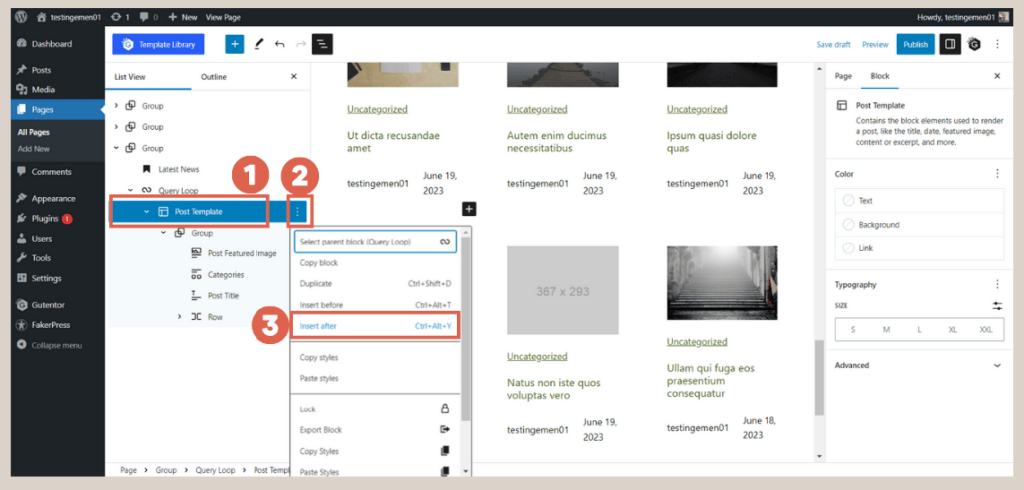
- In the List View, click on the Post Template block > click on the three dots > and select the Insert after option. This will add the Pagination block.
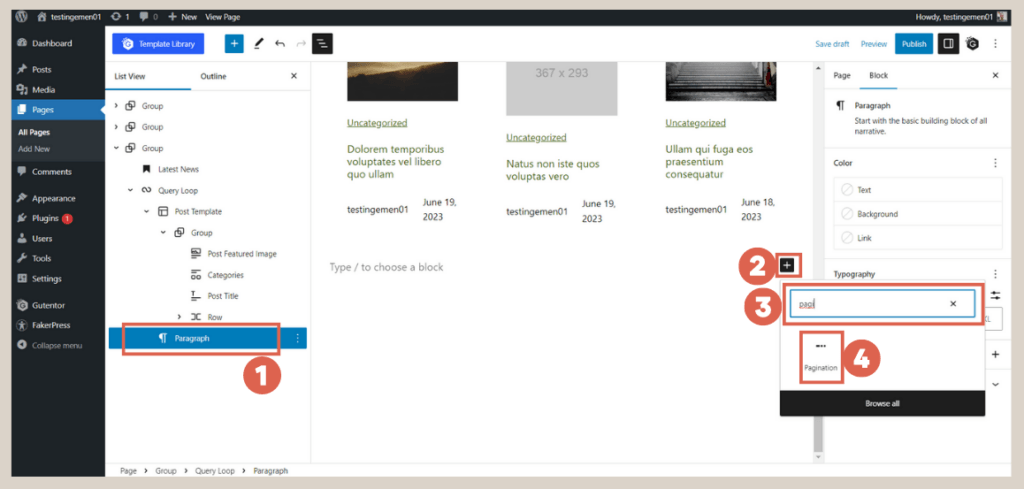
- Click on the existing Paragraph block > click on the [+] sign > type pagination in the search box, and select the Pagination block. This block creates navigation buttons to access other page lists.
- Done. Next, save your progress by clicking on Save draft.
After completing all the steps of creating and setting up the post section on the homepage, the final result will look like this:
Advertisements
Conclusion
That wraps up the sixth installment of the Gutenberg WordPress series, where we learned how to create post list on the homepage. This section serves as a showcase for several intriguing articles, capturing users’ attention when they land on the main page.
Next, you can enhance your homepage by adding a Gallery section. This area will display multiple images, attracting visitors and potentially increasing user engagement on the website.
However, it’s essential to understand that the interface created using Gutenberg may not fully align with your specific preferences. If you seek a website with personalized functionality and design, you can entrust the task to the Tonjoo Team.
We have successfully managed various website projects, catering to large corporations and startups alike, including renowned names like Telkom, Astra International, Hello Health Group, and Hipwee.
Feel free to share your website ideas and requirements with us through Tonjoo’s contact information, and we’ll be delighted to help bring them to life!
Last Updated on July 18, 2024 by Tonjoostudio Team

Advertisements