Advertisements
Once you’ve grasped the concept of Gutenberg WordPress and its notable functionalities, it’s time to dive into the Gutenberg block editor and fully explore its potential.
By comprehending the purpose of each feature, you’ll find it much easier to craft engaging WordPress posts and even design tidy WordPress themes.
As a beginner, you might wonder how to effectively utilize the Gutenberg WordPress block editor. Simply follow this step-by-step guide from start to finish.
Don’t be hesitant to use the table of contents here to directly read to the relevant topics you need.
Advertisements
How to Use Block Editor in WordPress (Gutenberg)
If you’re accustomed to the Classic Editor, you might find the Gutenberg version of the editor a bit daunting. However, once you grasp its features and understand how to use them, you’ll discover that it’s quite user-friendly.
To begin using Gutenberg, ensure that you have WordPress version 5.0 or above installed. If you already have the required version, simply create a new Post or Page as usual through the WP Admin interface.
1. Creating a Text Block
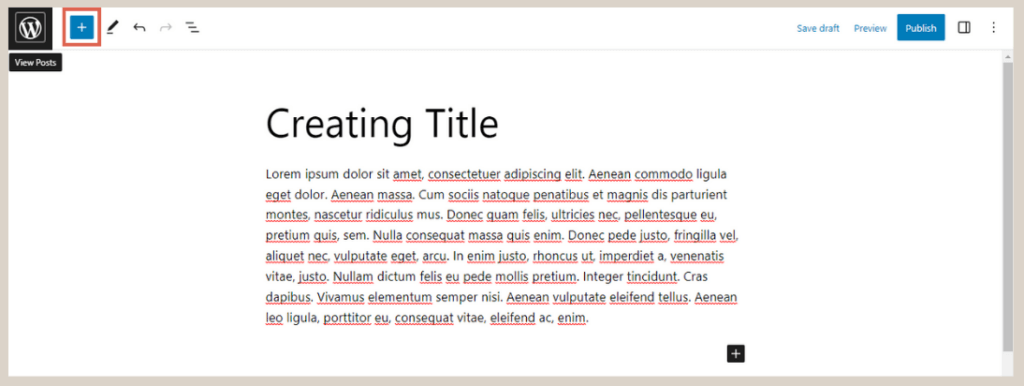
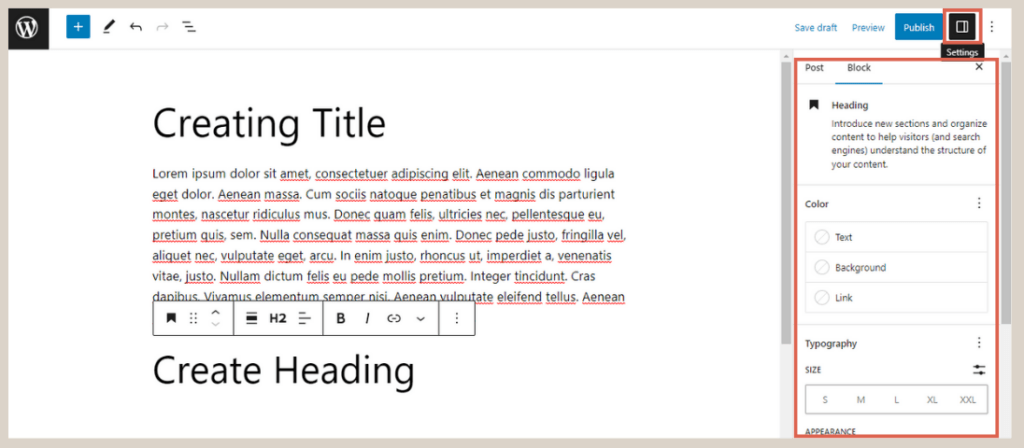
The Text Block feature allows you to edit text content in your post or page, including headings, subheadings, paragraphs, and quotes.
To use the Text Block:
- Click on the [+] at the top left corner.

- In the Text block group, select the desired block (e.g., Heading) to create your content.

- Fill in the block with your text.
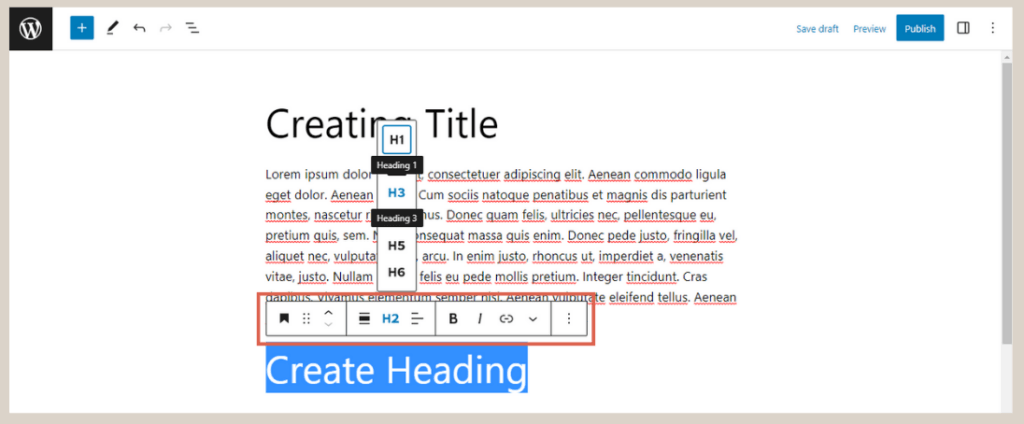
- Use the toolbar above the block to make adjustments.

- Further adjustments can be made through the Settings button at the top right.
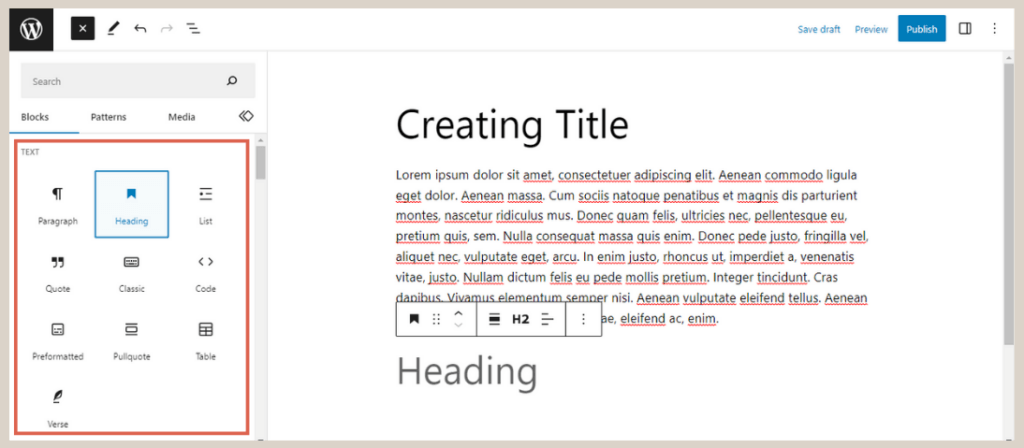
Here are the features of the Text Block and their functions:
- Paragraph: This is the most commonly used block for regular text (paragraph) insertion in your content.
- Heading: Use this block to insert titles or subheadings into your content. You can choose from six levels (H1-H6), aiding in content structure and SEO optimization.
- List: This block allows you to create ordered (numbered) or unordered (bulleted) lists.
- Quote: Insert quotations into your content using this block, allowing for distinct text formatting to highlight the quote.
- Classic: This block provides the classic WordPress editing tool, creating a familiar interface for users accustomed to the previous WordPress editor or the Classic Editor.
- Code: Use this block to display program code snippets in a monospaced text format, preserving the original formatting and spacing.
- Preformatted: This block displays text exactly as you typed it, preserving spaces and lines. It’s useful for showcasing text with special formatting.
- Pullquote: Similar to the Quote block but larger and more prominent, this block is used to highlight important quotes or sections of your text.
- Table: This block enables you to create tables within your content, with customizable rows, columns, and text in each table cell.
- Verse: Use this block to insert poetry, songs, or any line-based text requiring specific spacing and tabulation settings.
Advertisements
2. Creating Media Blocks
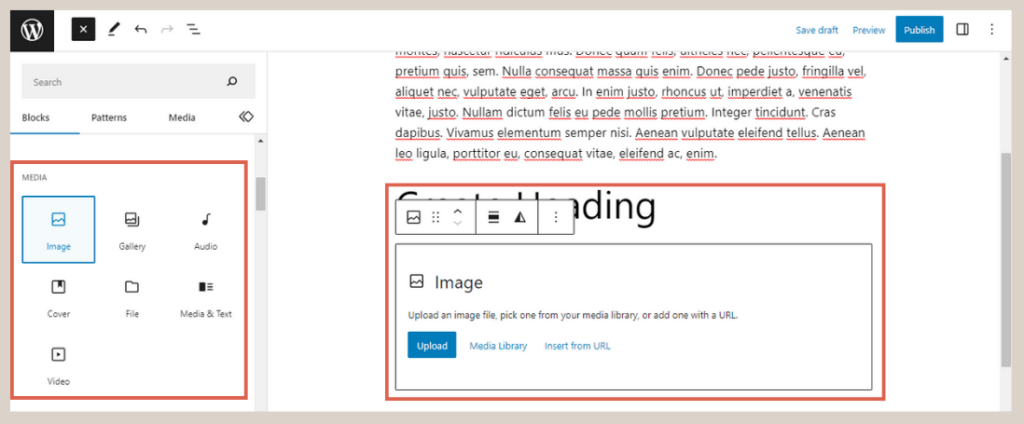
The Media Block includes features for adding and managing media-based content, such as images, videos, and audio.
To use the Media Block:
- Click [+] at the top left corner.
- In the Media block group, choose the desired block (e.g., Image) to add media.
- Insert the media you want to use.
- Use the toolbar above the block for adjustments.

- Further adjustments can be made through the Settings button at the top right.


Here are the features of different media blocks in the Gutenberg WordPress editor:
- Image: This block enables you to incorporate images into your content. You can choose an image from the media library, upload it from your device, or use a URL.
- Gallery: Use this block to showcase multiple images in a gallery format. You have the flexibility to adjust the number of columns and the size of the images.
- Audio: This block allows you to include audio files in your content, making it suitable for displaying podcasts, music, or other audio content.
- Cover: With this block, you can add a background image or video with overlaying text. It is commonly used to create captivating headers or introductions on pages or posts.
- File: This block enables you to add links to downloadable files. Users can click on the link to download the specified file.
- Media & Text: This block combines both text and media (image or video) into a single block. Typically, the media is placed alongside the text, creating a more dynamic layout.
- Video: Use this block to insert videos into your content. You can either upload videos directly or add links to videos from external platforms like YouTube.
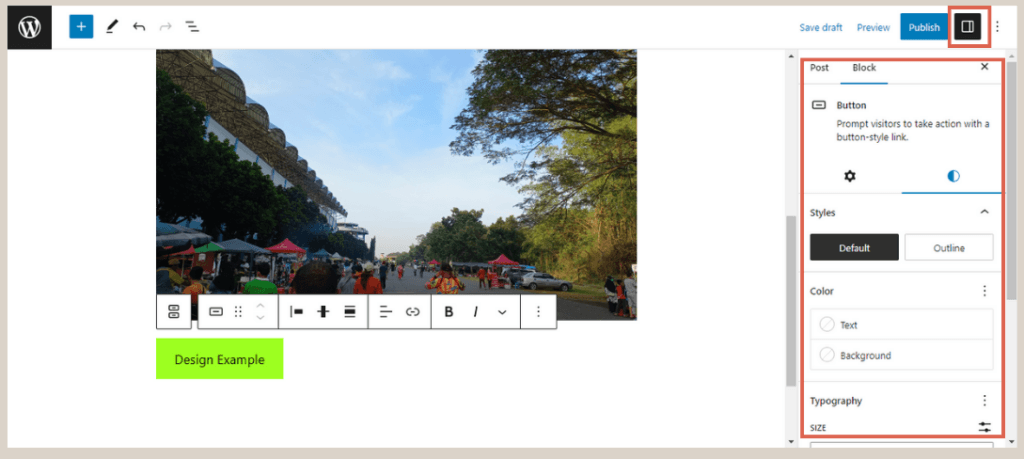
3. Creating Design Blocks
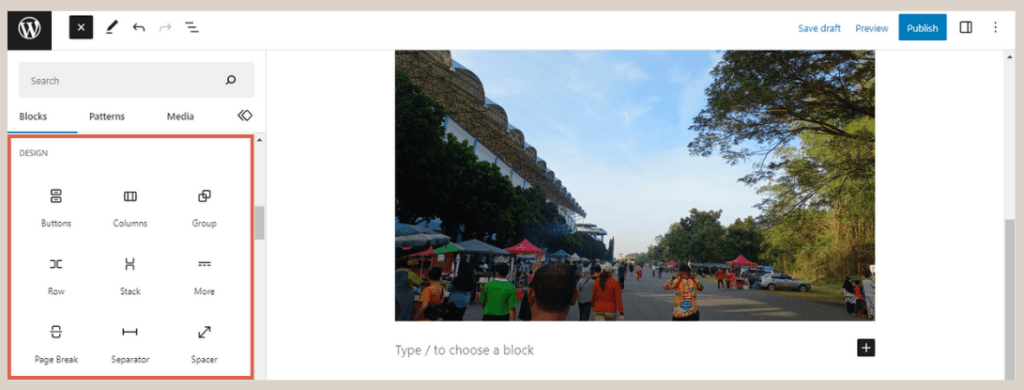
Design Blocks help you design the appearance of your post or page, allowing you to create buttons, columns, and more.
To use the Design Block:
- Click [+] at the top left corner.
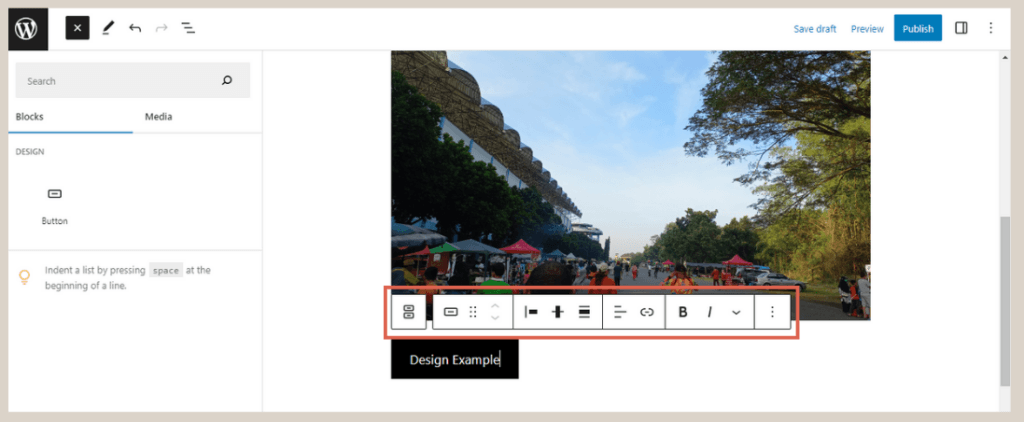
- In the Design block group, select the desired block (e.g., Button) to create your design element.

- Insert the design element.
- Use the toolbar above the block for adjustments.

- Further adjustments can be made through the Settings button at the top right.

Here are the features of different design blocks in the Gutenberg WordPress editor:
- Button: Utilize this block to include customizable buttons in your content. You have the freedom to adjust the button’s text, color, and link.
- Columns: This block enables you to partition your content into multiple columns, allowing you to create intricate and well-organized layouts.
- Group: Use this block to group multiple blocks together, making it convenient to apply the same style or background to several blocks.
- Row: This block refers to arranging blocks horizontally within columns and is often available through certain Gutenberg plugins.
- Stack: Stack pertains to stacking blocks vertically on top of each other.
- More: With this block, you can limit the content displayed on blog or archive pages, prompting visitors to click “Read More” to view the entire content.
- Page Break: Use this block to divide your content into multiple pages, particularly useful for creating multi-page articles or breaking up lengthy content into several pages.
- Separator: This block allows you to insert horizontal separator lines to visually separate sections of your content.
- Spacer: Incorporate this block to add vertical empty space between blocks, facilitating adjustments to the layout and spacing between content elements.
Advertisements
4. Using Widget Blocks
Widget Blocks allow you to add widgets or external applications to your website.
To use the Widget Block:
- Click [+] at the top left corner.
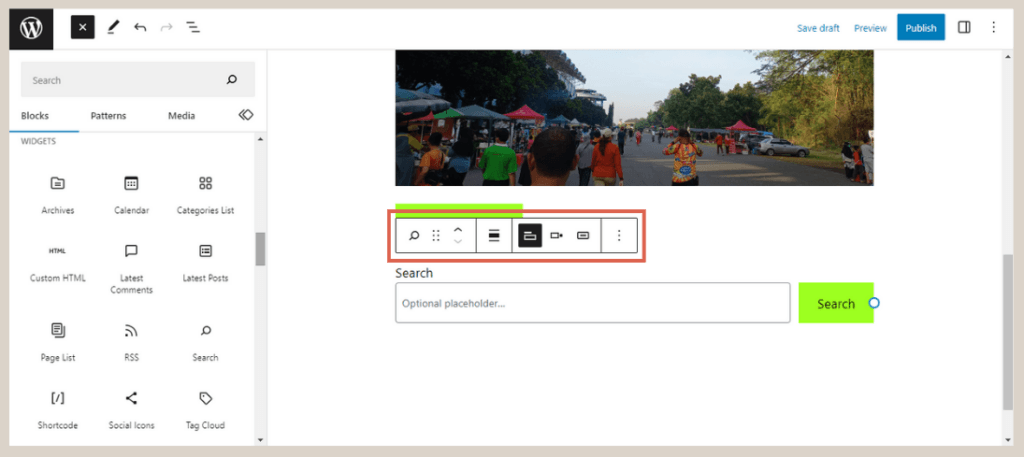
- In the Widget block group, choose the desired block (e.g., Search) to add the widget.
- Insert the widget.
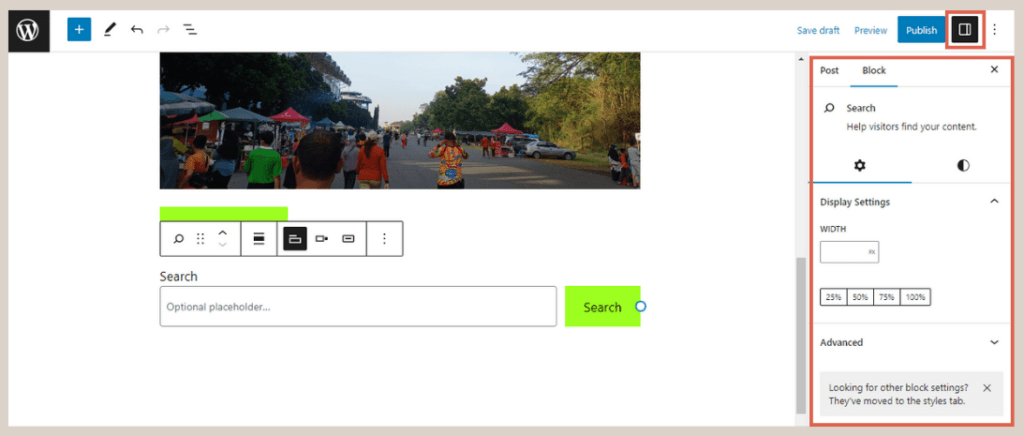
- Use the toolbar above the block for adjustments.

- Further adjustments can be made through the Settings button at the top right.

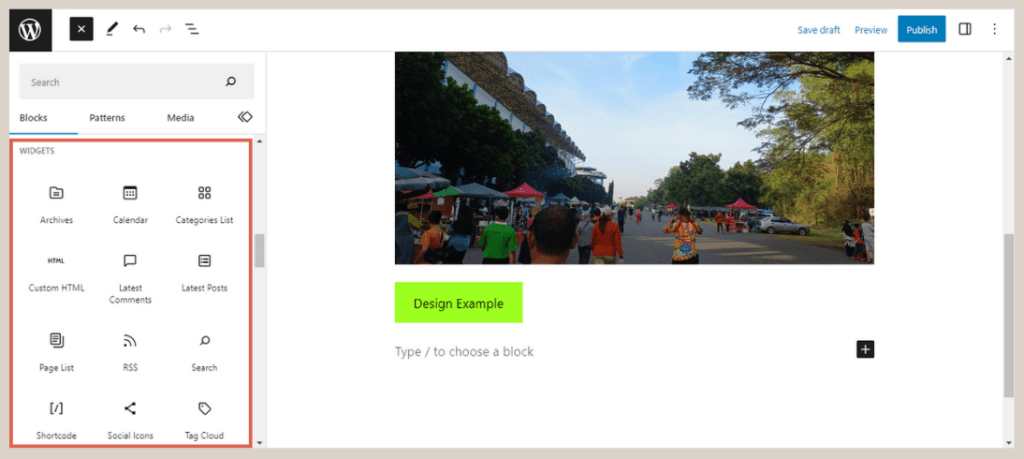
Here are the features of different widget blocks in the Gutenberg WordPress editor:
- Archives: This block exhibits a monthly list of your posts, enabling visitors to explore older content based on publication dates.
- Calendar: This block presents a calendar featuring links to your posts, organized by their respective publication dates.
- Categories List: This block showcases a list of your post categories, allowing visitors to click on a category to view all posts within that specific category.
- Custom HTML: Utilize this block to write and insert custom HTML code into your content, providing the flexibility to incorporate personalized elements.
- Latest Comments: This block displays the most recent comments from your entire site, keeping visitors updated on the latest discussions.
- Latest Posts: This block exhibits a list of your newest posts, allowing readers to easily access your most recent content.
- Page List: This block showcases a comprehensive list of all the pages available on your website, providing convenient navigation for users.
- RSS: This block allows you to display entries from an RSS feed, enabling users to stay updated with the latest content from external sources.
- Search: Incorporate this block to add a search box to your site, empowering visitors to search for specific content within your website.
- Shortcode: With this block, you can include a short-code, which is a specialized piece of code that enables you to display specific content, such as forms or galleries.
- Social Icons: This block allows you to add icons that link to your social media profiles, making it easy for users to connect with you on various platforms.
- Tag Cloud: This block exhibits a tag cloud, which is a list of tags used on your site, with the size of each tag representing its frequency of use.
Advertisements
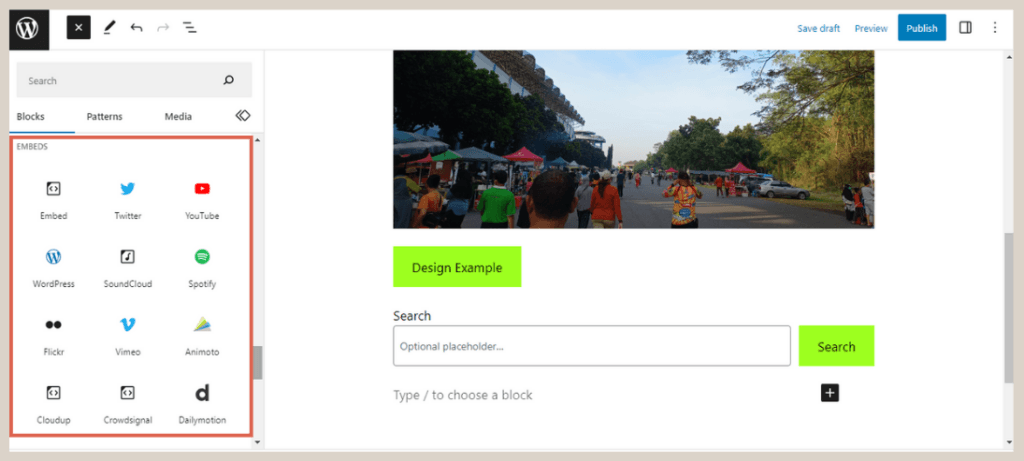
5. Creating Embeds
The Embeds feature enables you to add content from other platforms, such as YouTube, Twitter, Facebook, etc., to be displayed on your website.
To use Embeds:
- Click [+] at the top left corner.
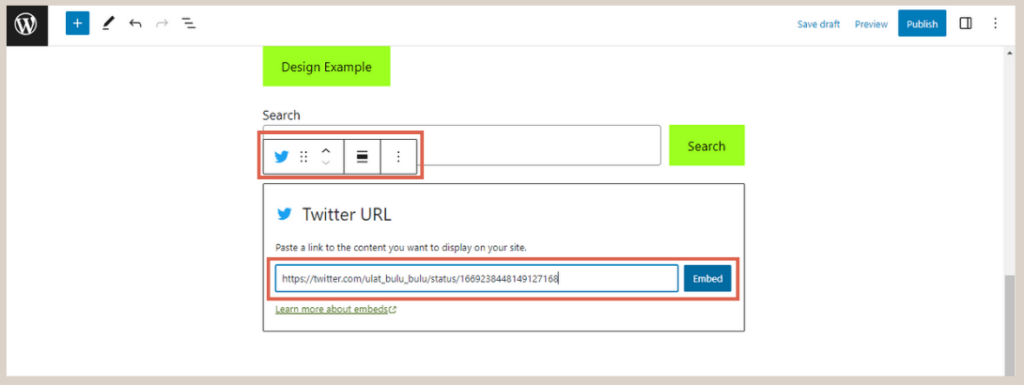
- In the Embeds block group, choose the desired block (e.g., Twitter) to insert specific content.

- Enter the media link for embedding.

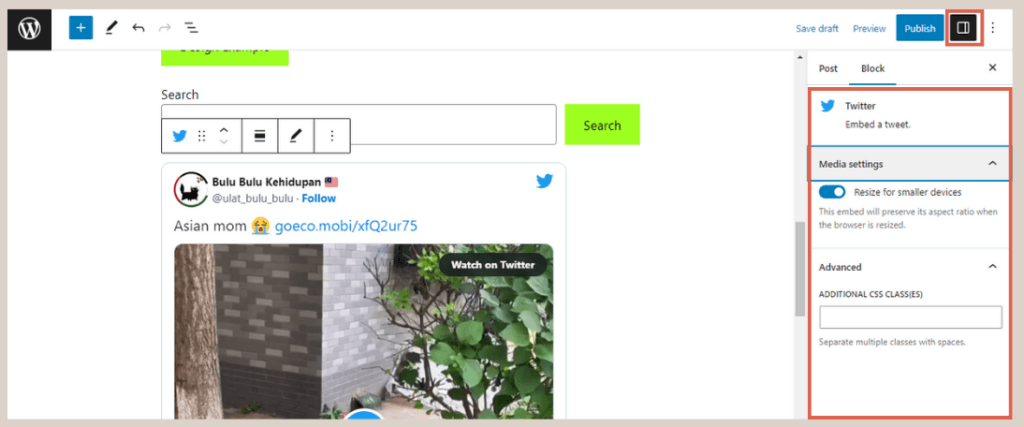
- Use the toolbar above the block for adjustments.
- Further adjustments can be made through the Settings button at the top right.

Advertisements
Ready to Use Block Editor?
Now that you understand how to use block editor in WordPress, from Text Blocks to Embeds Blocks, you’re well on your way to creating a dynamic and engaging WordPress website.
Remember, it may take some time to fully grasp the editor’s potential, but with practice, you’ll become more proficient.
If you prefer to focus on your business and leave the website development to professionals, consider Tonjoo Studio.
With over 10 years of experience in building websites for various clients, they can help bring your dream website concept to life. Reach out to Tonjoo via their contact page to discuss your vision!
For more insights on WordPress, WooCommerce, Plugin and other web development articles from Moch. Nasikhun Amin on the Tonjoo Studio’s Blog.
Last Updated on July 18, 2024 by Tonjoostudio Team

Advertisements