How to Create a WordPress Pricing Table
Advertisements
One marketing method to increase the conversion rate or sales on an e-commerce website is by creating a WordPress pricing table.
Besides installing WooCommerce to create an e-commerce website, using a pricing table feature is also quite effective in encouraging visitors to purchase or subscribe to your products.
A pricing table plays a role in enabling visitors to easily see the price comparisons you offer along with the features they will receive. So, how do you create a pricing table in WordPress?
Advertisements
Preparation Before Creating a WordPress Pricing Table
A pricing table or price table is a section of a website page that displays several package prices for subscribing to a product or service.
Therefore, this table is usually found on websites that offer various types of products or services with different features and benefits based on their price.
In this tutorial, we will learn to create a pricing table using a plugin. So, even if you can’t code, you can create a pricing table like this:
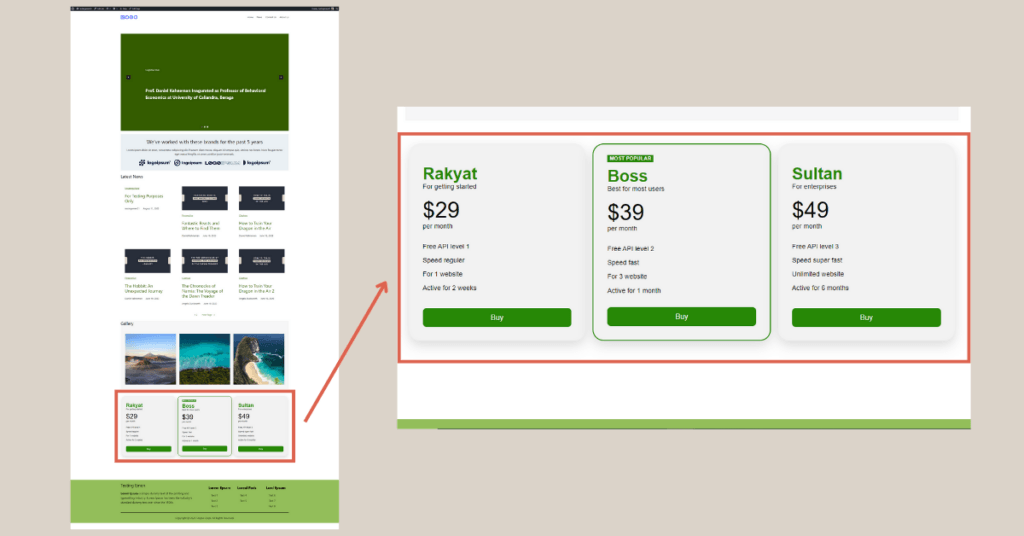
Appearance of the pricing table created in WordPress without coding.
Here are two things you need to prepare when you want to create a pricing table on a WordPress-based website:
- Create a page to insert the pricing table. Most websites place the pricing table on the homepage. In this tutorial, we do the same. If you don’t have a homepage yet, you can learn how to create a Homepage with Gutenberg.
- Once the homepage is ready, you need to install a free WordPress pricing table plugins Here, we will use the Easy Pricing Tables plugin.
How to Create a WordPress Pricing Table
Creating a WordPress pricing table starts with (1) installing the Easy Pricing Tables plugin, then (2) inserting the pricing table onto the homepage, and finally (3) configuring the layout and appearance of the table. Follow the complete tutorial below!
Advertisements
Step 1: Install Plugin Easy Pricing Tables
The first step to create a pricing table is by installing the WordPress Easy Pricing Table plugin. This Easy Pricing Tables plugin is free to download and has been used by over 20,000 WordPress users.
Baca Juga
With this plugin, you no longer need to manually code with HTML and CSS to create a price table. Here are the installation steps:
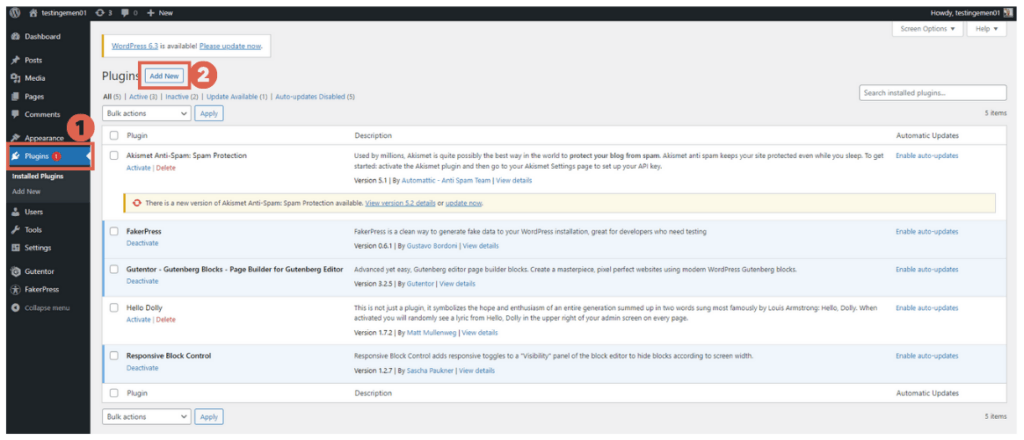
- On the WP Admin page, click the Plugins menu > then click Add New.
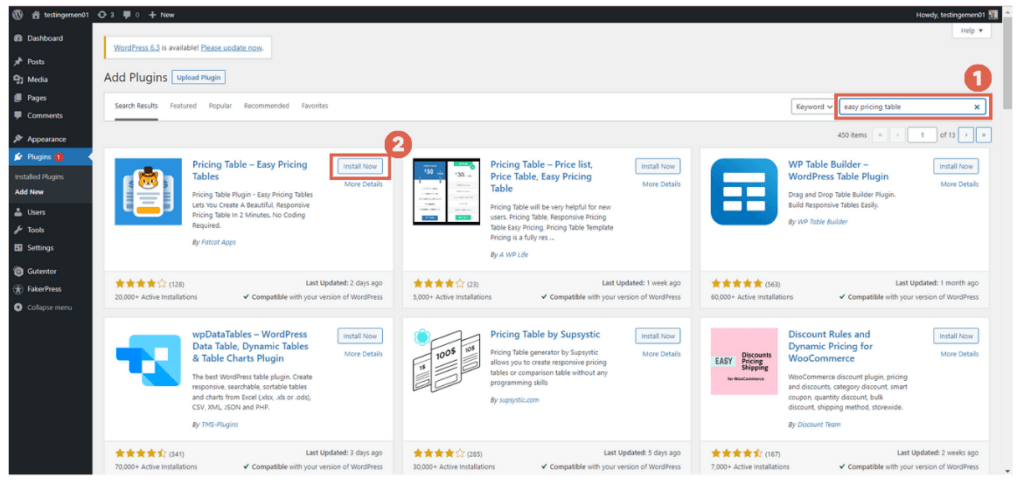
- Type easy pricing table in the search box > click the Install Now button on the Pricing Table plugin.
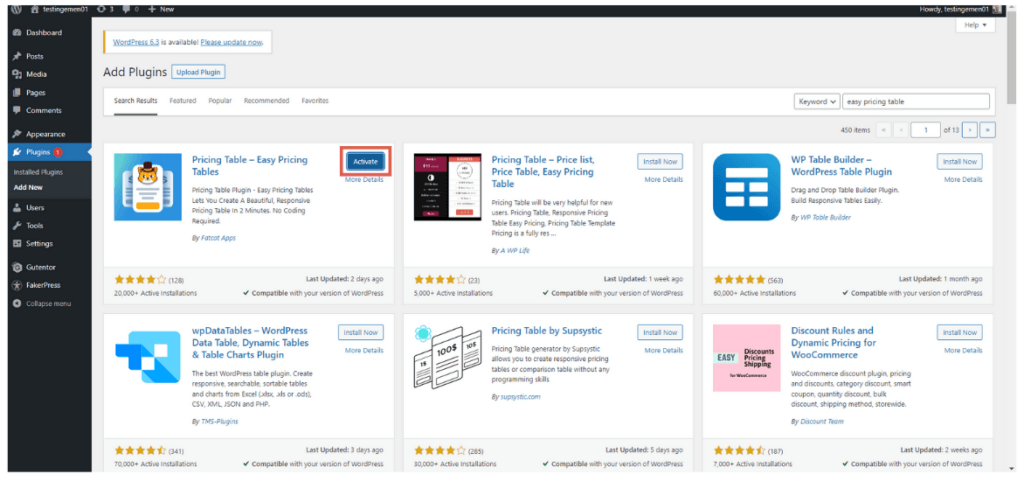
- Then click Activate to activate the plugin.
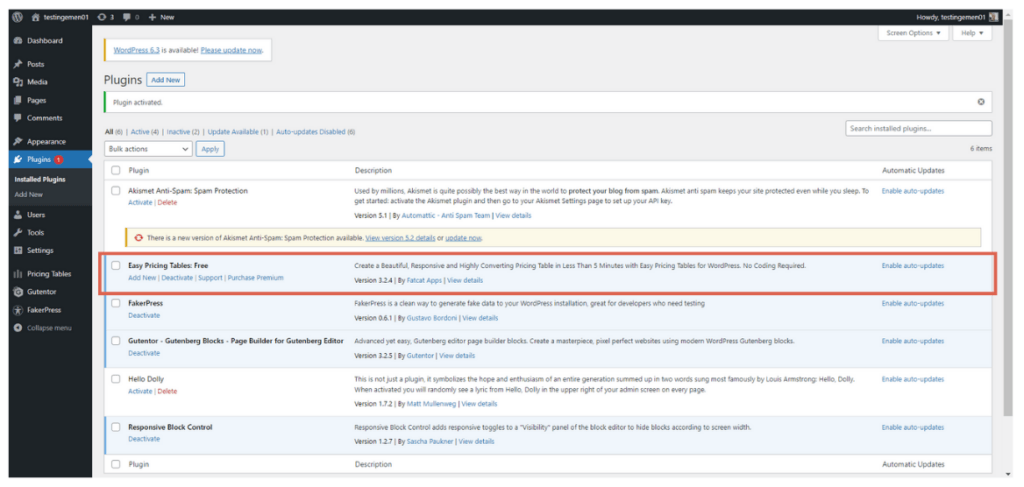
- Finished, you have successfully downloaded and activated the Easy Pricing Tables plugin.
Step 2: Insert Pricing Table to Page
The next step of implementing plugin price list WordPress is you need to create and place the price table on one of the pages you have created. Here are the steps:
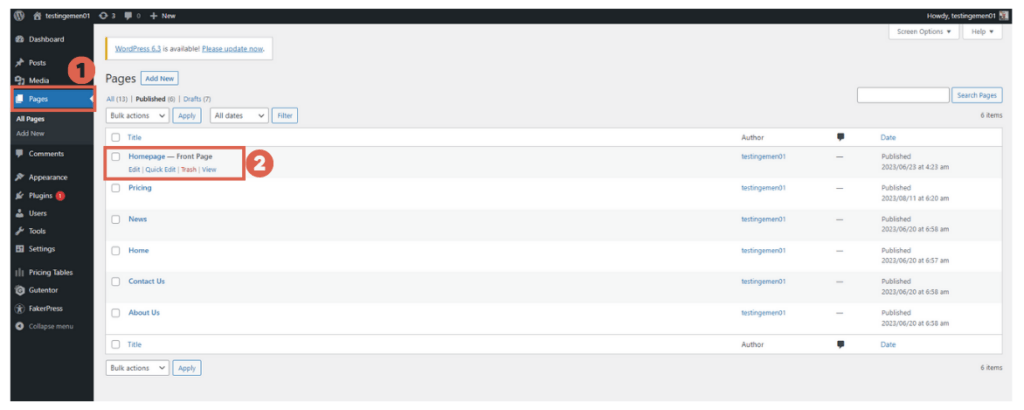
- On the WP Admin page, click Pages > then select the Page where you want to add the pricing table. Here, we are using the Homepage we created.
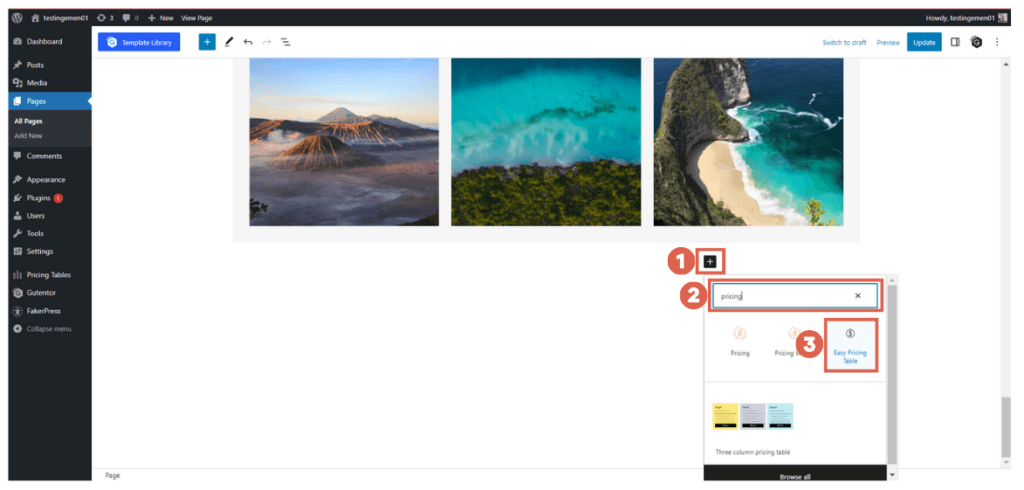
- On the Gutenberg editor page, click [+] > type pricing in the block search box > and select the Easy Pricing Table block.
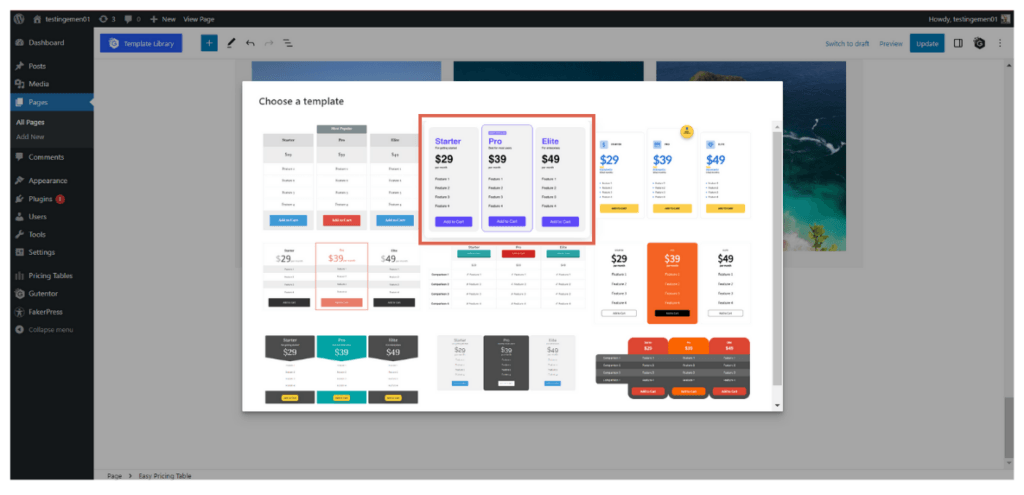
- After the Pricing Table design options appear, choose one. For the free version, only certain tables can be used. To use all types of tables, you can switch to the paid version starting from $49.
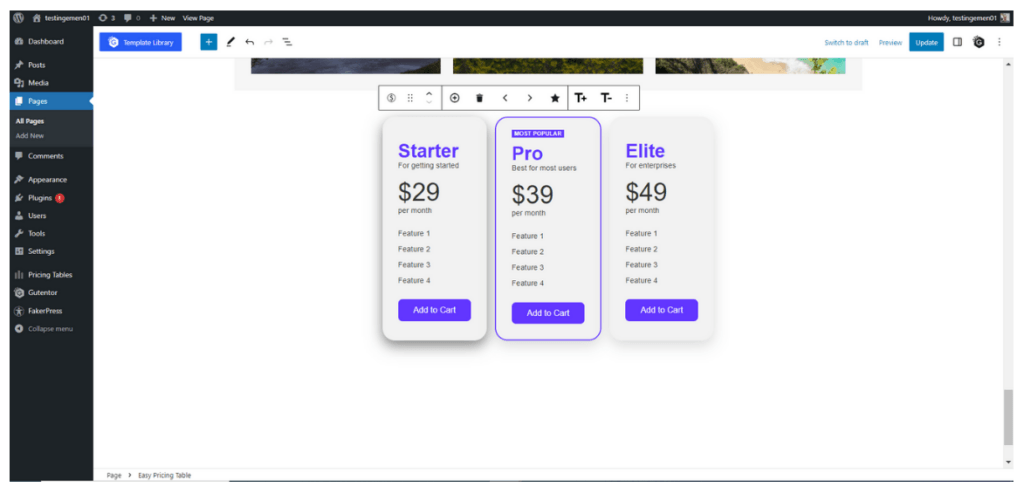
- Finished, the pricing table has now appeared on the website page.
Advertisements
Step 3: Set Up the Pricing Table
If it’s already installed, it’s time for you to adjust the appearance of the pricing table or pricing list according to your needs and the WordPress theme you are using. The settings are quite easy. Here are the steps:
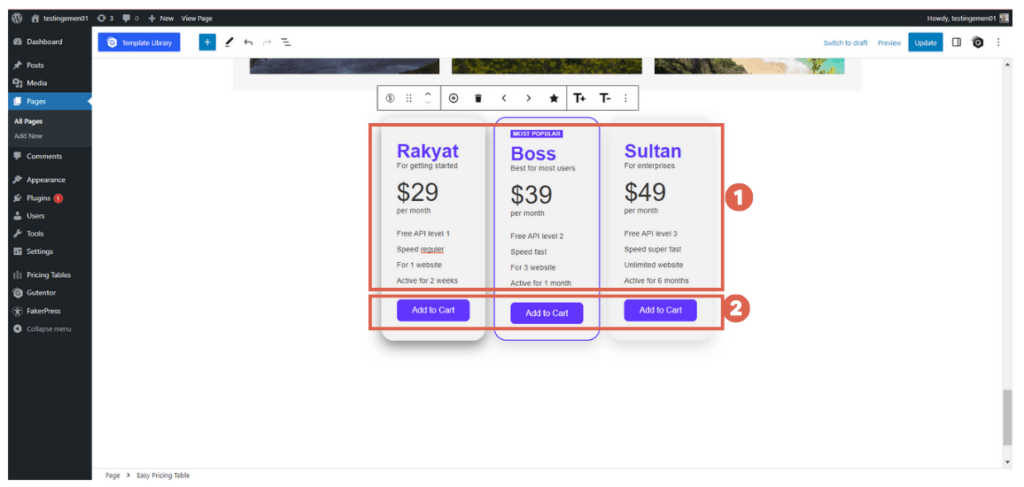
- If the pricing table is already on the editor page, it’s time to adjust it. Part number 1 can be adjusted by directly changing the text. Part number 2 can be clicked to insert a link.
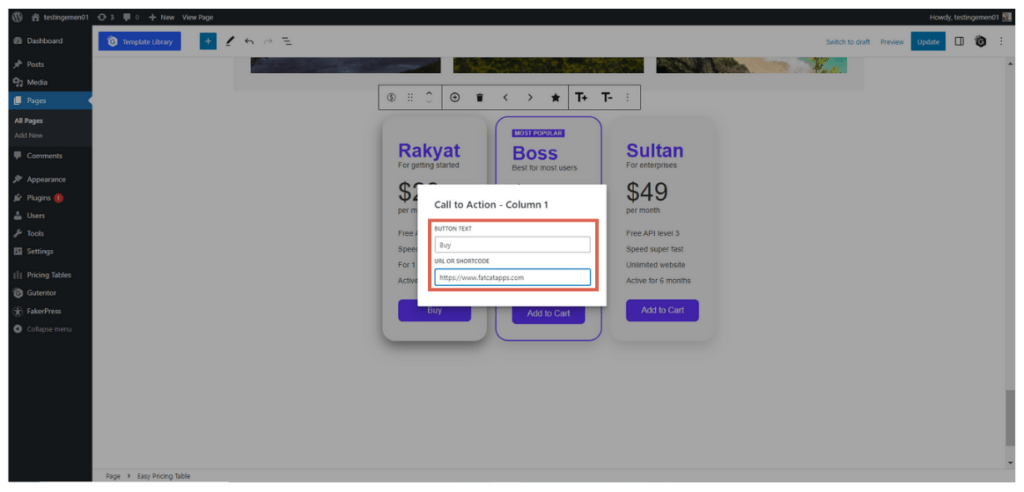
- Please change the name of the button and insert the product link.
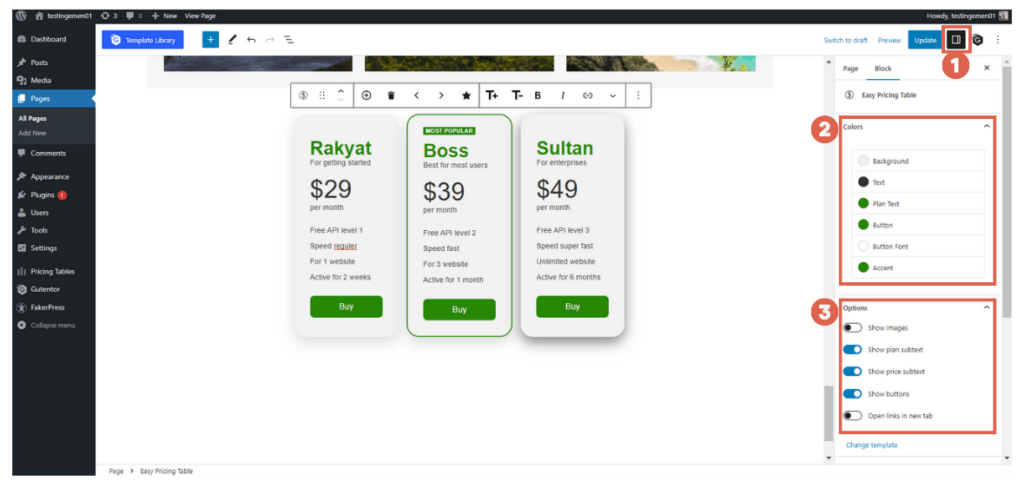
- If done, please open Settings in the upper right corner > click Colors to set the color elements on the pricing table block > click Options to show/hide one/several elements.
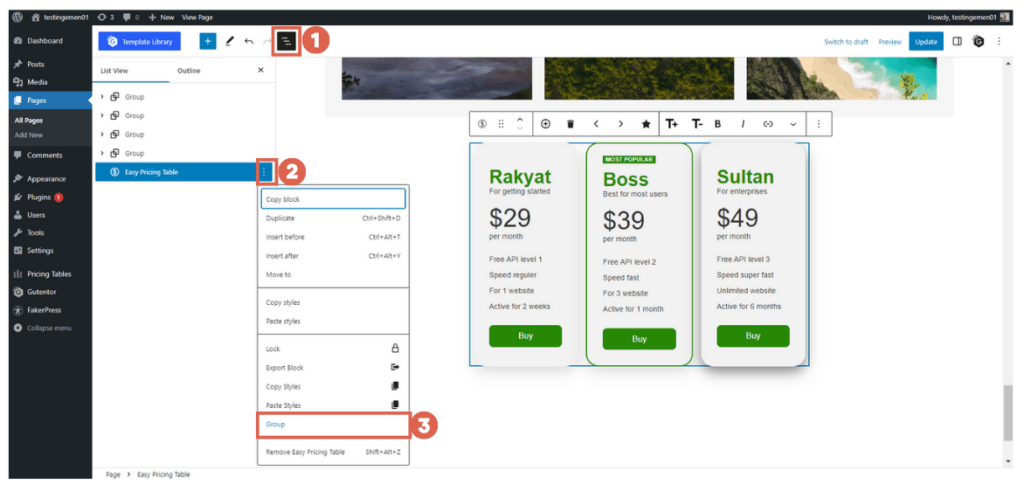
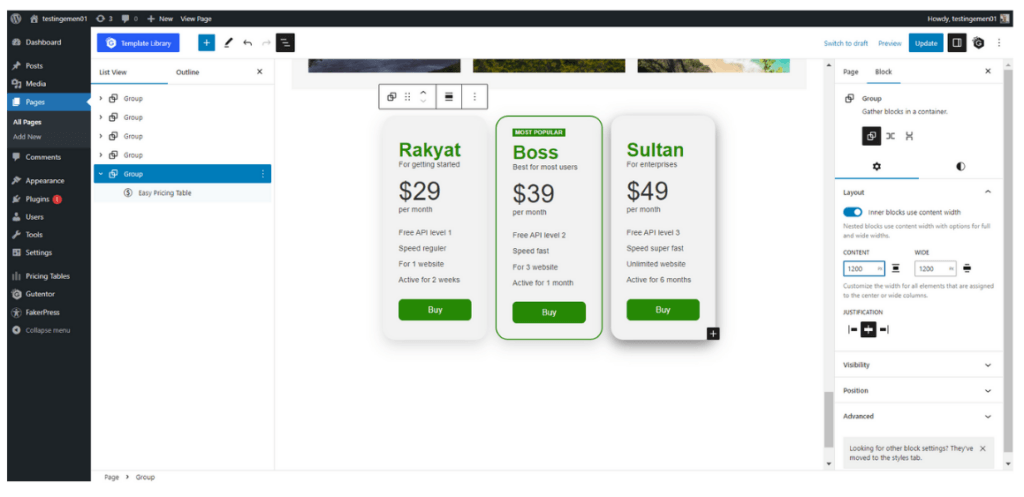
- Now click List View on the left side > click the three dots on the Easy Pricing Table block > select the Group option. Creating this group will make it easier to set up the pricing table layout.
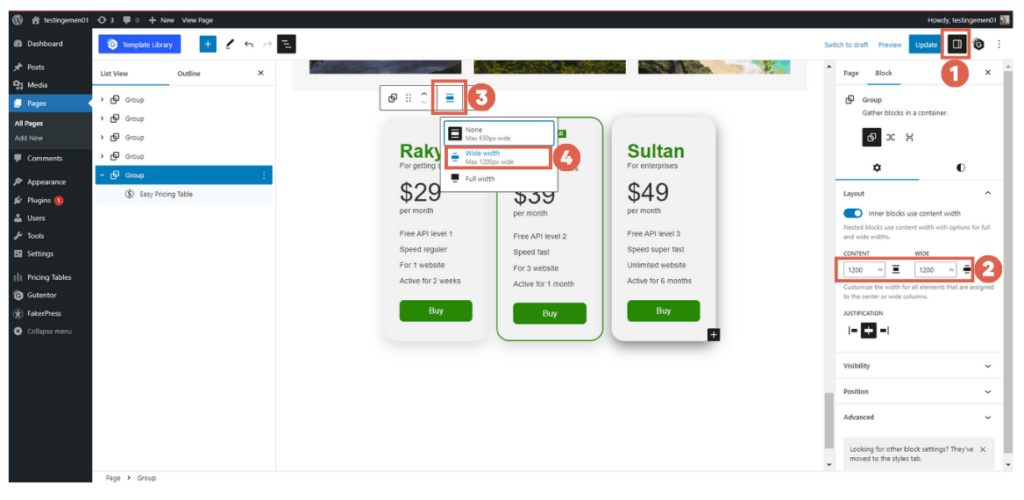
- Next, click Settings on the right side > in the CONTENT section, fill in with a size that fits your page layout. Here we are using size 1200.
- Then set the width of the price table to Wide width.
- Finished, it’s time to see the final result of the creation of the pricing table on the WordPress site. The final result is like this:
Advertisements
Ready to Create a Price Table in WordPress?
That’s a tutorial on how to create a WordPress pricing table without having to code HTML, CSS, PHP, etc. This feature makes it easier for website users to make purchasing decisions.
The pricing table is very helpful for those who have an online business website. If you’re one of them, you can also learn how to create discount coupons in WooCommerce WordPress to increase sales.
However, if you want to focus more on business development, you can entrust the creation of your e-commerce website to the Tonjoo’s team, a software development company with more than 10 years of experience.
Let’s discuss your desired website through Tonjoo’s Contact, and we will help make it happen!
Last Updated on July 18, 2024 by Tonjoostudio Team
Advertisements
