Advertisements
You can easily display recent posts in WordPress blog without any plugins or widgets by leveraging the Gutenberg block editor.
While installing a WordPress plugin is also an option, building this feature without one keeps your website lightweight and ensures faster loading times.
So, how do you create an attractive recent posts section for your blog without a plugin? And what are the benefits of adding this feature to your WordPress blog? Here’s a complete guide.
Advertisements
Benefits of a Recent Posts Section on Your WordPress Blog
The recent posts feature on a WordPress blog displays a list of the latest articles published on a website.
This feature is typically placed in the sidebar, footer, or another area of your WordPress theme, depending on its design and settings. Here are the key benefits of having a recent posts section:
1. Increases Engagement
Showcasing your latest content can capture visitors’ attention and encourage them to explore more of your website.
Advertisements
2. Improves Time on Site
By providing quick access to new content, visitors are more likely to spend more time on your site, which can help reduce your bounce rate.
3. Supports SEO
Providing internal links to your latest posts helps boost SEO by distributing link equity and improving site crawling by search engines.
Advertisements
4. Increases Traffic
By highlighting new and relevant content, visitors are more inclined to click and read more pages, which can directly increase your page traffic. Don’t forget to install Google Analytics on WordPress. This allows you to monitor traffic, user behavior, and see which pages are most visited.
Advertisements
5. Promotes Content
New content gets additional exposure, which can increase its views and interactions, such as comments and shares.
Advertisements
6. Adds Content Variety
Displaying recent posts adds variety and dynamism to your page layout, making the user experience more engaging and informative.
Now that you understand the benefits, follow the tutorial below to create a recent posts section in WordPress.
Also Read:
How to Add Recent Posts to Your WordPress Blog with the Block Editor
If you’re using the Twenty Twenty-Two theme or an older one in WordPress, you can create a recent posts widget via the Appearance > Widgets menu.
However, this method doesn’t work for the Twenty Twenty-Three theme and newer versions, as there is no Widget option under Appearance.
To solve this, you can use the Gutenberg block editor—specifically, the Latest Posts block. Here are the steps to create a recent posts section in your WordPress block editor:
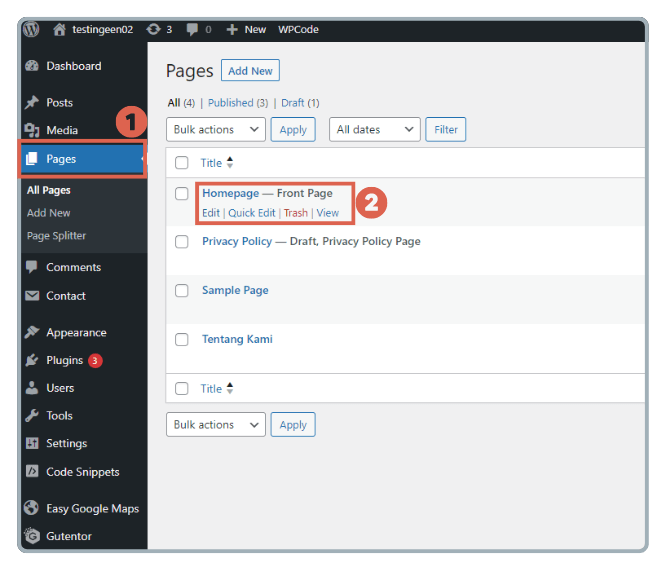
- Navigate to Pages and select the page where you want to add the recent posts feature. Here, we’re adding it to our Homepage. You can also display the recent posts or latest articles list on other pages as needed.

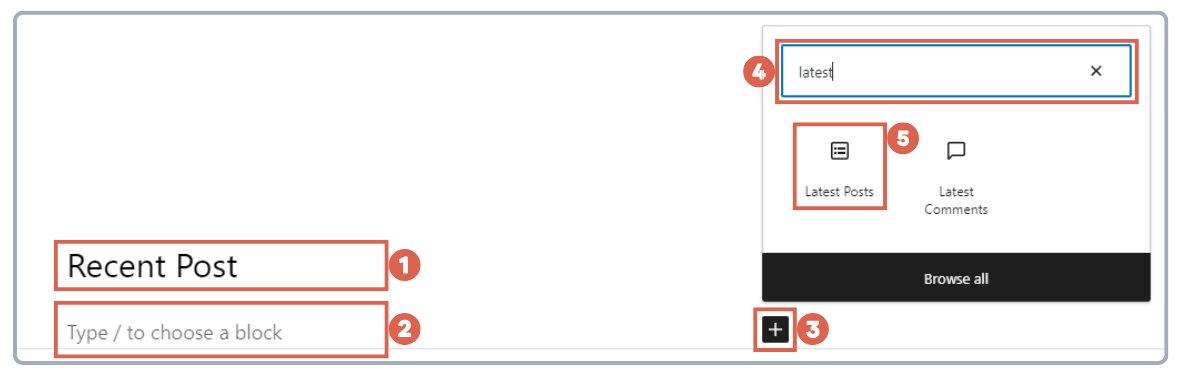
- Create a Recent Posts heading. Click below it to add a new block, then click the [+] icon. Type latest into the search box and select the Latest Posts block.

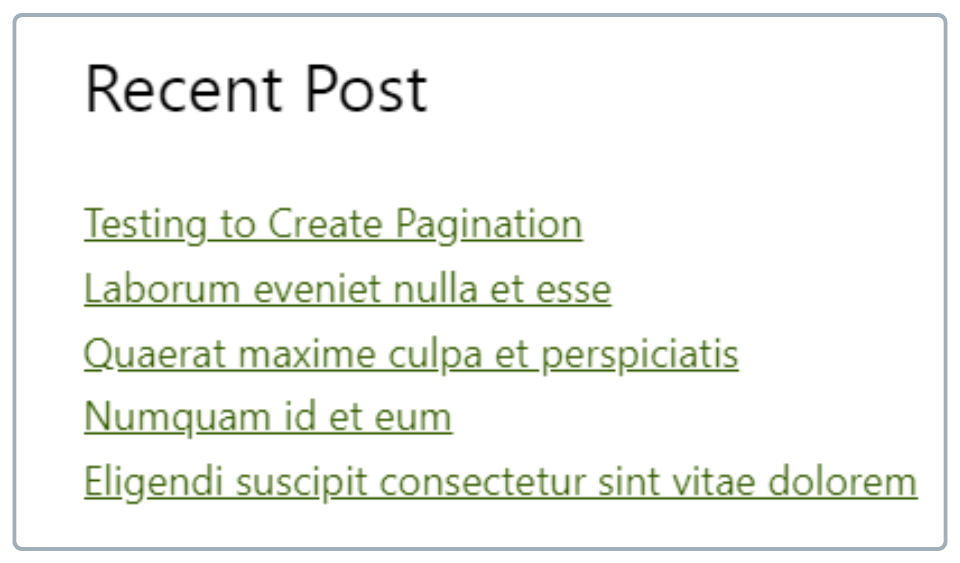
- Once successful, it will look like this:

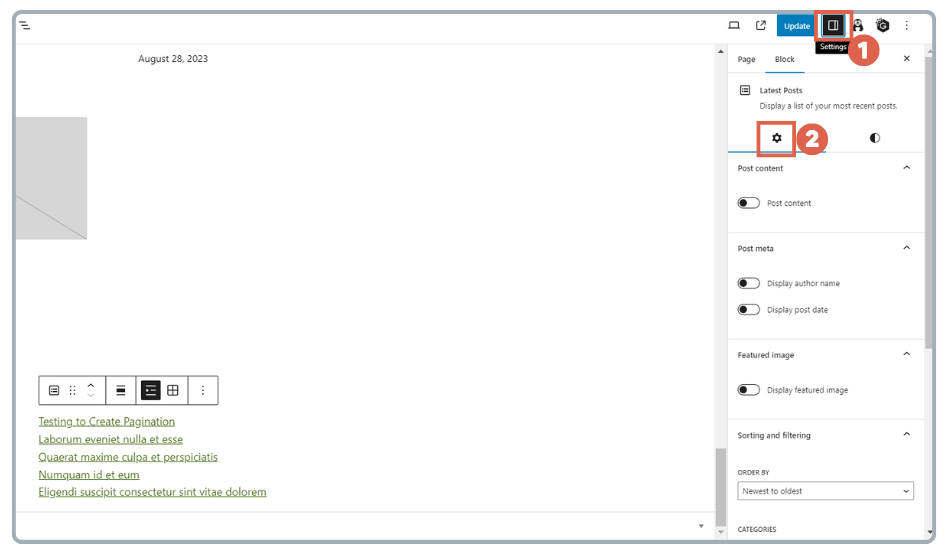
- Next, open the Settings sidebar in the top-right corner by clicking the Settings icon. You can configure the block from this sidebar.

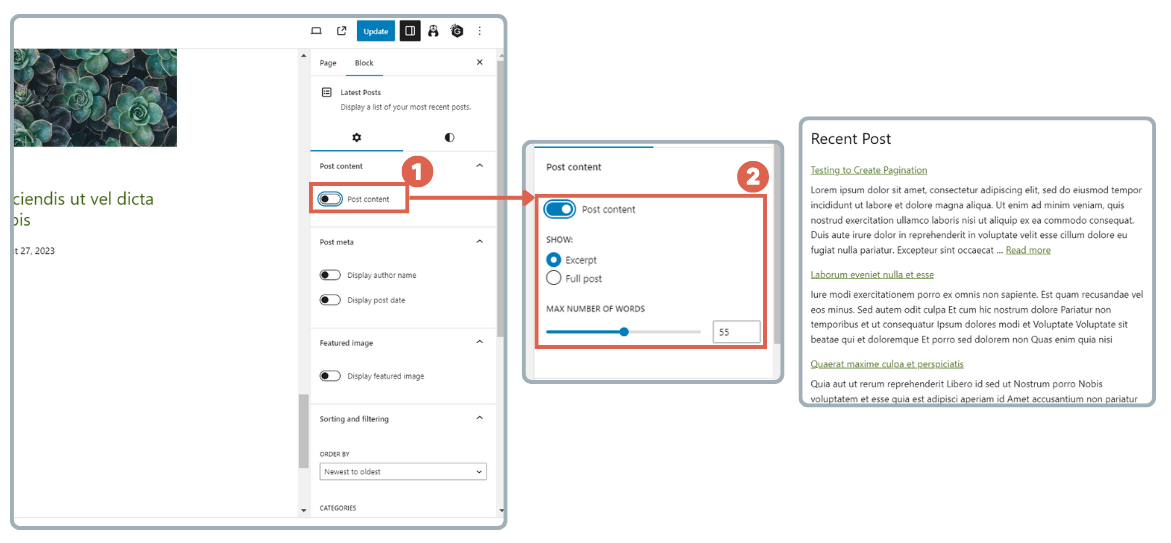
- To display a portion of the article’s content, enable the Post content toggle. You can choose between Excerpt or Full post. You can also adjust the number of words displayed by setting the MAX NUMBER OF WORDS. If you don’t want to show any content, simply leave this toggle off.

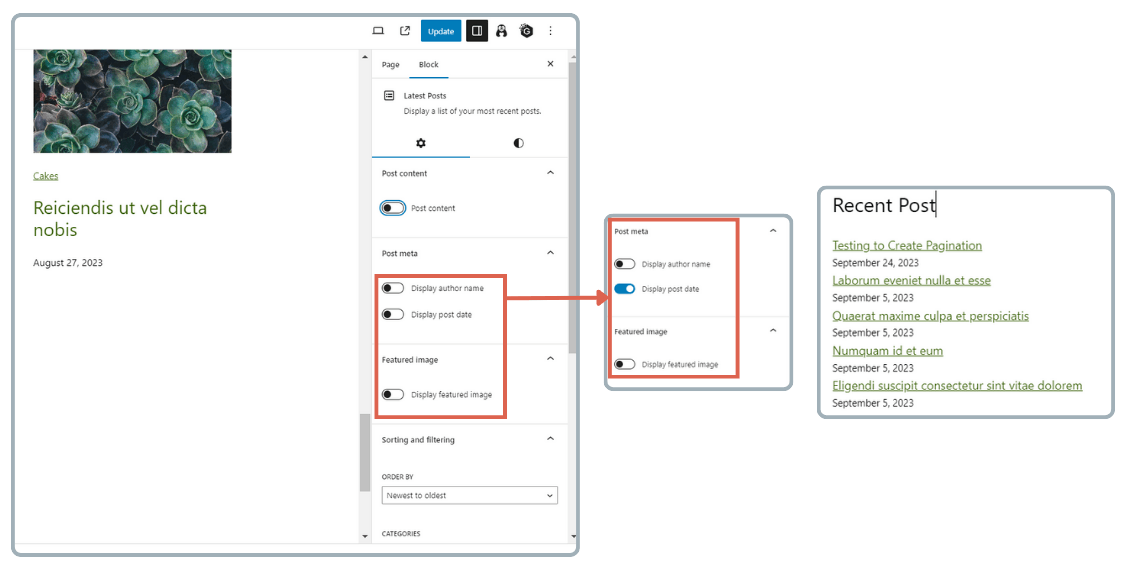
- In the Post meta settings, you can choose to display the author’s name (Display author name) and/or the post date (Display post date).

- The Display featured image setting can be enabled if you want to show the article’s featured image.
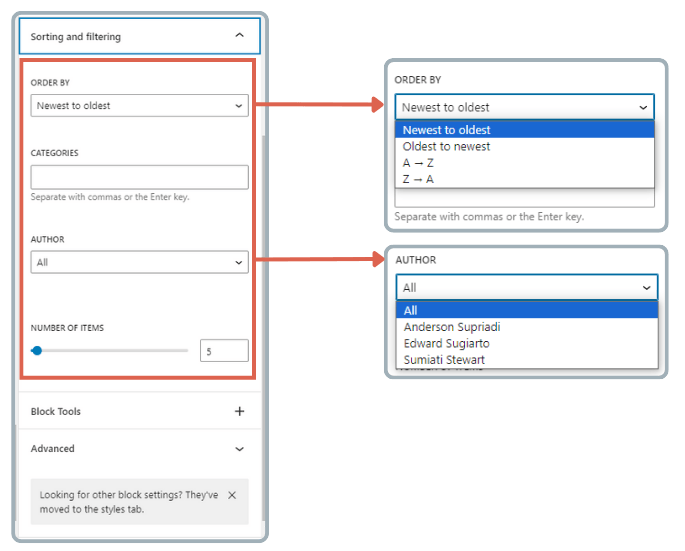
- Under Sorting and filtering, you have several options:
– Order By: Sort articles based on available criteria.
– Categories: Filter articles displayed in the recent posts section by category.
– Author: Filter articles displayed based on the author’s name.
– Number of items: Set the number of article titles to display in the recent posts section.
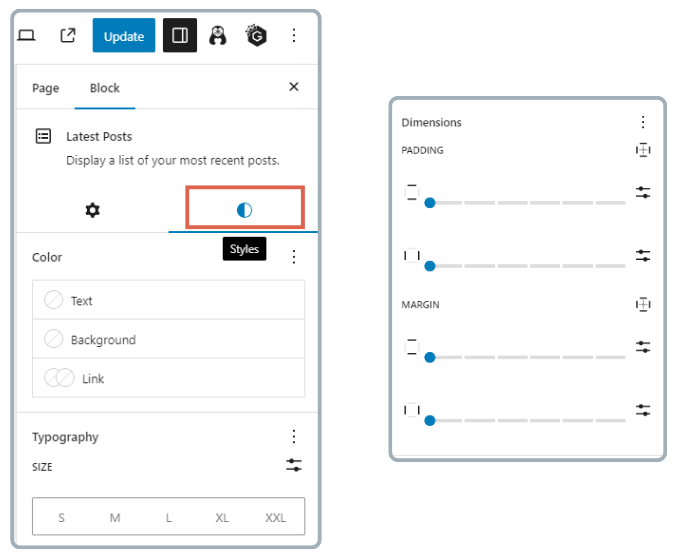
- To customize the appearance of your recent posts, click the Styles icon. Here, you can adjust several style settings:
– Text, background, and link colors
– Font size
– Dimensions and Margin
And now, your simple recent posts section is complete. However, there’s an additional function you might find useful for this feature: making the recent posts section sticky.
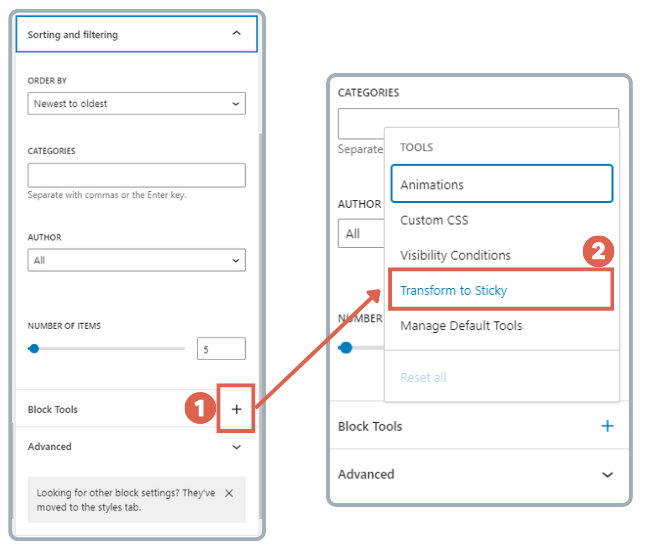
You can also make this recent posts section sticky using the same method as creating a sticky header in WordPress. This is done using the Otter Blocks plugin.
- Install the Otter Blocks plugin.
- Open the page where you’ve added the recent posts section.
- Open the Settings sidebar > select Settings > scroll down to the Block Tools section, click + > and choose Transform to Sticky.

- Finally, save your changes and view the result on the front-end.
By making your recent posts section sticky, you can create a helpful navigation element that makes it easier for visitors to explore your website.
Ready to Display Recent Posts in Your WordPress Site?
This has been a tutorial on how to create a recent posts section on a WordPress blog without needing plugins or the traditional WordPress widgets.
This method is especially useful if you want to avoid slowing down your website with extra plugins or if you are using a modern theme like Twenty Twenty-Three or newer.
If you have any questions, run into issues, or need expert WordPress or WooCommerce developers, feel free to reach out to us through the Tonjoo Contact page. We’re here to help!

For more articles on WordPress, WooCommerce, and web development, check out Tonjoo Studio Blog by Moch. Nasikhun Amin.
Last Updated on September 23, 2025 by Moch. Nasikhun Amin

Advertisements