Advertisements
Popups are a crucial element of modern digital marketing strategies, especially for websites built on WordPress. With an attractive design and precise targeting, popups can boost conversions, collect subscriber emails, and promote special offers. Among the many popup plugins available for WordPress, OptinMonster stands out as one of the most popular.
This plugin has been installed over 800,000 times and is renowned for its advanced features, such as exit-intent technology, which detects when a visitor is about to leave your website.
This tutorial will guide you through the steps to create a popup in WordPress using the OptinMonster plugin, from installation and linking your OptinMonster account to designing the popup, setting display rules, and finally, publishing it.
Advertisements
How to Create a Popup in WordPress Using OptinMonster
Before you can create a popup in WordPress with OptinMonster, you first need to install the OptinMonster plugin. Please read our article on how to install a WordPress plugin to learn the steps. After installing and activating the OptinMonster plugin on your WordPress site, the process of creating a popup involves a few key steps:
Stage 1: Linking Your OptinMonster Account
The first step is to connect your WordPress installation with your OptinMonster account.
- After activating the OptinMonster plugin, you will be directed to the OptinMonster account creation page. Click on New? Claim Your Free Account.
- Next, you’ll be asked to fill out a form explaining why you are using OptinMonster.
- Then, you will be prompted to select your website type.
- After that, you’ll be asked to choose your primary goal for using OptinMonster.
- Choosing additional features. In this step, you’ll be asked to select any extra features you want to use. By default, every OptinMonster user gets the All Campaign Types and Page-Level Targeting features. There are also free add-ons you can choose from.
- Linking your website with OptinMonster. Click Create Free Account.
- Next, you’ll be prompted to enter a payment method. Even if you’re using the free plan, you must provide payment details. OptinMonster accepts MasterCard, Visa, and PayPal. If your bank’s debit card is a MasterCard or Visa, you can enter the card number, expiration date, and the CVV number from the back of the card.
Advertisements
Stage 2: Create a Popup in WordPress Using OptinMonster
In the previous steps, you have installed, activated, and linked your website to OptinMonster. The next stage is to create the popup itself. Here are the steps to create a popup in WordPress using OptinMonster:
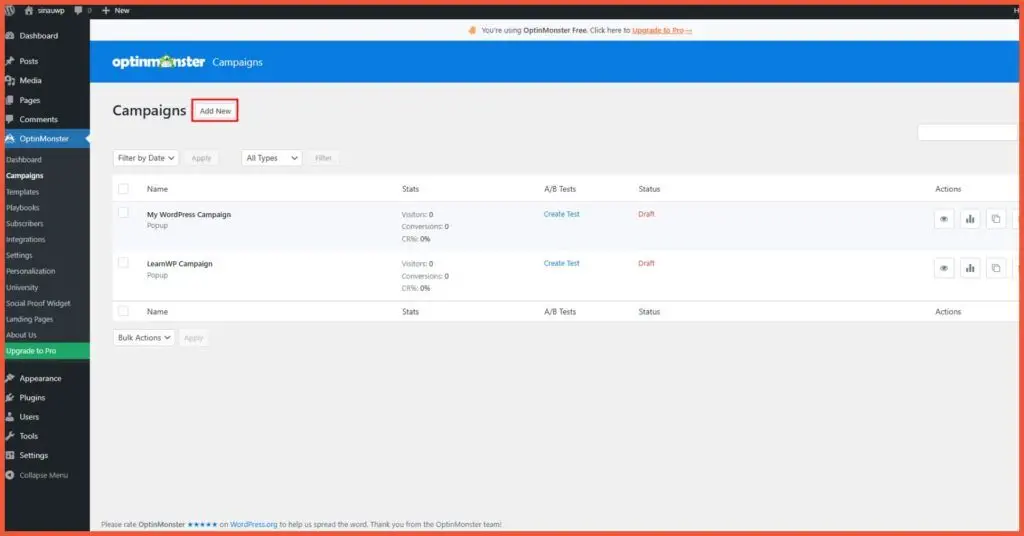
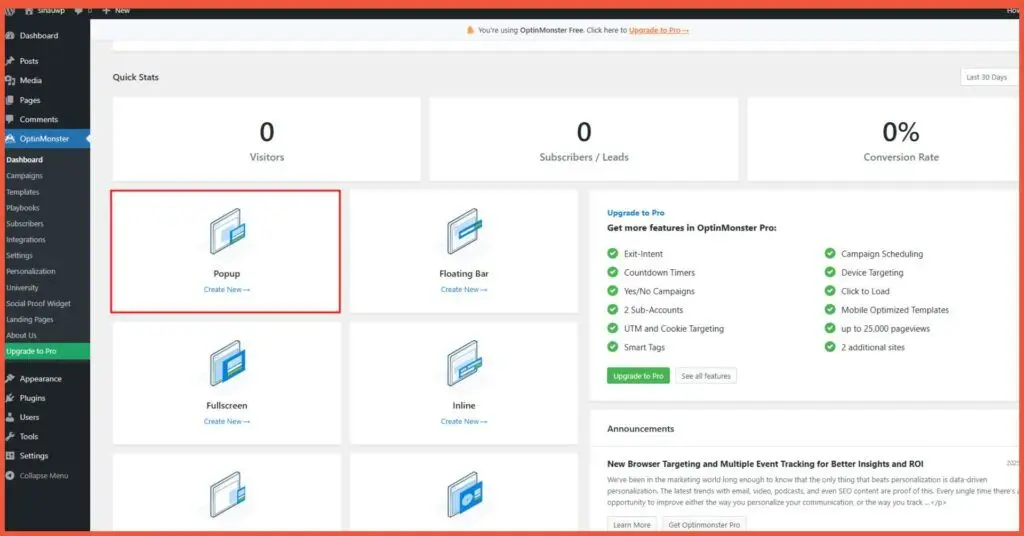
- From your WordPress admin dashboard, navigate to OptinMonster > Campaigns > Add New.

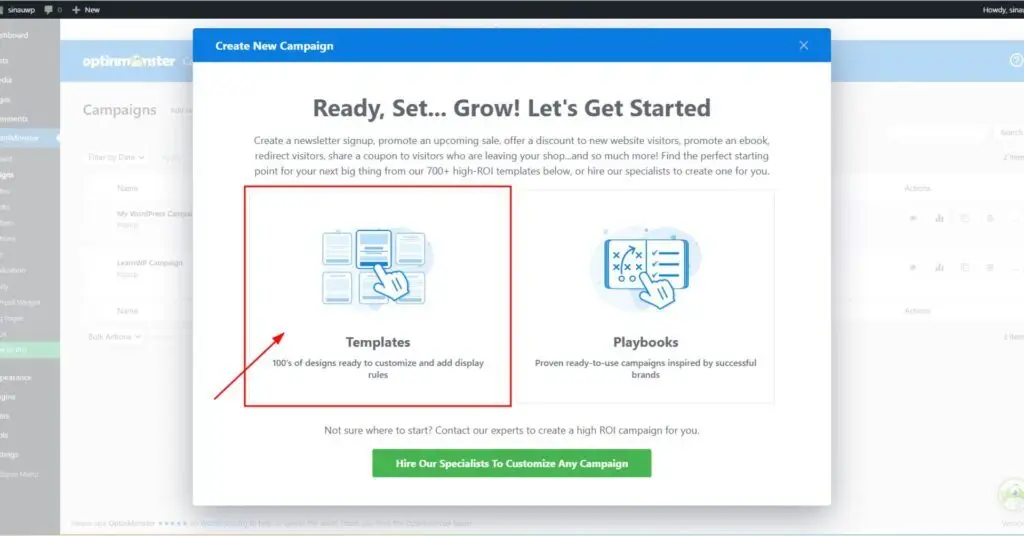
- You will be prompted to choose a template or a playbook. For this tutorial, click on Templates.
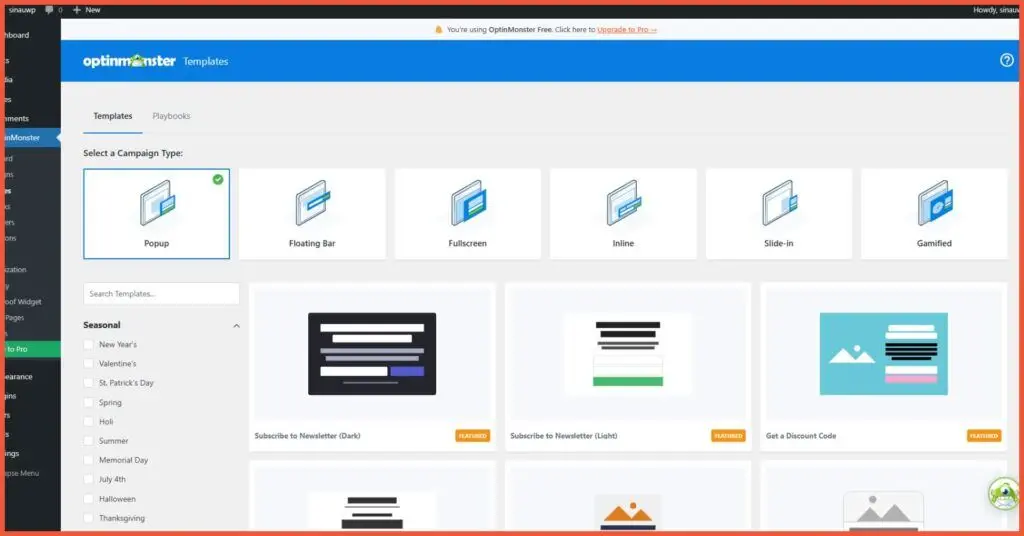
- You will then be redirected to the OptinMonster dashboard. Click on Popup.
- Next, you’ll choose a popup template. There are many templates available. You can also preview a template before selecting it. Once you find one you like, click Use Template.
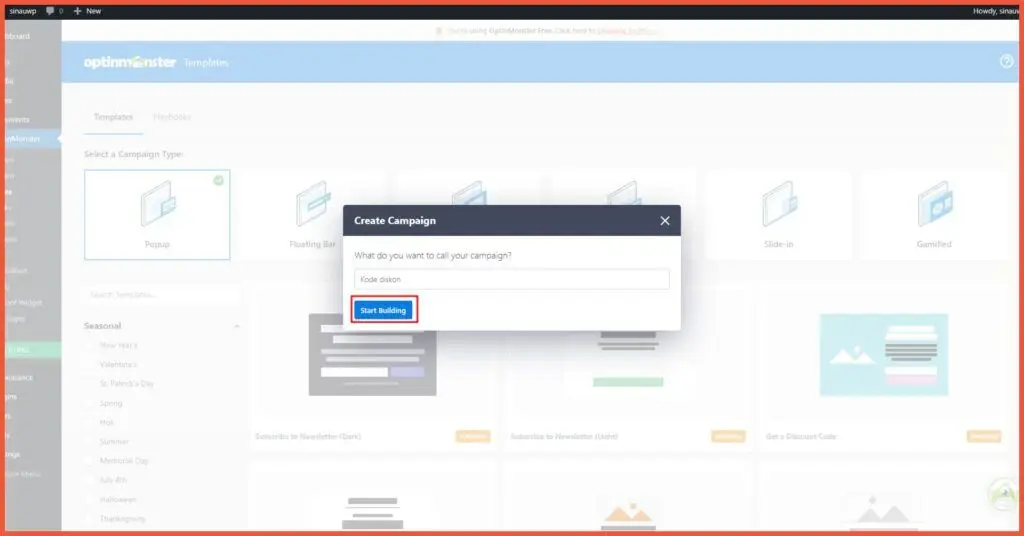
- You will then be asked to name your campaign. After choosing a campaign name, click Start Building.
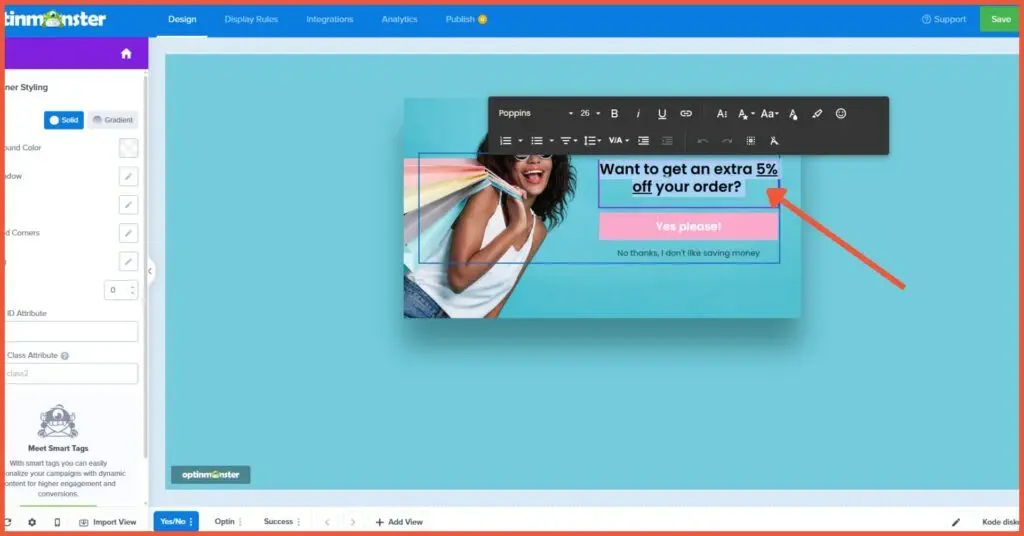
- You will be taken to the Design page. Here, you can edit existing elements and add new blocks. For example, to edit text, simply select the text you want to change, and various editing options will appear. You can change the font type, size, color, and even insert a permalink.
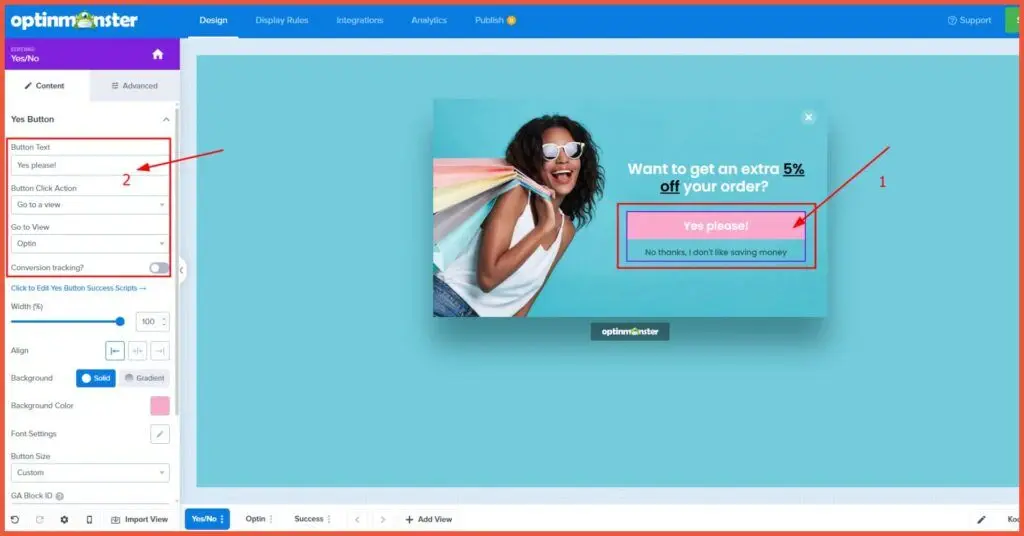
- Next, you can edit the call-to-action button. To edit the button, click on it within the template, and its editing options will appear. You can change the text, click action, size, and alignment.
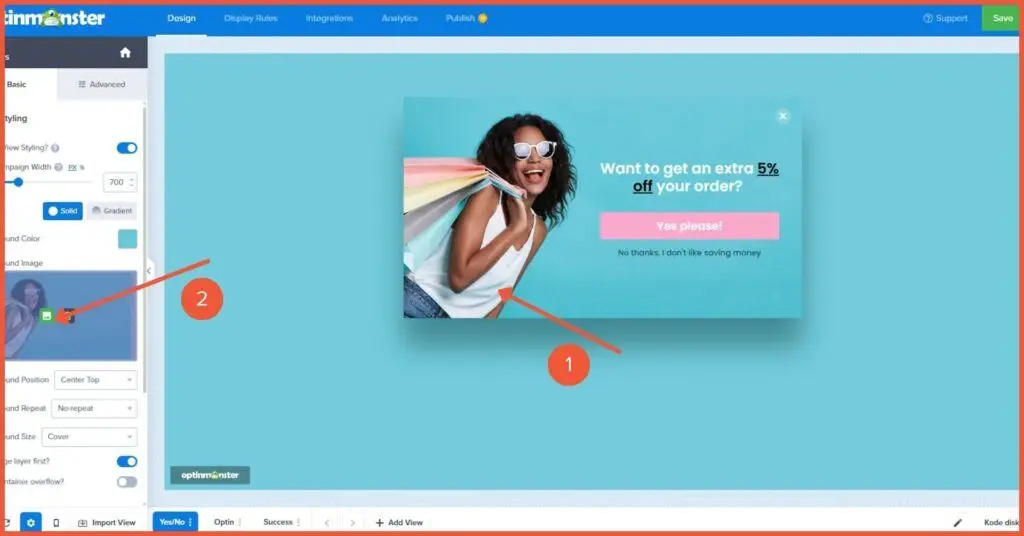
- The next step is to add an image to your popup. To do this, drag an Image block onto your canvas or click the existing image placeholder. Then, click Select Image.You can drag and drop an image or click Select from Computer to upload a new one.
Select the image you want to upload for your OptinMonster popup. You can upload an image directly from a folder on your computer.
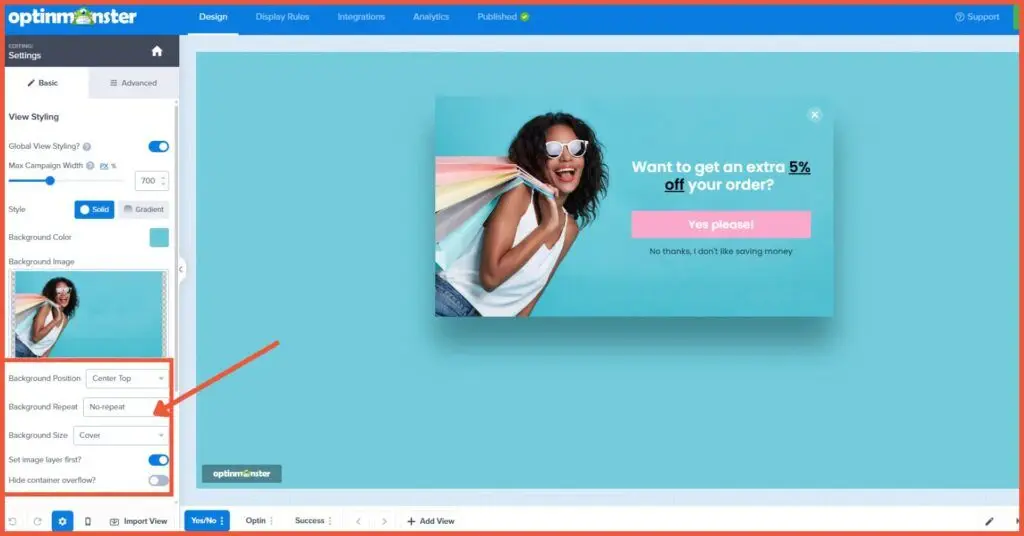
- You can also adjust the alignment, add alt text, a link, and your Google Analytics code if you have one.
Your popup design is now complete.
 You can drag and drop an image or click Select from Computer to upload a new one.
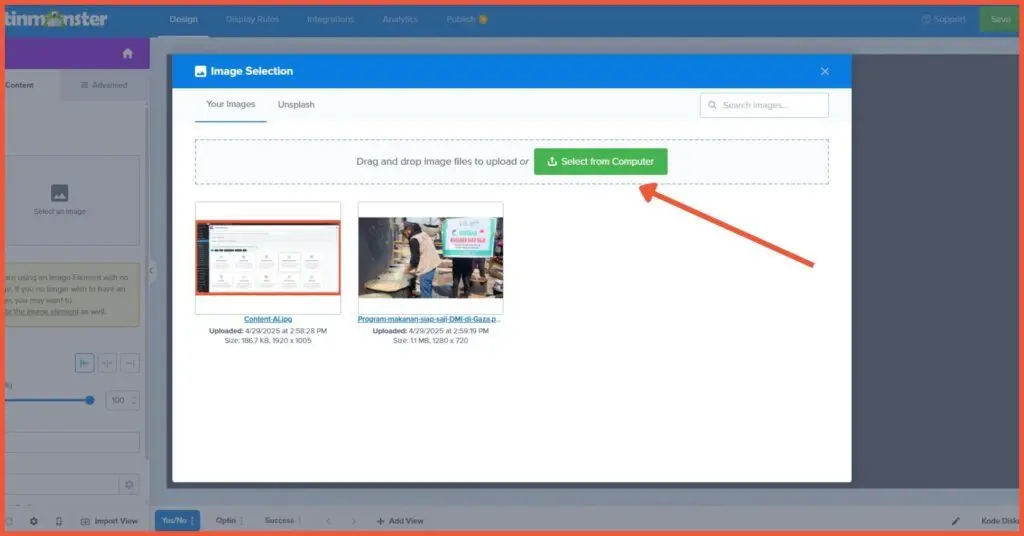
Stage 3: Setting Up Display Rules
Once your popup design is finished, the next step is to configure the display rules, also known as exit-intent settings. Display Rules is a feature that allows you to control where and when your campaign appears on your website. By default, every OptinMonster template comes with pre-set display rules. These settings include:
Also Read:
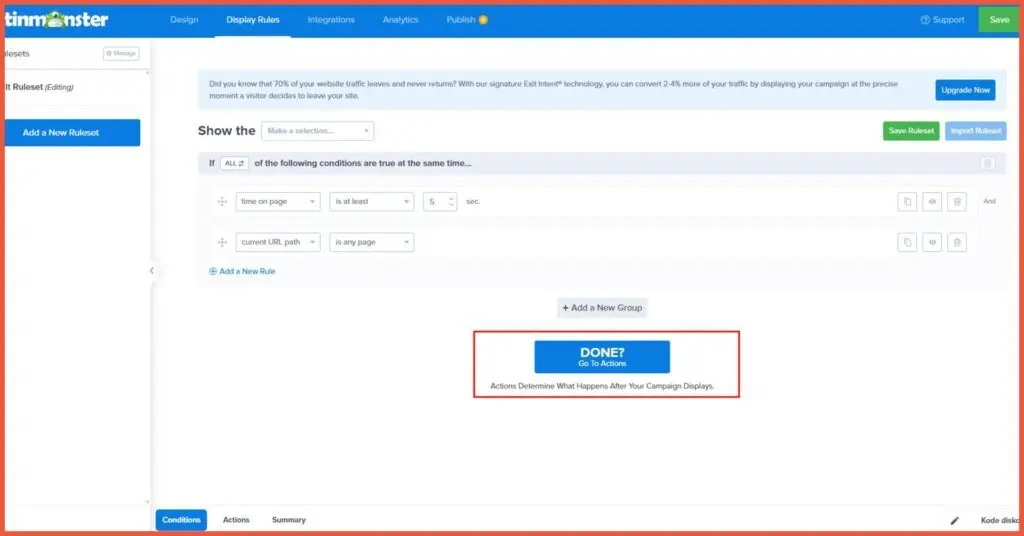
- Conditions: In this section, you can set when the popup appears on the user’s screen and for how long. Once you’re done setting the conditions, click Done to proceed to the next step.
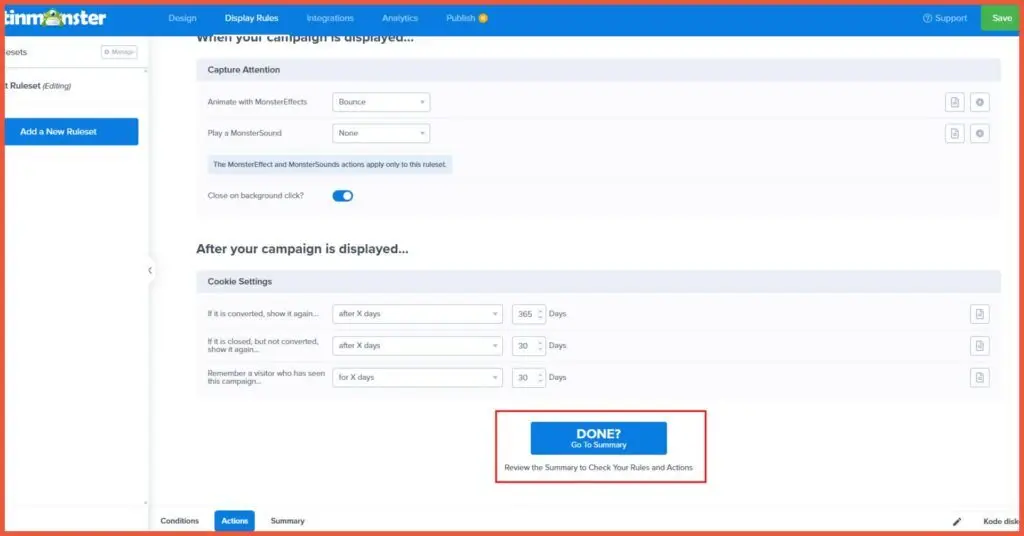
- Actions: Here, you can configure elements to capture your visitor’s attention. For instance, under the Capture Attention menu, you can add animations and background sounds. You can also set an action for after the popup is displayed.
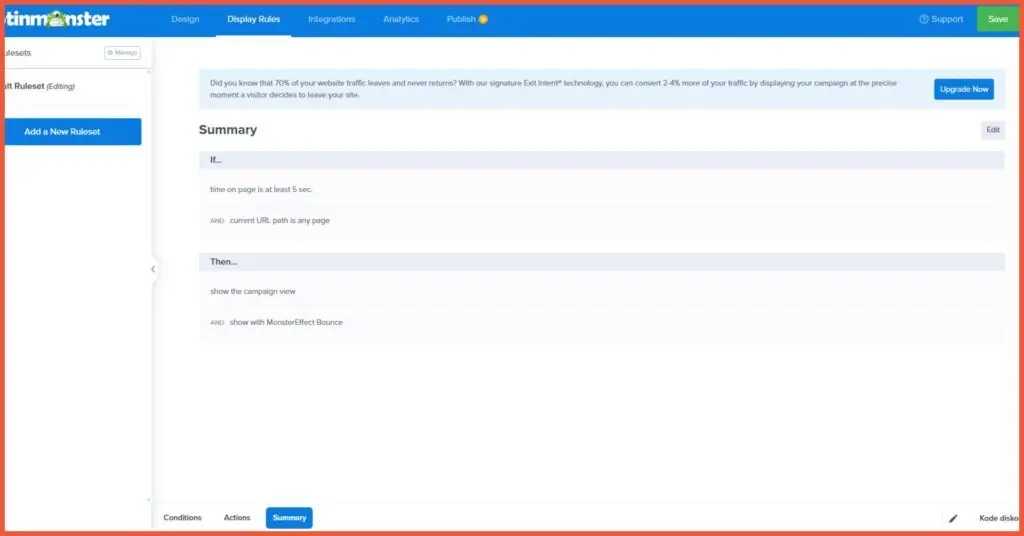
- Summary: This shows a summary of the display rules you have created. If everything is set, click Save > Publish.
Here is what the OptinMonster popup will look like when it appears on your visitor’s screen:
Advertisements
Successfully Create a Popup in WordPress Website?
That’s how you create a popup in WordPress using OptinMonster. Building popups with the OptinMonster plugin is a highly effective strategy for increasing conversions, generating leads, and boosting engagement. With features like exit-intent, targeting, and an intuitive drag-and-drop builder, OptinMonster empowers website owners to create attractive and well-targeted popups.
However, it’s important to remember that the success of a popup also depends on a compelling offer, a non-intrusive design, proper targeting, privacy compliance, and continuous optimization efforts. Additionally, the requirement to connect to OptinMonster’s servers might be a drawback for some users. Please read our article on the best WordPress popup plugin recommendations for other options.
For those who prefer to focus on growing their business without the hassle of managing a WordPress website, trust Tonjoo. We are a professional custom website development service with hundreds of clients, including Gadjah Mada University, Polygon Bikes, and many more. We are ready to create a functional and sophisticated website tailored to your specific needs.

For more articles on WordPress, WooCommerce, and web development, check out Tonjoo Studio Blog by Moch. Nasikhun Amin.
Last Updated on October 23, 2025 by Moch. Nasikhun Amin

Advertisements