Gutenberg Tutorial (Part 4): How to Create Footer for Website
Advertisements
After successfully creating the Header in the previous Gutenberg WordPress tutorial, the next step is to learn how to create footer in WordPress when building a simple page on a website.
The Footer is the bottom part of a website that typically contains contact information, company description, additional navigation links, and copyright information.
The end result of creating the Footer using the Gutenberg WordPress editor is shown below:
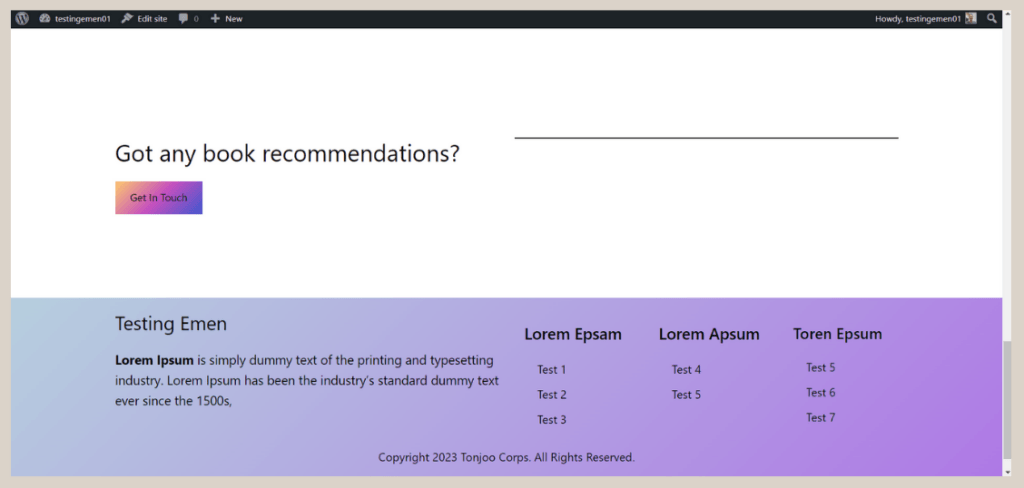
Final result of footer created using Gutenberg WordPress editor.
This tutorial consists of four steps to complete process on how to make footer without HTML and CSS, including creating columns, adding the description section, creating the navigation menu section, and setting the background.
Let’s delve into the details of each step!
Advertisements
Step 1: Setting up Footer Columns
The initial step in crafting the footer involves adding columns, which act as dividers between different footer sections, ensuring a well-organized appearance. Here’s how to create static footer columns:
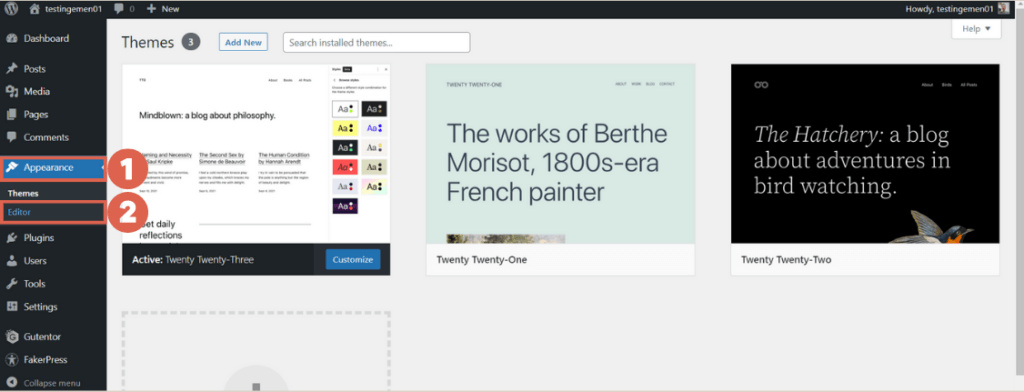
- Access the WP Admin page and click on Appearance > select Editor from the menu.
- Choose Template Parts > then click on the Footer section to access the editing options.
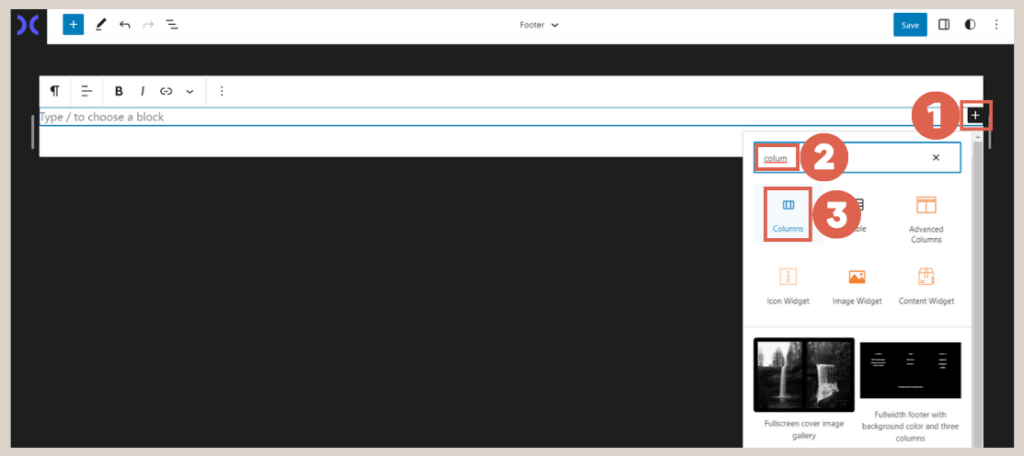
- Within the existing block, click on the [+] symbol. In the search box, type columns > select Columns to create the column structure.
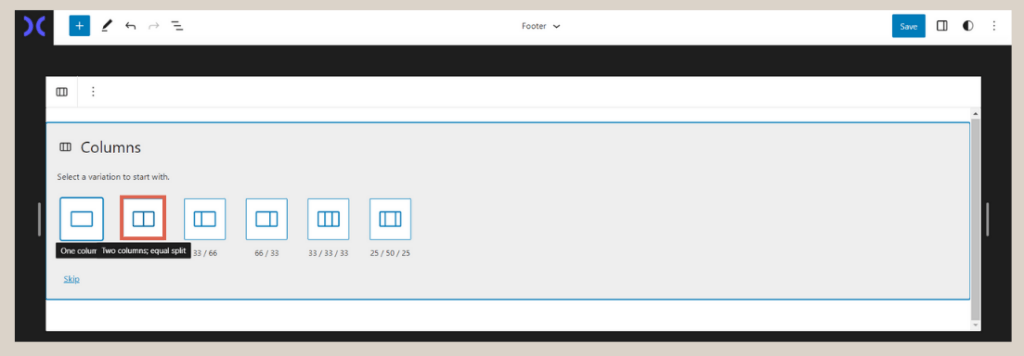
- Opt for the 50/50 column option to create two equally-sized sections in the footer.
- Congratulations! You have successfully established a two-column footer, with one column designated for the description and the other for the navigation.
Step 2: Crafting the Footer Description
Moving on, we will utilize the right column of the footer to create the description section.
This area can include essential details about the company, such as its name, address, and a concise overview. Here’s how to proceed with creating the footer description:
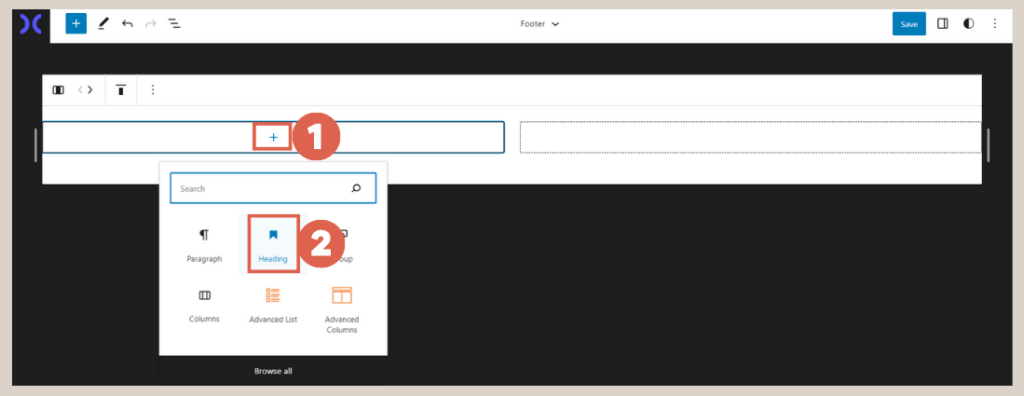
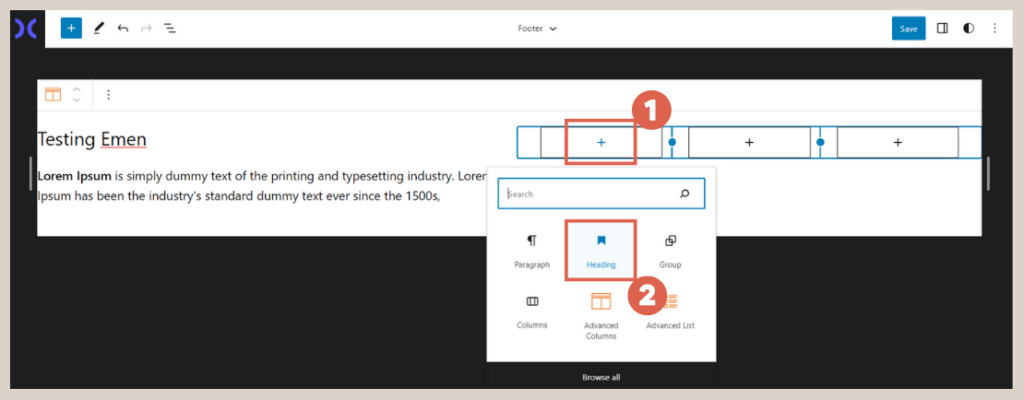
- In the left column of the footer, click on the [+] symbol > select Heading > input the title for the footer description.
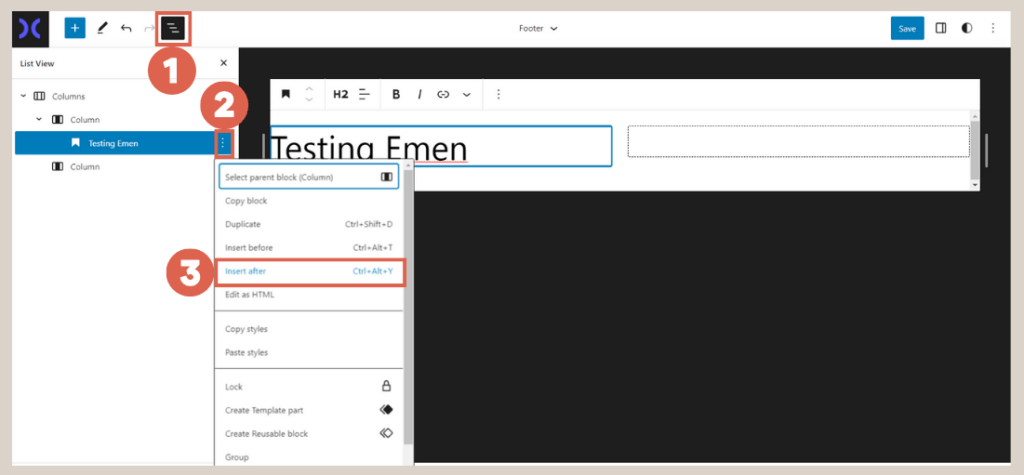
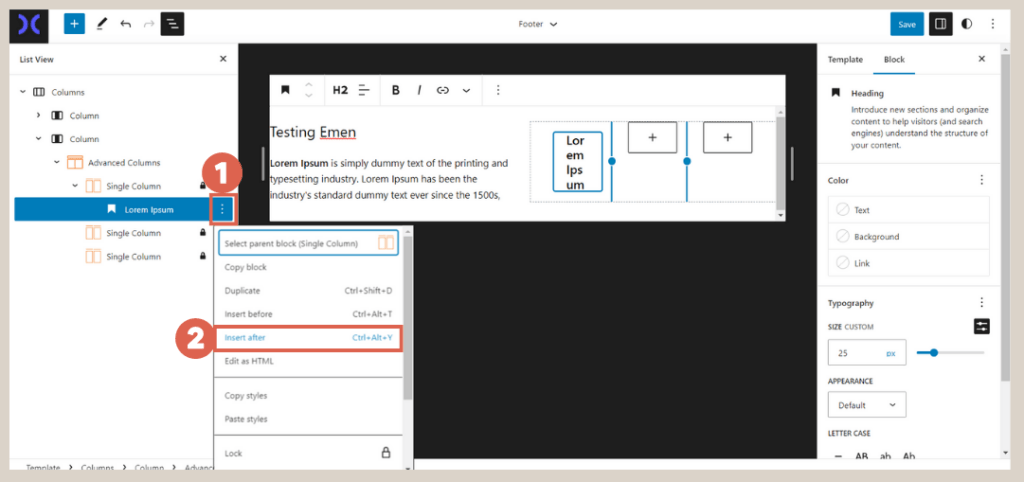
- Navigate to List View > choose the created Heading > click on the three dots > select Insert after to add the description below the heading.
- Once the paragraph block appears, fill in the footer description with the desired information.
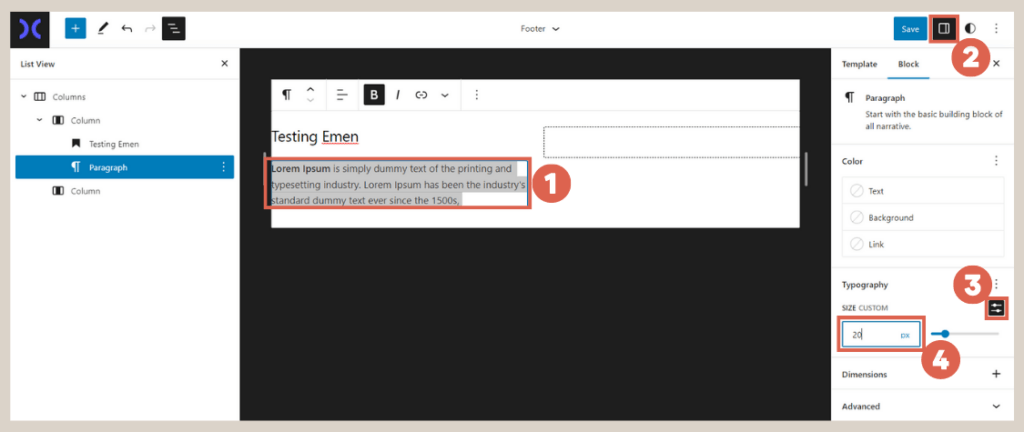
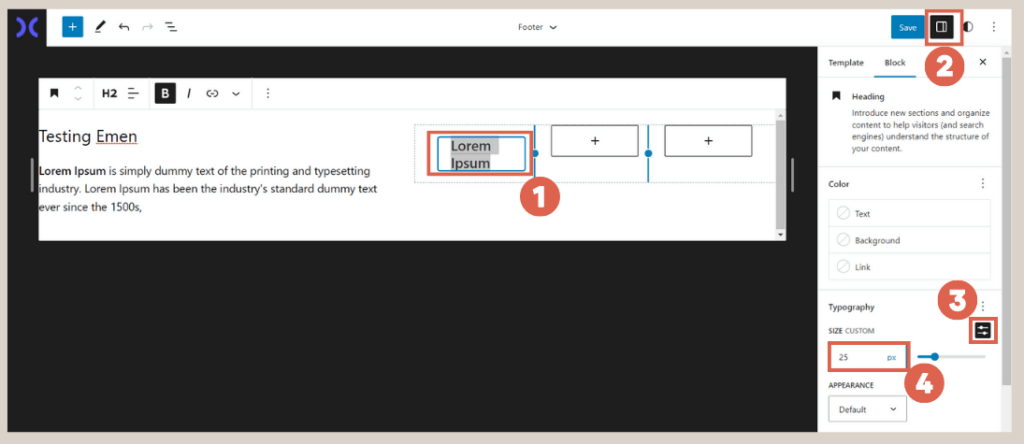
- Now, customize the heading by clicking on it > proceed to click on Settings in the top right corner > in the Size Custom section, click on Setting > enter the desired header size (we used size 30).
- Similarly, adjust the description in the footer by clicking on the paragraph block > click on Settings > access the Typography section > once there, click on Setting > enter the appropriate font size (we used size 20).
- Fantastic! The section for the footer description is now complete.
You can populate this fixed footer section with pertinent information such as the company’s address, a brief company overview, and other relevant details.
Advertisements
Step 3: Crafting the Footer Navigation Menu
Footers often serve as a platform for showcasing additional navigation or related menus, such as privacy policy, terms and conditions, sitemap, or other pages that may not be included in the main menu.
Baca Juga
Now, you can add these menus in the navigation menu section of the footer. Here’s how to proceed:
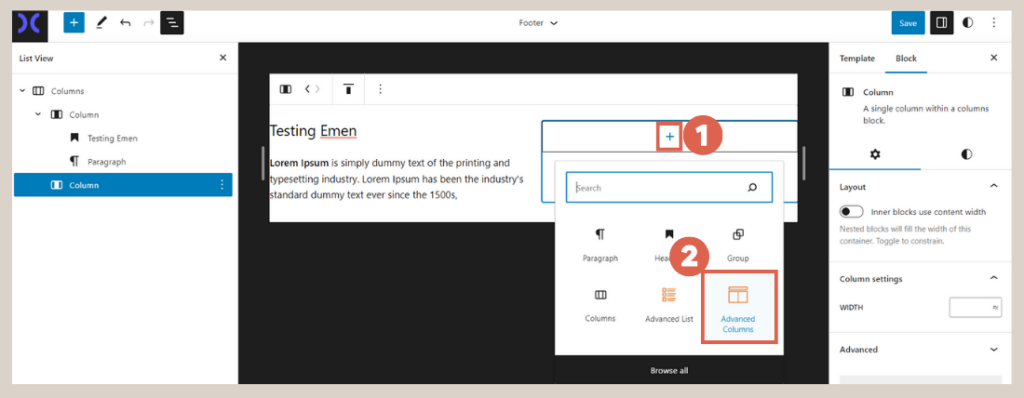
- In the right column of the footer, click on the [+] symbol > select Advanced Columns.
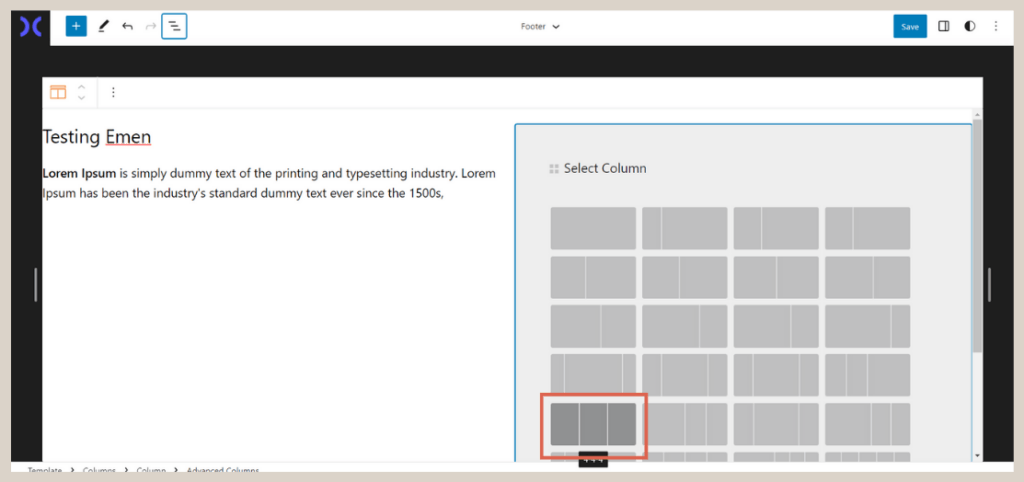
- Opt for the 4-4-4 column layout, which consists of three sections.
- Click on the [+] symbol in the first column > select Heading.
- Input the desired menu title in the heading > adjust the font size in the Typography section of the Settings (we used size 25).
- Add a menu list by clicking on View List on the left side > click the three dots on the menu title and select Insert after.
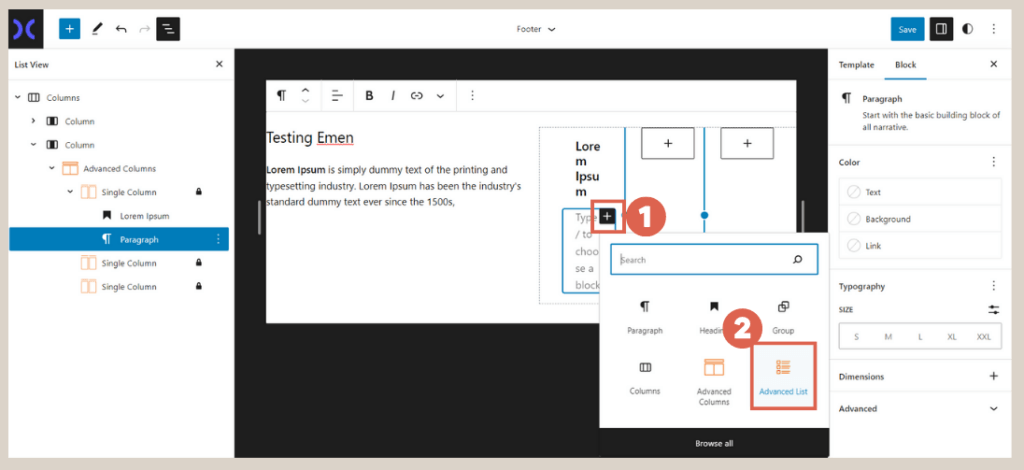
- Once the block appears, click on the [+] symbol and select Advanced List.
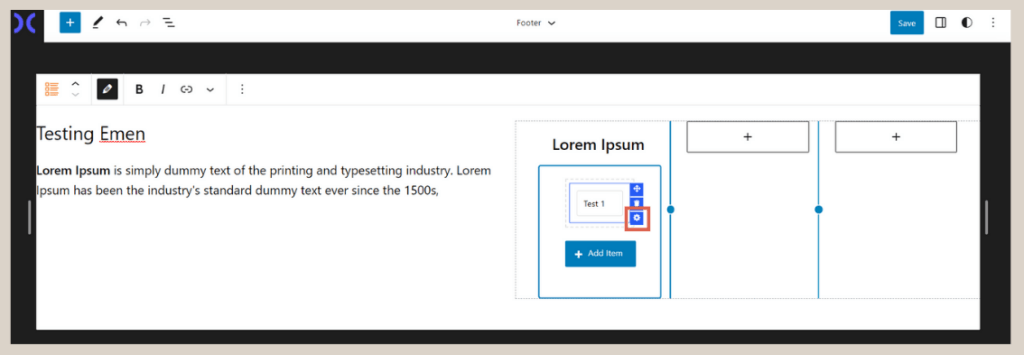
- Fill the first list with the menu name > click on the settings icon.
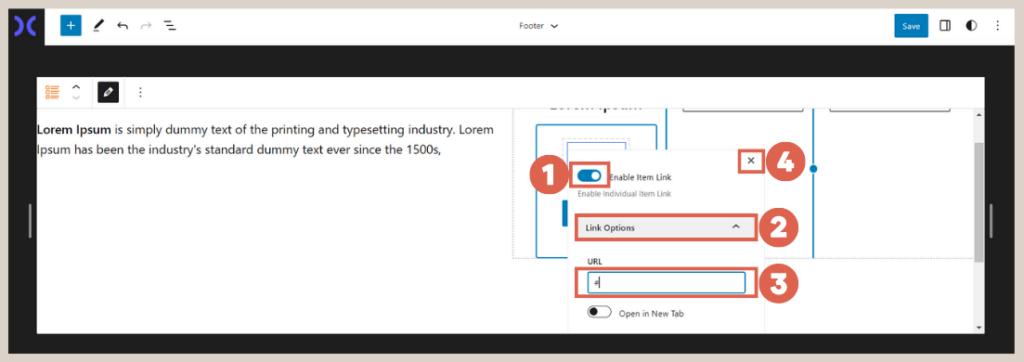
- Click the Enable Item Link toggle > access Link Options > Enter “#” in the URL field if there is no page to link to yet. You can replace “#” with the page URL later when available.
- Repeat the process to add menu titles and items to the two adjacent columns.
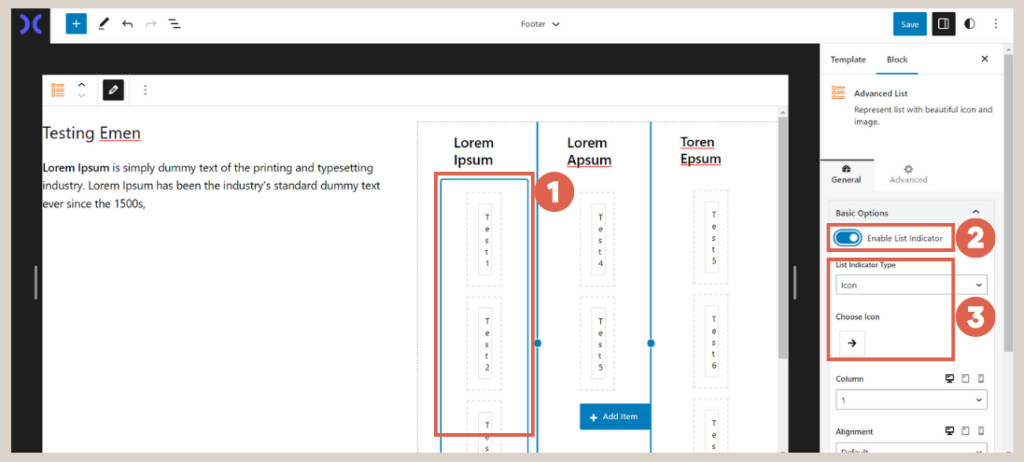
- Once they are added, click on one of the menu items > open the settings > you can customize the List Indicator icon using its toggle.
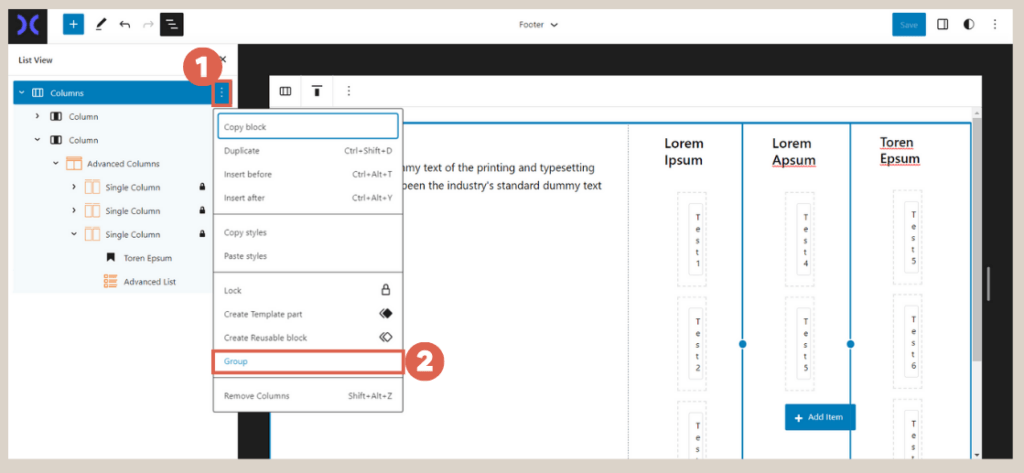
- Merge the entire footer section into a single group by opening List View in the top left corner > clicking on the three dots on the whole Columns section > selecting Group.
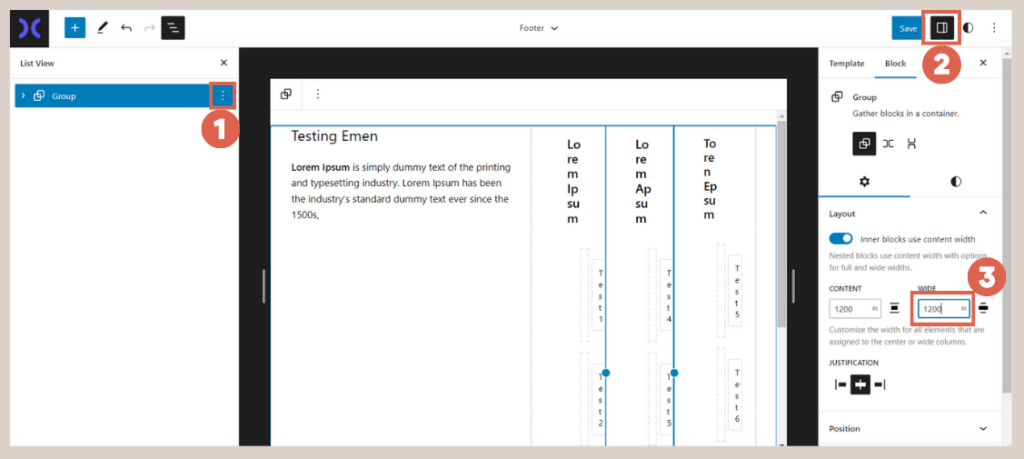
- Tidy up the footer by clicking on the three dots on the whole Group section > accessing Settings > entering 1200 in the Width section, > clicking Save.
Step 4: Enhancing Background, Copyright, & Footer Padding
To enhance the visual appeal of the footer section, you can add a background color to it. Additionally, you can include important legal information, such as a copyright notice, in the footer.
To achieve a neat appearance, don’t forget to provide padding to the footer. Here’s how you can add the background, copyright, and padding to the footer:
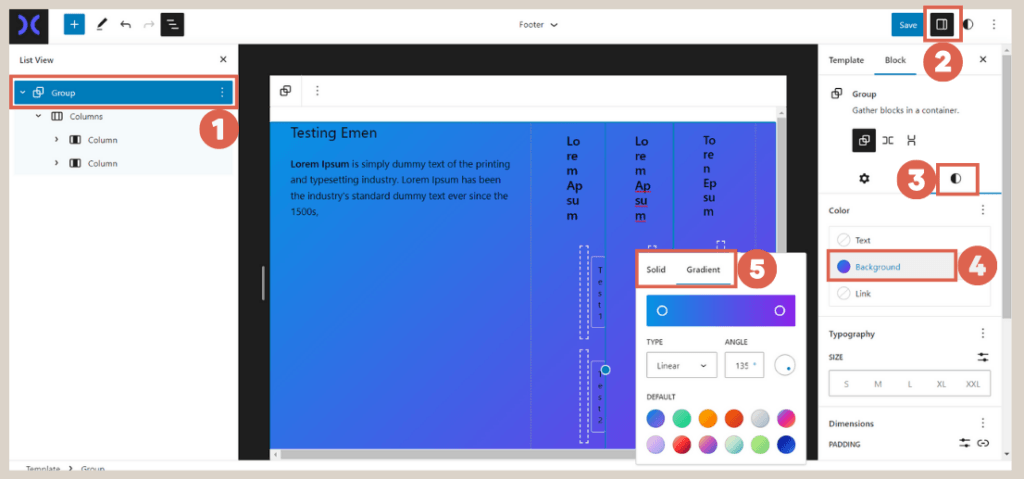
- Open the List View in the top left corner > select the footer Group
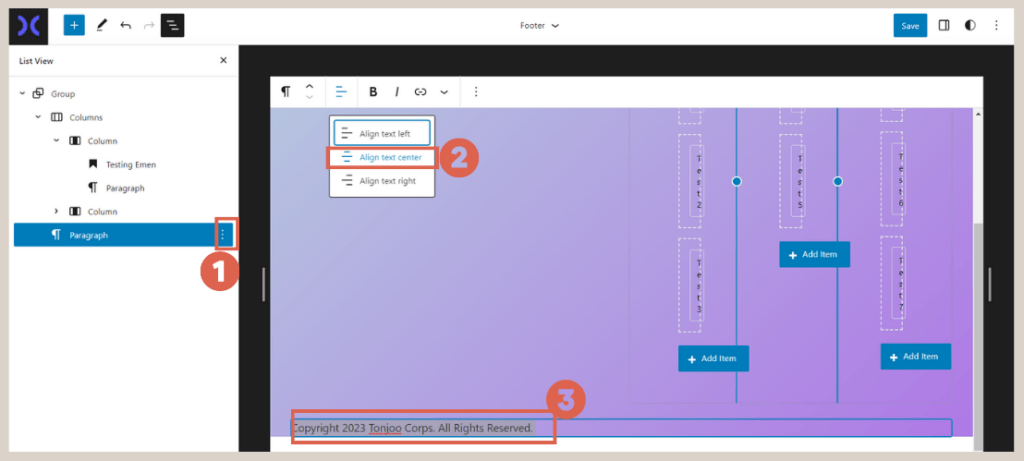
> click on Settings > choose the Style option > select Background > adjust the background color according to your preference. - Next, add the copyright notice by clicking on the three dots in the Columns section > selecting Insert after and entering the copyright text.
- To center-align the text click on the Copyright block > select the paragraph alignment settings > and choose Align text center.
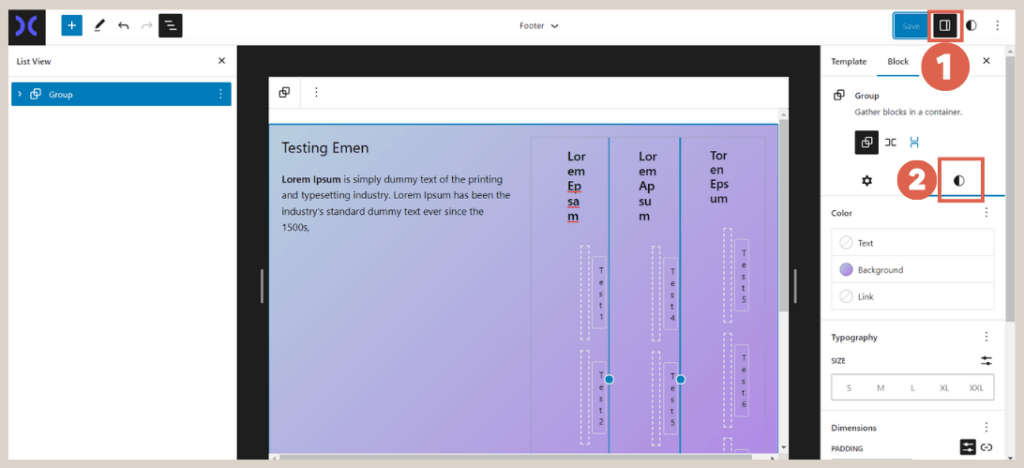
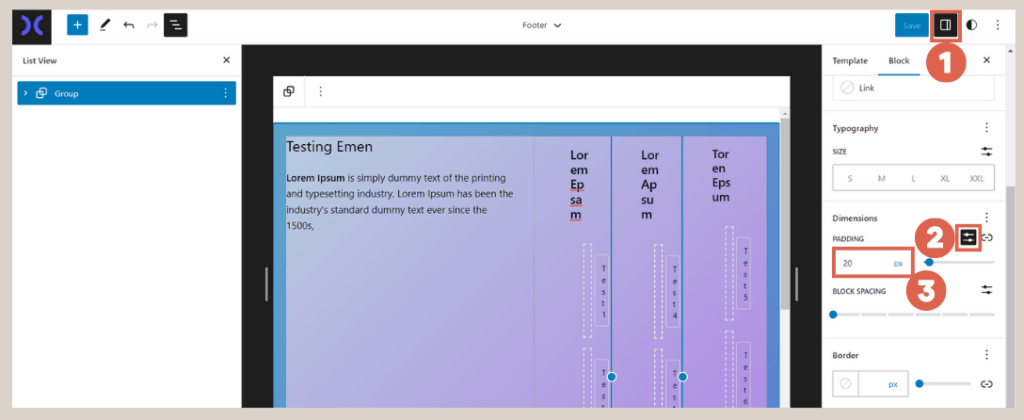
- Set the padding by selecting the entire footer > clicking on Settings > then choosing Style > scrolling down to the Dimensions section > click on Settings and enter the desired padding size (we used size 20).
- Done. You have now successfully created the footer background, copyright notice, and added padding.
Advertisements
Ready to Create Footer on WordPress using Gutenberg?
That concludes the Gutenberg WordPress tutorial on how to create a footer stay at the bottom in WordPress. The footer is a significant section of a website that provides additional information and facilitates navigation for visitors.
The next step in creating a simple page using Gutenberg WordPress is to configure the components of the homepage.
Indeed, building a website can be a time-consuming process, even for creating a website with basic design and functionality.
If you wish to streamline the website development process, you can rely on Tonjoo Team, a professional software agency with experience in developing websites for government and start-ups.
Feel free to contact us to discuss further!
Last Updated on July 18, 2024 by Tonjoostudio Team
Advertisements
