Advertisements
Increase PHP max_input_vars limit in WordPress – Errors displaying the max_input_vars message in WordPress are common and can be resolved by increasing this value. This article will explain several methods you can use.
Generally, the way to fix the max_input_vars error in WordPress is by modifying the code containing this value in the .htaccess file or in a few other places. By doing so, the WordPress error can be resolved.
So, what exactly is max_input_vars in WordPress? What are the concrete steps to handle this issue? You’ll find all the answers comprehensively in this article!
Advertisements
What is max_input_vars in WordPress?
Max_input_vars is a setting in PHP that determines the maximum number of input variables a server can accept. These input variables include get, post, and cookie data.
If the max_input_vars value is too low, submitted data might not be processed or could be ignored. Also, a value that’s too low can trigger an error warning like the following:
maximum number of allowed fields exceeded. please increase 'max_input_vars'
This max_input_vars limitation commonly occurs on websites with significant user interaction that process a large volume of input data.
This issue isn’t limited to PHP Content Management Systems (CMS) like WordPress but can also occur on e-commerce sites, registration or reservation sites, and other types of interactive websites.
Therefore, if your WordPress site encounters an error due to an insufficient number of variables, the solution is to increase the max_input_vars value.
How to Increase max_input_vars Limit in WordPress
There are several methods you can use to increase the max_input_vars limit in WordPress through your control panel, including via the .htaccess, wp-config.php, and .php.ini files.
Advertisements
Method 1: How to Increase max_input_vars Limit Via .htaccess
This method only applies to servers using Apache. Here are the steps to increase the max_input_vars variable through the .htaccess file:
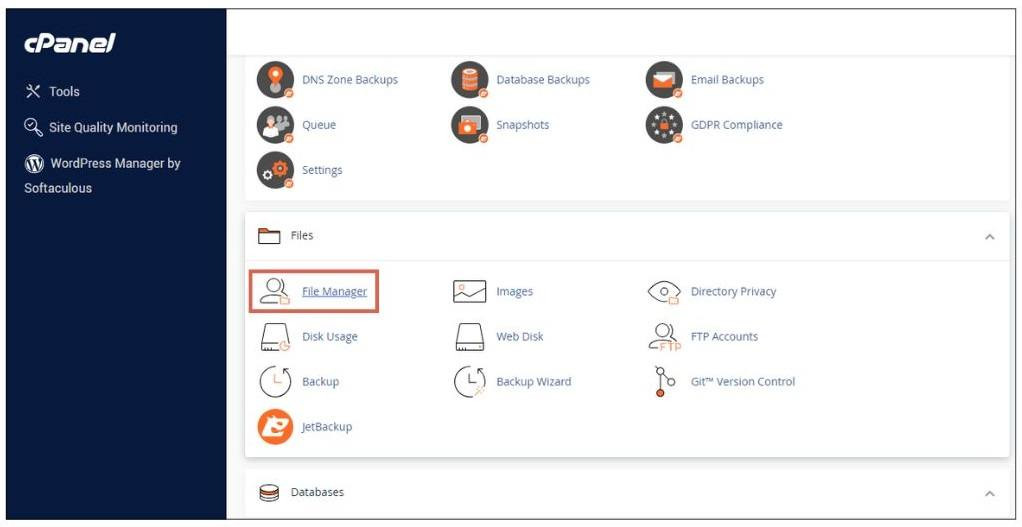
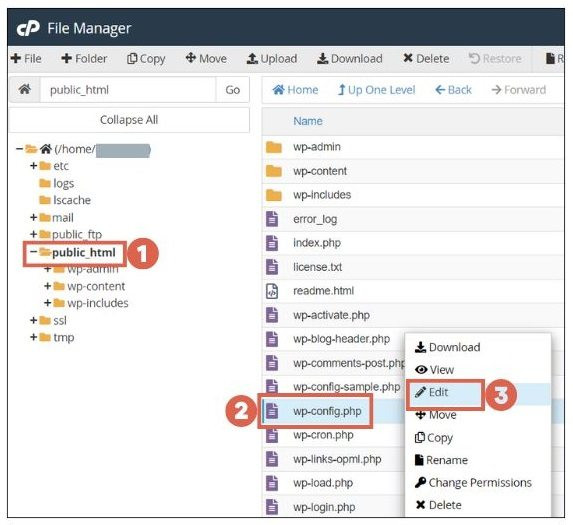
- Log in to cPanel, scroll down, and open File Manager.

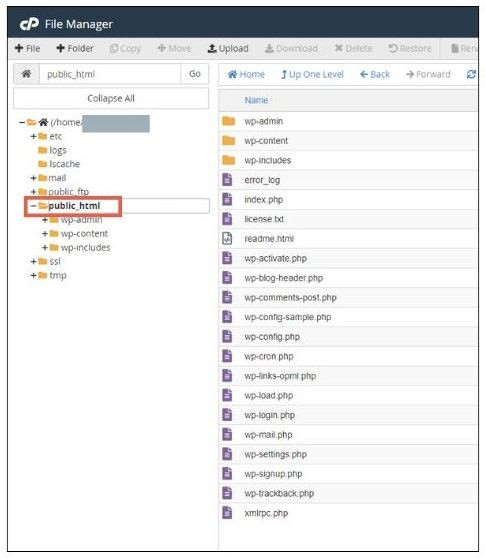
- In the folder menu on the left, open the
public_htmlfolder and look for the.htaccessfile.
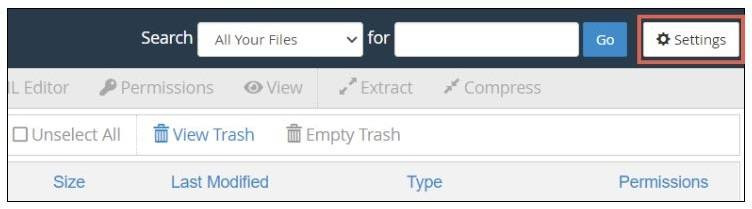
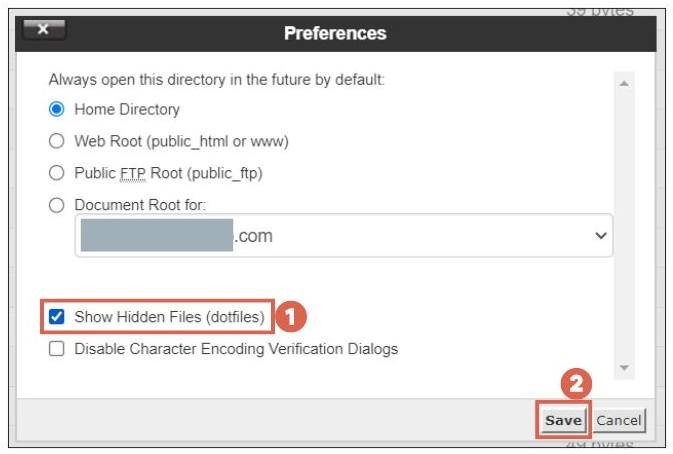
- If the
.htaccessfile is not found, you can display it by clicking Settings in the top right corner.
- Check the Show Hidden Files (dotfiles) option and click Save to display the .htaccess file, which is hidden by default.

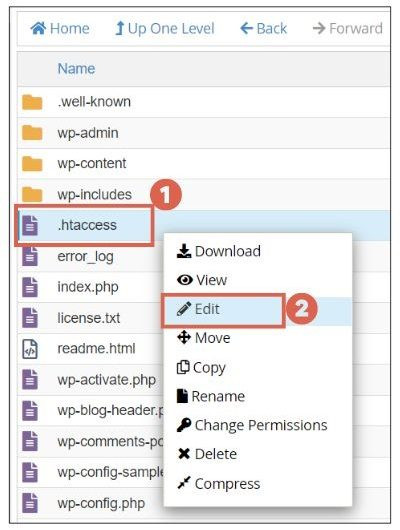
- Click once on the
.htaccess, file, right-click, and select the Edit option.
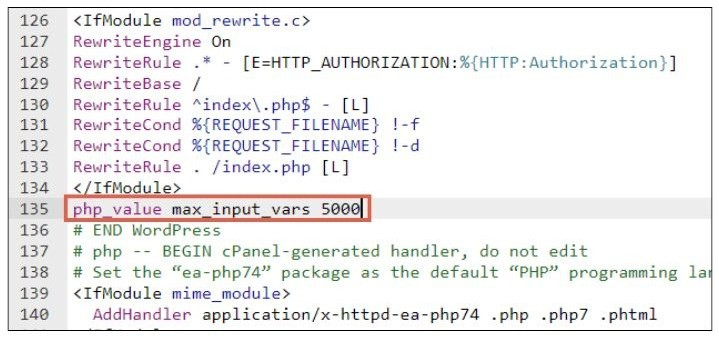
- Insert the line
php_value max_input_vars 5000before the# END WordPressline.
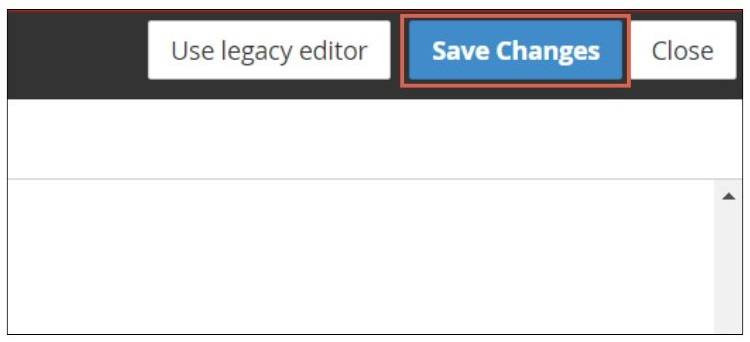
- Once done, click Save Changes in the top right corner.

The advantage of using this method is its ease of making changes without requiring root access to the server. Additionally, the changes made only affect the directory where the .htaccess file is located, not the entire server.
Method 2: How to Adjust max_input_vars Via wp-config.php
Also Read:
Setting max_input_vars through the wp-config.php file is specifically for WordPress-based sites and will affect the entire WordPress installation. Here are the steps to increase max_input_vars in wp-config.php:
- Log in to cPanel, scroll down, and open File Manager.
- In the folder menu on the left, open the
public_htmlfolder, find thewp-config.phpfile, then right-click and select the Edit option.
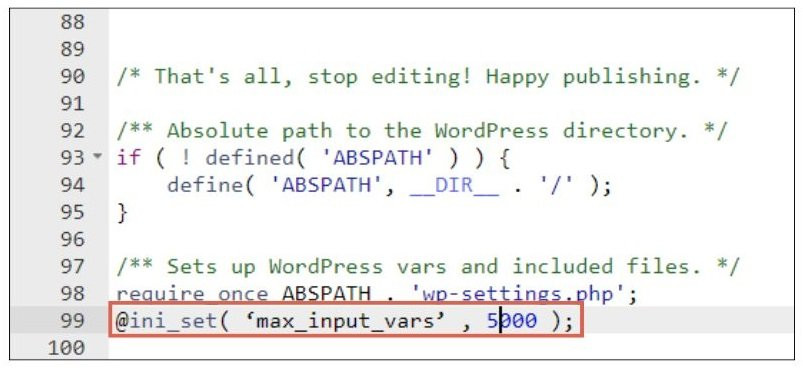
- Insert the line
@ini_set('max_input_vars', 3000);near the end of the file.
- Adjust the numerical value according to your needs.
The benefit of this method is that it doesn’t require access to broader server configurations. However, it’s worth noting that this approach is sometimes ineffective because the setting must be applied before WordPress processes input from get, post, and cookie requests.
Advertisements
Method 3: How to Increase max_input_vars Via php.ini
This setting is applied globally, affecting all PHP scripts running under that php.ini configuration. Here are the steps:
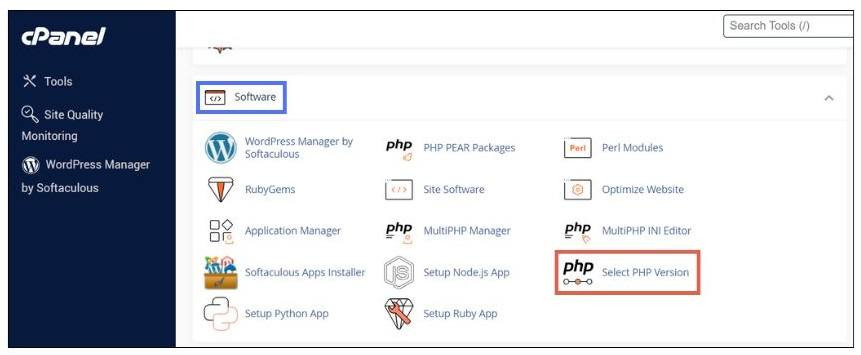
- Open cPanel, scroll down to the Software section, then select the Select PHP Version.

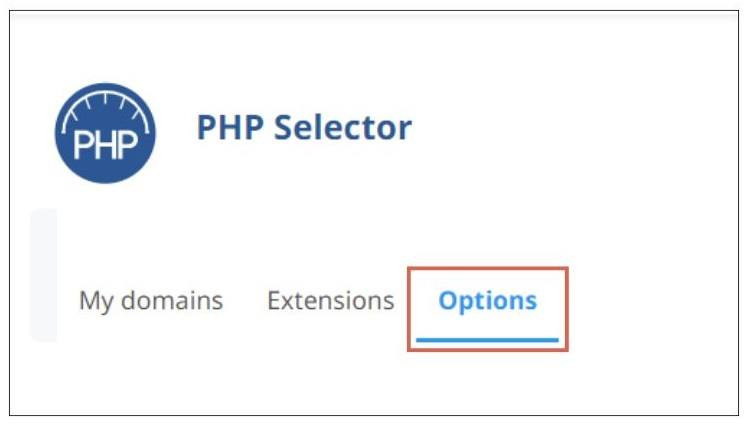
- Click on the Options tab.

- Scroll down to the max_input_vars option, click on the current value next to it (or enter it in the field), and set a higher value.
- Save your changes.
This method is considered the most stable and effective for changing PHP settings because the modifications are made at the server configuration level.
However, this method requires root or at least administrative access to the server, which might not be available on all hosting services.
Advertisements
Have You Successfully Increased max_input_vars Limit on Your WordPress Site?
These are several options to resolve the max_input_vars error on your WordPress site. Each method has its specific use case, depending on your needs, access availability, and the type of hosting you use.
If you’d rather not deal with max_input_vars issues while developing your website, you can entrust it to the Tonjoo team, which has experience in developing WordPress-based sites such as Universitas Gadjah Mada, Hipwee, and others.
If you’re facing website issues or need assistance developing a WordPress-based website, please contact the Tonjoo Team directly via Contact Tonjoo, or leave a comment below.

For more articles on WordPress, WooCommerce, and web development, check out Tonjoo Studio Blog by Moch. Nasikhun Amin.
Last Updated on June 28, 2025 by Moch. Nasikhun Amin

Advertisements