Advertisements
Learning how to install WordPress on XAMPP can be a great method during the development process. This allows you to test the site’s features and functionality privately.
However, before beginning the installation, there are several preparation steps you need to take to ensure the process of installing WordPress on your laptop or computer goes smoothly.
So, what is XAMPP? How to install WordPress on XAMPP? What preparations are needed before installing WordPress? All of these questions will be answered in this article.
Advertisements
What Is XAMPP?
XAMPP is an open-source web server software that can be used offline. In the context of WordPress, XAMPP acts as a localhost environment, allowing you to install and develop WordPress without the need to pay for hosting.
This means you can perform WordPress development and testing directly on your personal computer, which functions as the server. You also don’t need an internet connection when working on WordPress development in the XAMPP localhost environment.
XAMPP is compatible with various operating systems, including Windows, Linux, macOS, and Solaris. It is a package that combines several programs—Apache, MySQL, PHP, and Perl.
While there are other web server options like WAMP Server, XAMPP is widely used and has a large community. This makes it easier to find solutions to any issues you might encounter when learning how to install WordPress on XAMPP.
How to Install WordPress on XAMPP
Below are the steps on how to install WordPress on localhost, which can be done entirely offline. You’ll only need an internet connection to download the XAMPP application and the WordPress files.
Advertisements
Step 1: Prepare by Installing XAMPP
- Install XAMPP on your laptop. You can download it from the official Apache Friends website.
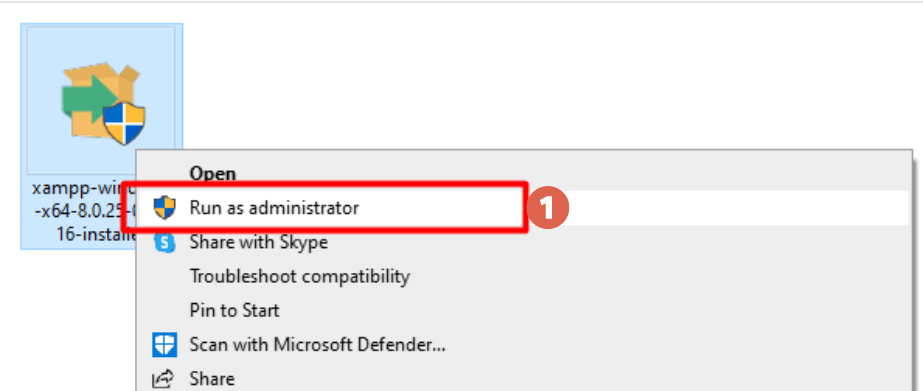
- Once downloaded, right-click on the XAMPP file (in RAR format) > then select Run as Administrator.

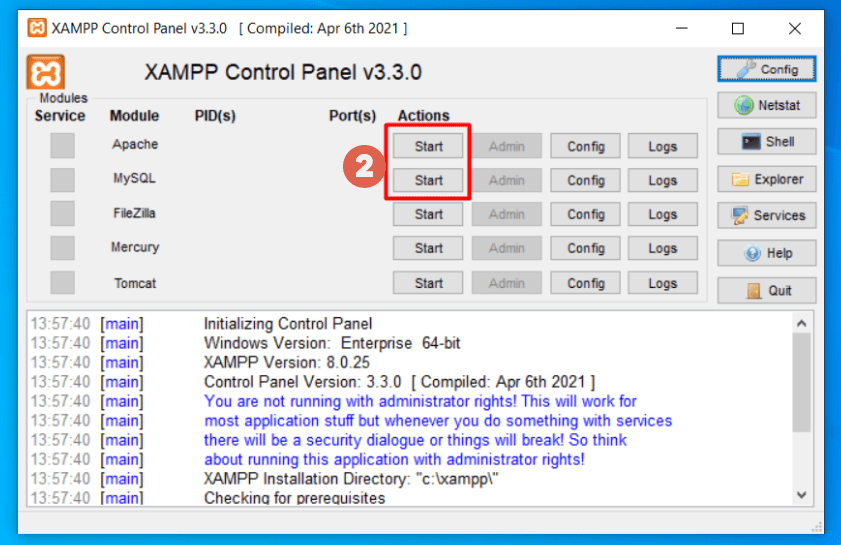
- Click Start for both the Apache and MySQL modules. If the MySQL module fails to start, try uninstalling and reinstalling XAMPP.

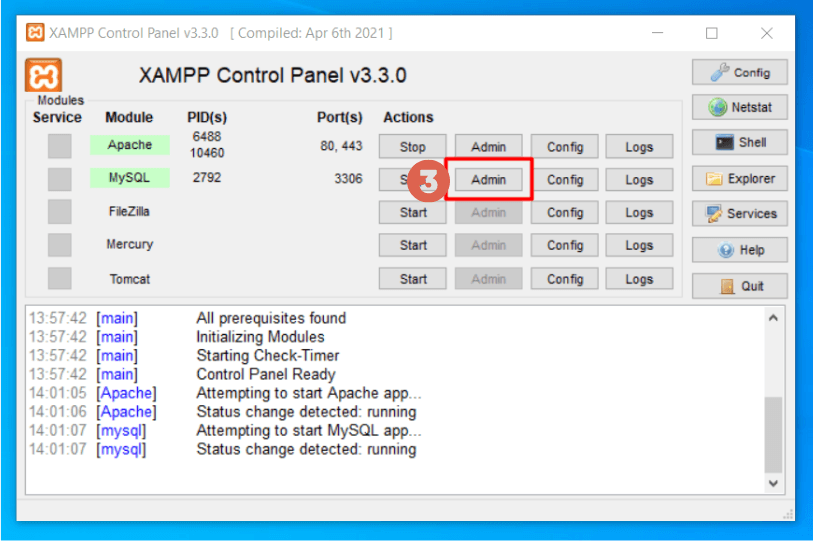
- Click Admin on the MySQL module.

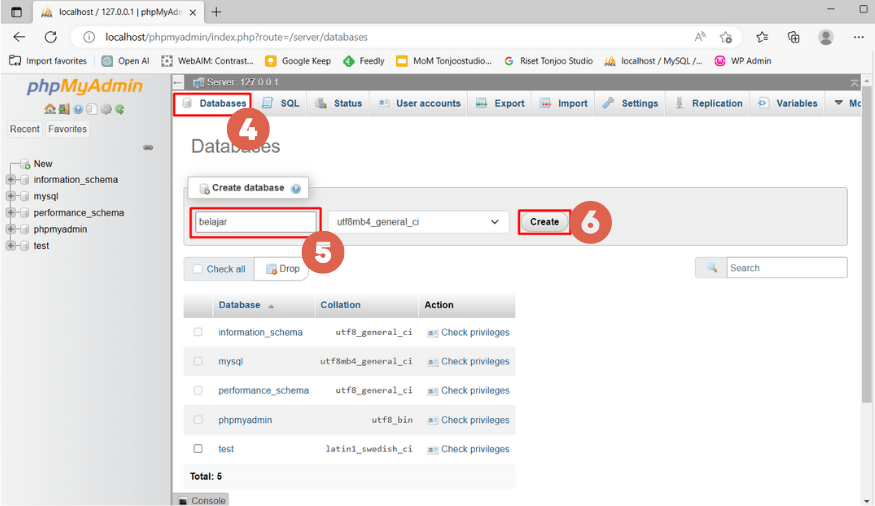
- Go to the Database tab > enter the name of the database > then click Create.

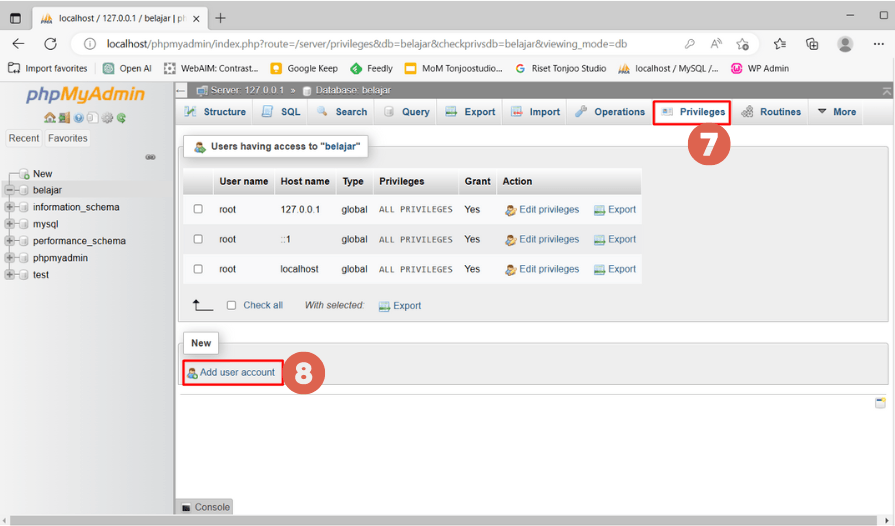
- Navigate to the Privileges tab to create a user account and assign access > click Add user account.

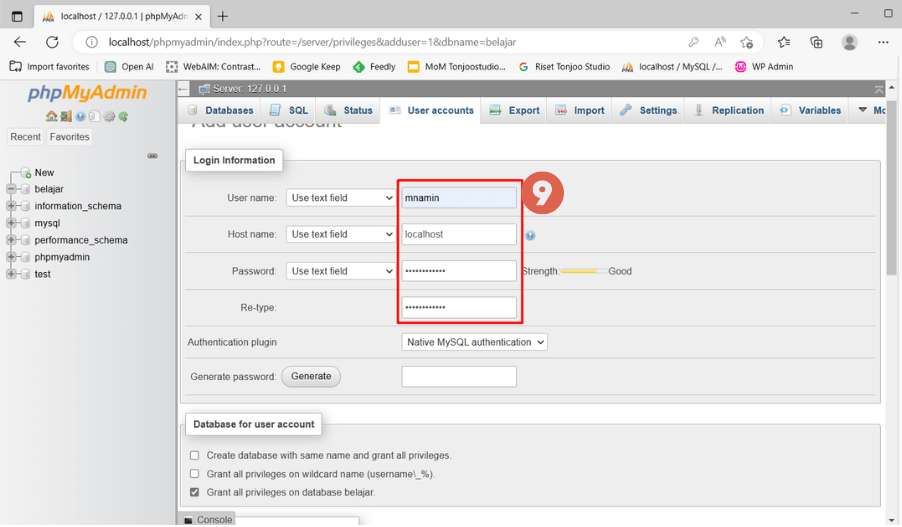
- Enter the login information that you’ll later use to log into WordPress.

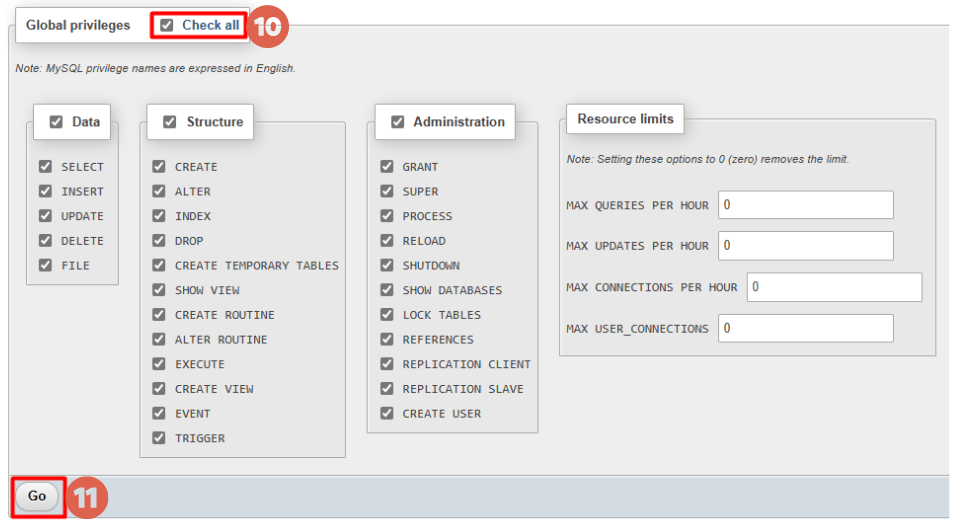
- Scroll down to the Global privileges section, Check All, then click Go. This step grants your account full access to the selected functions.

- Done! You’ve successfully completed the XAMPP installation.
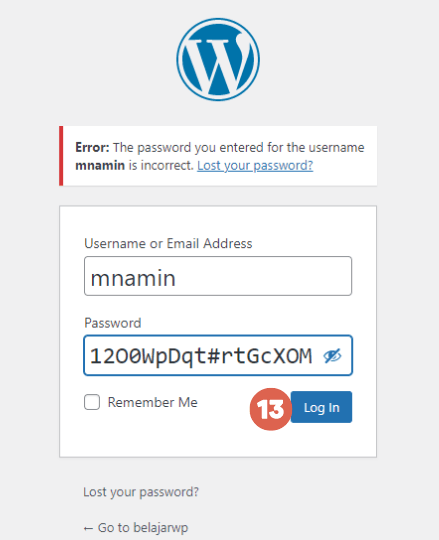
If you forget the password you created earlier, you can refer to tutorials on how to recover a lost WordPress password in localhost.
Step 2: Download and Install WordPress on XAMPP
The next step is to download the WordPress files and place them into the XAMPP folder located in the (C:) drive. Here’s how:
Also Read:
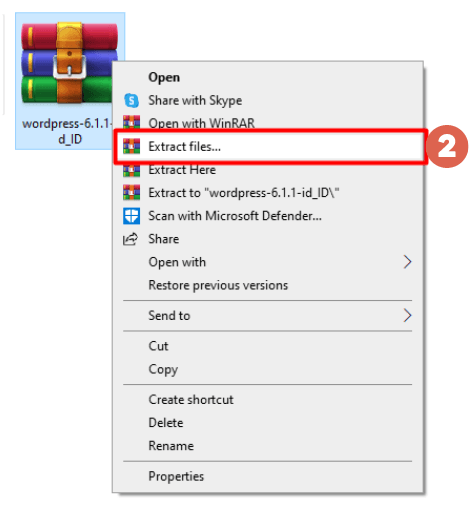
- Download the WordPress files from the official website.

- Once the download is complete, right-click on the file and select Extract files. Then, copy the extracted folder.
 If you’ve already installed the XAMPP web server and want to install WordPress, you’ll need to place the WordPress folder inside the htdocs folder.
 - To access this folder, go to Local Disk (C:) > xampp > htdocs and paste the copied WordPress folder here. You can rename the folder as needed. In this example, we use the name belajarwp.

- Next, open your browser (Google Chrome, Firefox, or Edge), type localhost/ followed by the name of your WordPress folder. In this case: localhost/belajarwp/.

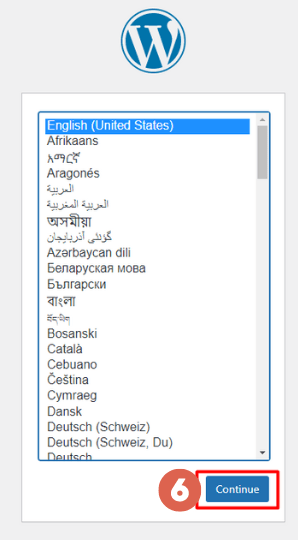
- Choose your preferred language for WordPress and click Continue.

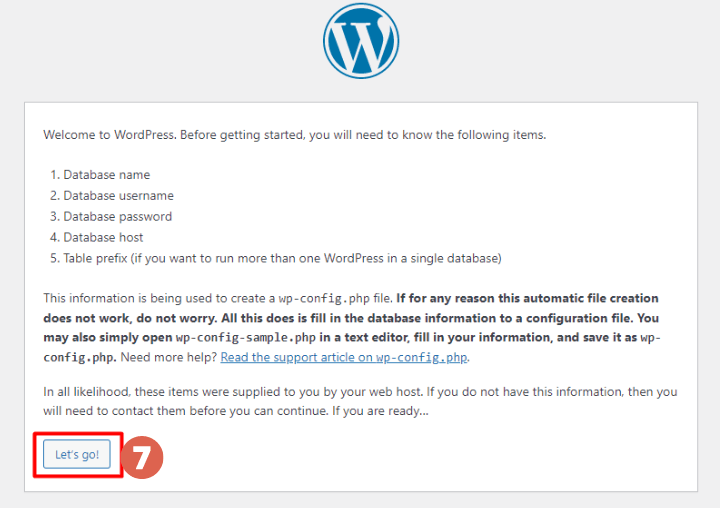
- Make sure you know the following details that will be required during setup, then click Let’s go!

You’ll need to fill in the following:
– Database Name
– Database Username
– Database Password
– Database Host
– Table Prefix (only if you want to run multiple WordPress sites in one database) - Enter the data and click Submit.

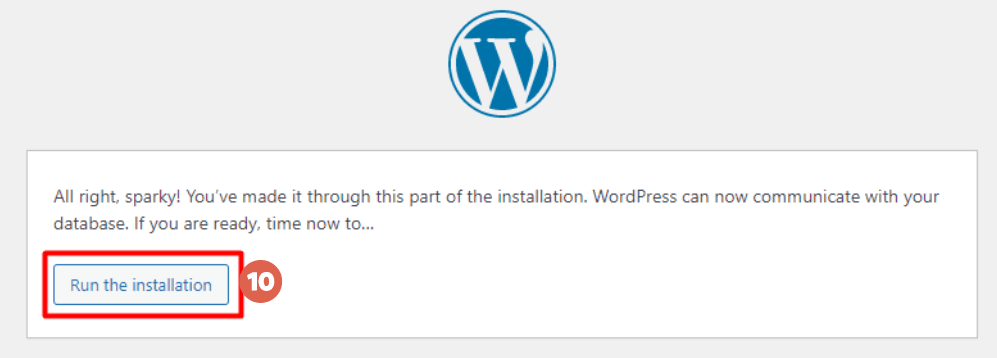
- Click Run the installation.

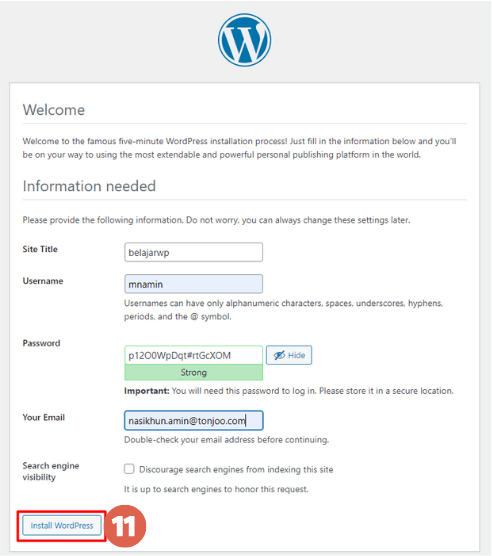
- Fill in the required site information. A new password will be generated automatically. Make sure to save this password. Then click Install WordPress.

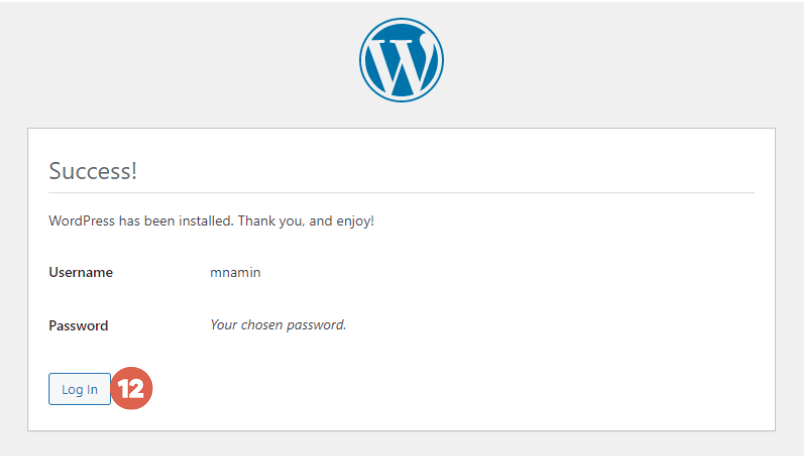
- Click Log in.

- Enter the Username and Password you saved earlier, then click Log in.

- Congratulations! You’ve successfully installed WordPress on your XAMPP localhost.


 If you’ve already installed the XAMPP web server and want to install WordPress, you’ll need to place the WordPress folder inside the htdocs folder.
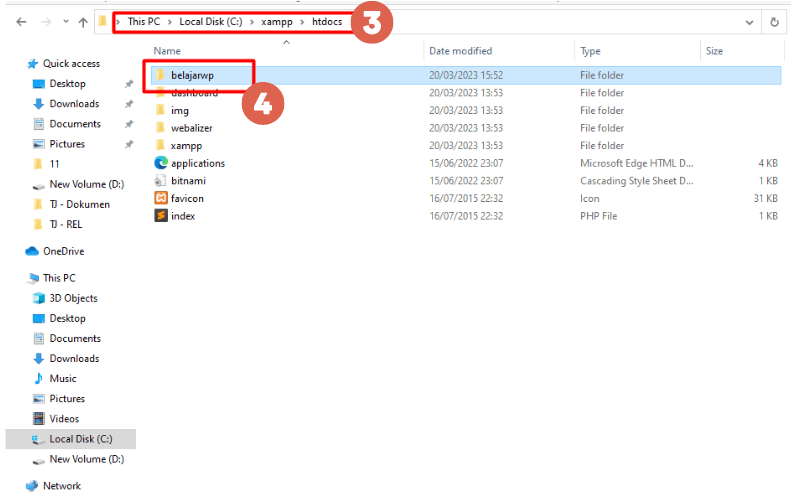


At this point, the installation process is complete. However, you’ll still need to perform basic WordPress configuration.
Advertisements
Step 3: Manage Your WordPress Site
Here’s how to perform basic WordPress configuration, including managing themes and plugins you may need.
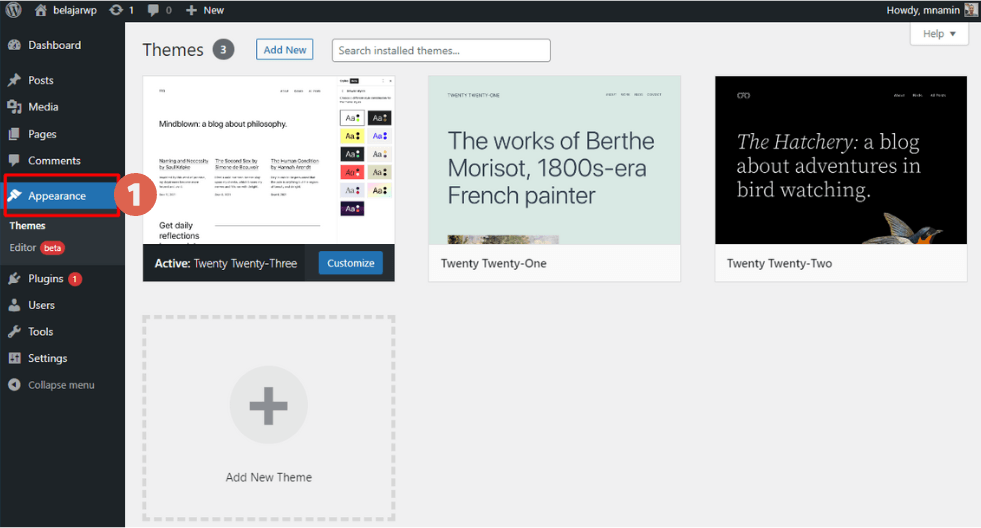
- Open the Appearance menu to choose your desired WordPress theme.

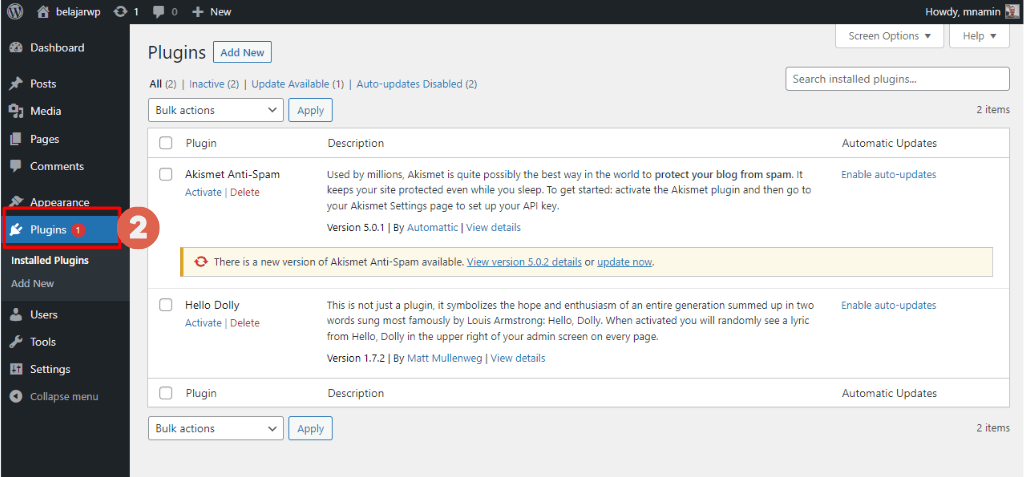
- To install WordPress plugins, go to the Plugins menu > click Add New to add a plugin.

Advertisements
Successfully Installed WordPress on XAMPP?
That’s the basic tutorial on how to install WordPress on XAMPP, which you can try yourself. By using XAMPP as a local server, you can privately develop and test your website without renting hosting.
So what should you do after installing WordPress? That depends on your development goals.
For example, if you want to create your own theme, you can follow a basic theme development tutorial.
Or if you want to build your own marketplace, you can also try installing WooCommerce on WordPress. This allows you to explore and create freely with WordPress.
However, if you don’t want the hassle of building a website yourself, you can trust the professional Tonjoo team, who have extensive experience working on various WordPress websites.
University sites and major media platforms like UGM, Pintarjualan.id, and Hipwee are just a few examples of their work. Consult your dream website needs with the Tonjoo Team today through Tonjoo Contact!

Read more articles on WordPress, WooCommerce, plugins, and web development by Moch. Nasikhun Amin on the Tonjoo Studio blog.
Last Updated on June 7, 2025 by Moch. Nasikhun Amin

Advertisements