
Advertisements
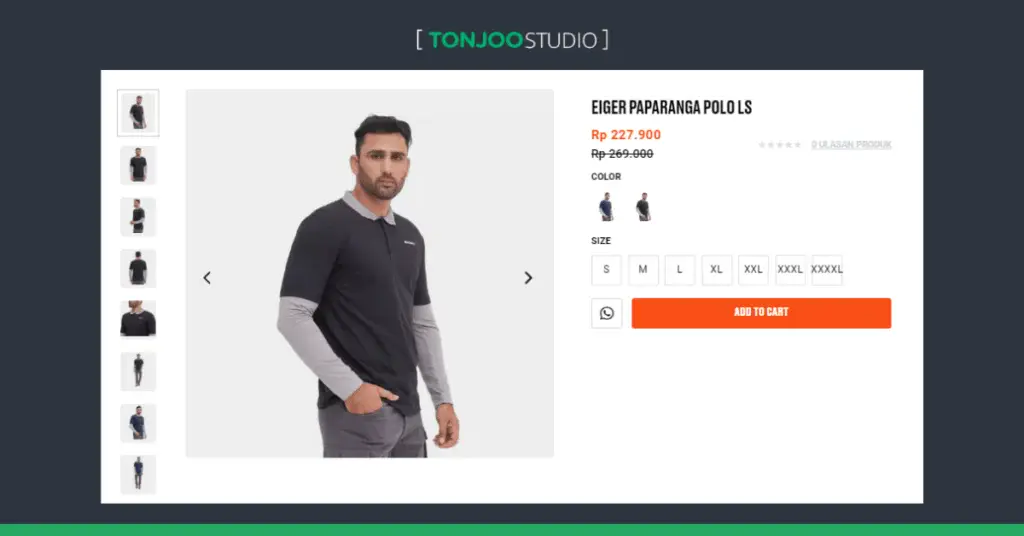
Knowing how to add product variations in WooCommerce is crucial if you sell items with multiple options, such as a t-shirt available in blue, red, and green.
To handle this, WooCommerce offers the Variable Product feature. This allows you to manage all variations within a single product listing, so you don’t have to create a separate product for each option.
Best of all, you don’t need to install any additional WooCommerce plugins. So, how do you add these variable products in WooCommerce? Let’s dive in!
Advertisements
What Are Product Variations in WooCommerce?
If you’re building an online store by installing WooCommerce on WordPress, you might not be familiar with its product variation feature. In WooCommerce, there’s a distinction between attributes and variations:
- Product attributes are the general categories of options for a product, such as material, color, and size.
- Product variations are the specific choices within an attribute. For example, for the ‘color’ attribute, the variations might be red, yellow, and blue. For the ‘material’ attribute, variations could be cotton, satin, and denim.
The main benefit of using product variations is that you only need to create a single product listing for an item that comes in multiple options. You then simply add the variations to it, saving you from creating individual product pages for each one.
This also improves the customer experience. Shoppers can view all available options on a single page without having to navigate to different pages for the same product in a different style.
How to Add Product Variations in WooCommerce
There are three main steps to adding product variations in WooCommerce: (1) creating a variable product, (2) adding the variation data, and (3) publishing the product.
Advertisements
1. Step 1: Creating a Variable Product
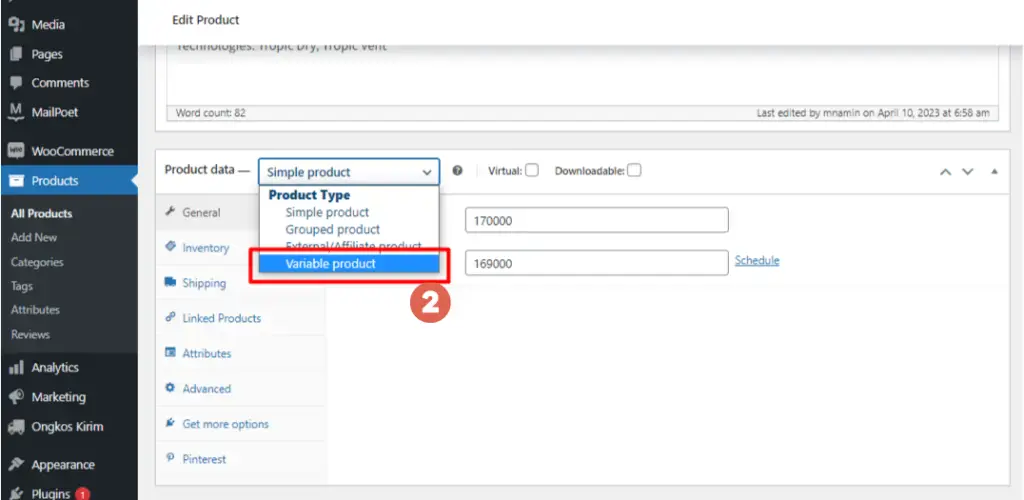
The first step is to change the Product Data option from the default Simple Product to Variable Product. Here’s how to do it:
- First, you can either (a) add a new product from scratch or (b) edit an existing one.
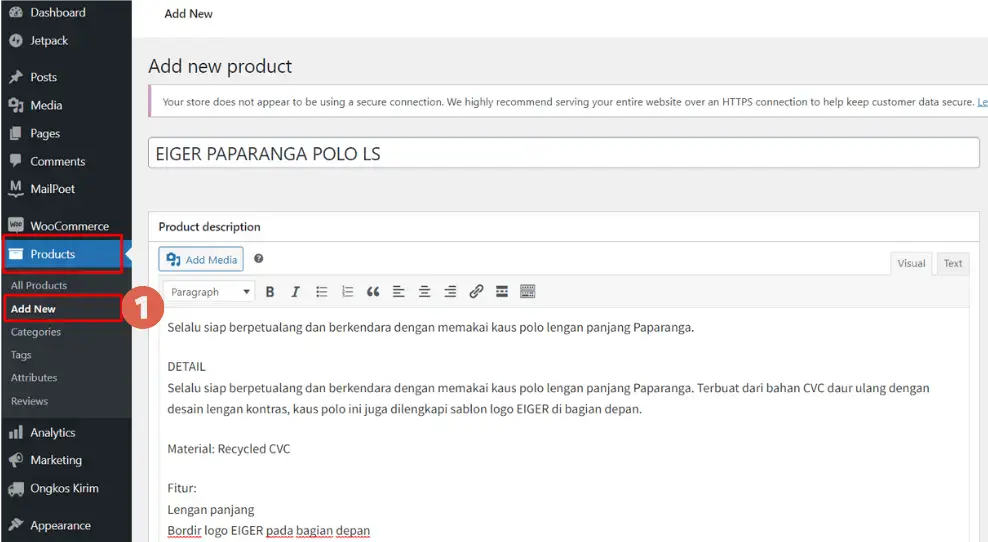
a.) To add a new product, navigate to Products > Add New. Then, fill in the product title and description.
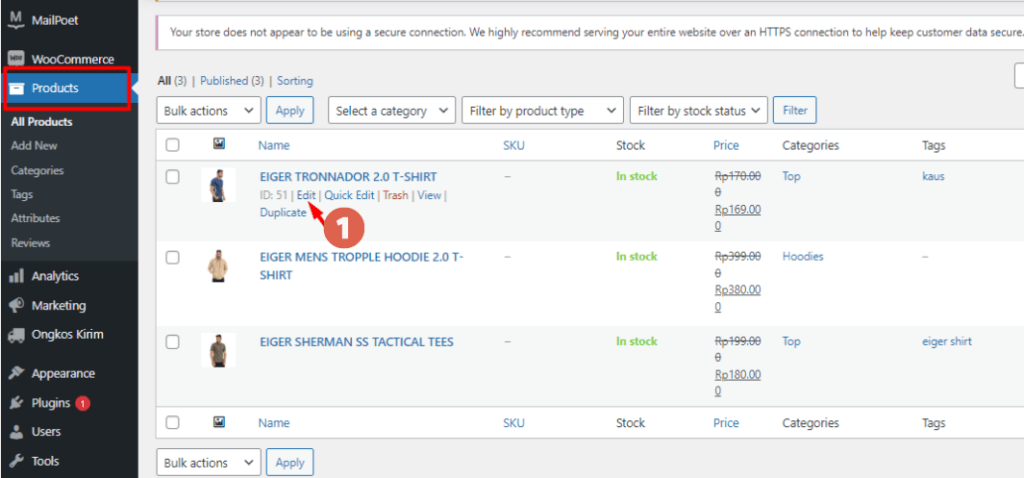
b.) If you want to add variations to an existing product, go to Products and click Edit on the item you want to modify.
- Scroll down to the Product data section and select Variable product from the dropdown menu.

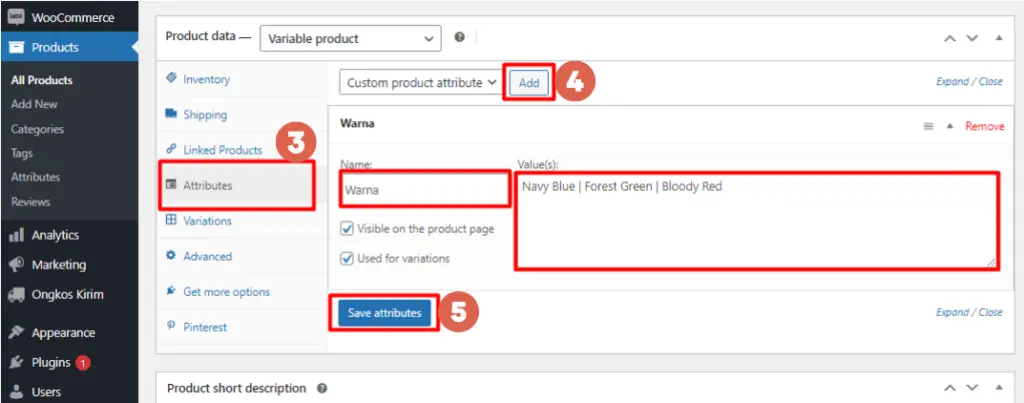
- Next, go to the Attributes tab. Click Add. In the Name field, enter the attribute name (e.g., Color). In the Value(s) field, list the different options for that attribute, separated by a vertical bar |. For example: Navy Blue | Forest Green | Bloody Red.

- Once you’ve added the attributes, click Save attributes.
2. Step 2: Adding Variation Data
Next, you need to add specific data like price, weight, dimensions, and stock levels for each variation. There are two ways to do this.
(1) If each variation has different details (e.g., different prices), you can add the data manually. (2) If all variations share the same details, you can add the data in bulk. Here are the steps for both methods.
a. Adding Variation Data Manually
Also Read:
This manual method is ideal when you have a small number of variations or when each variation has unique properties.
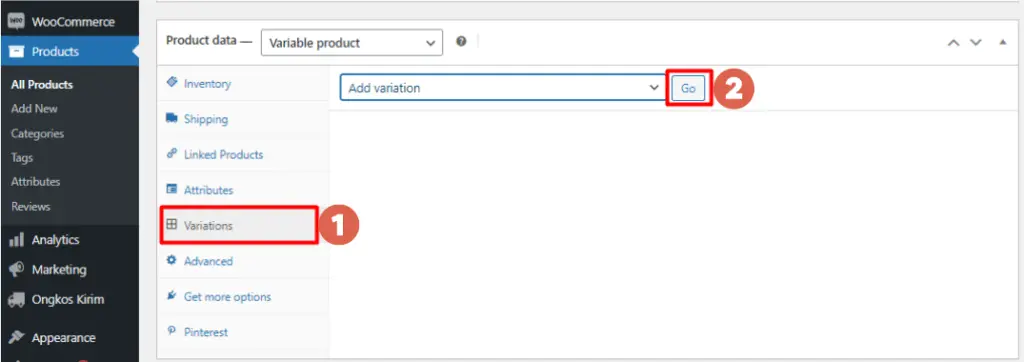
- Go to the Variations tab, and click Go.

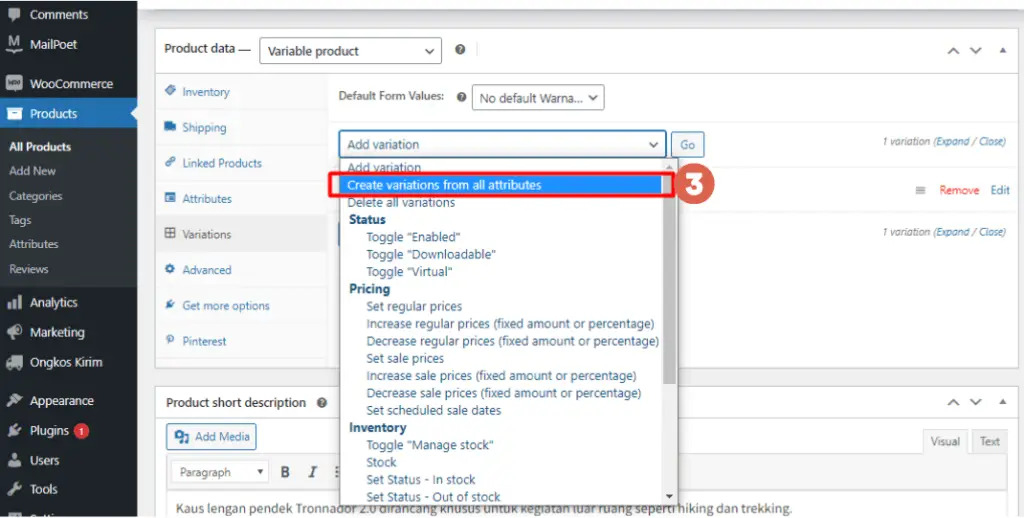
- Click the Add variation dropdown and select Create variations from all attributes. Then, click Go.

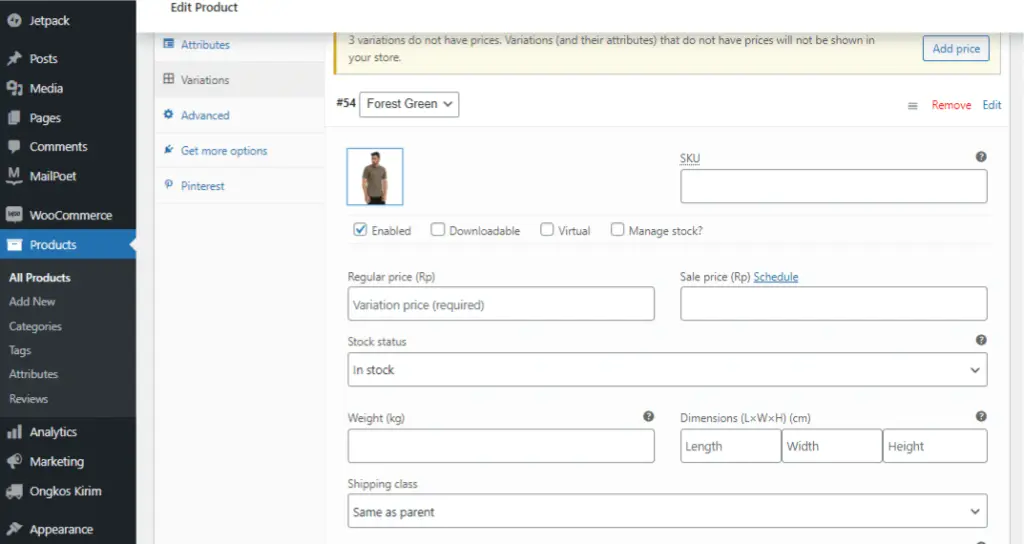
- Click on each variation to expand its settings. In our example, we’ll edit the details for the ‘Forest Green’ variation.

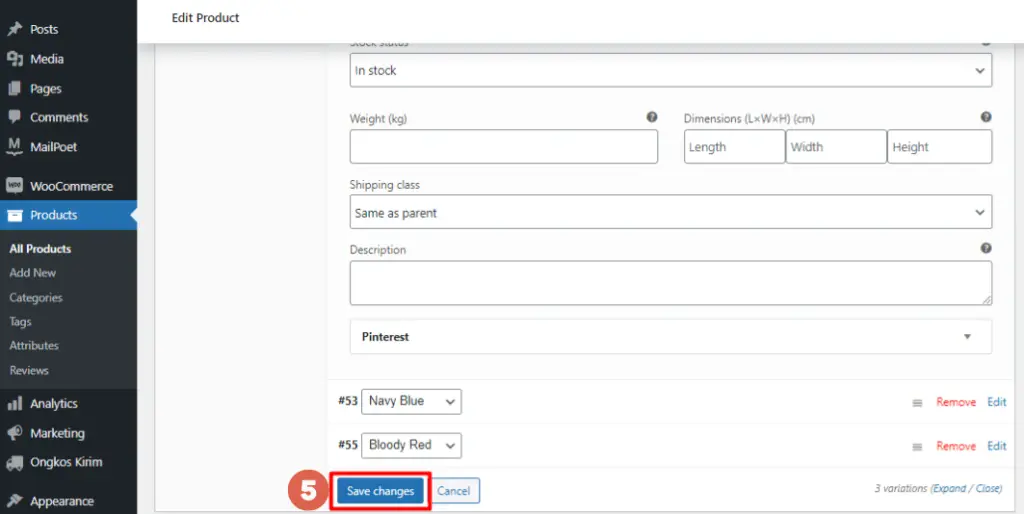
- Enter the product details for the variation:

– SKU (Stock Keeping Unit): A unique code for each product variation.
– Enabled: Check this box to make the variation available on your website.
– Downloadable: Check this if the variation is a downloadable product.
– Virtual: Check this if the variation is a digital product (not shipped).
– Regular Price (required): Enter the price for this specific variation.
– Sale Price (optional): Enter a discounted price if the item is on sale.
– Stock status: Select whether the item is in stock.
– Weight: Enter the weight for this variation.
– Dimensions: Enter the product dimensions (L×W×H).
– Shipping class: You can usually leave this as is.
– Description: Add a specific description for this variation if needed. - When you’re done, click Save changes. Repeat this process for all other variations.


b. Adding Variation Data in Bulk
This method is useful when all your product variations share the same properties. For example, if a t-shirt costs the same regardless of whether it’s red, green, or yellow.
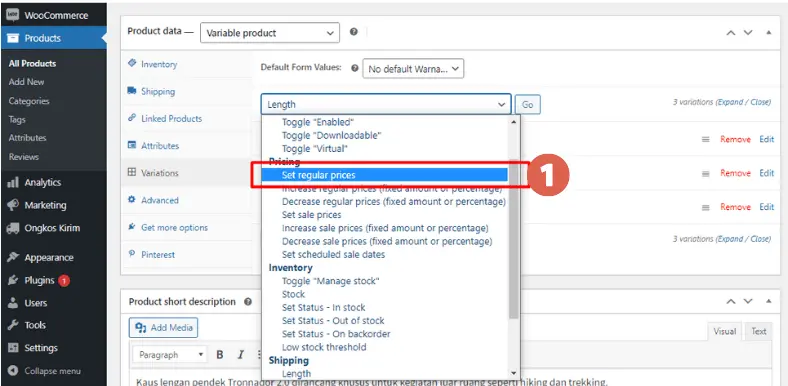
- Click the Add variation dropdown and select the bulk action you want to perform. For instance, to set the same price for all variations, choose Set regular prices and click Go.

Besides setting a regular price, there are many other settings you can apply to multiple products at once:
– Status: Manage product status settings.
– Pricing: Set regular prices, sale prices, and sale schedules.
– Inventory: Manage stock availability.
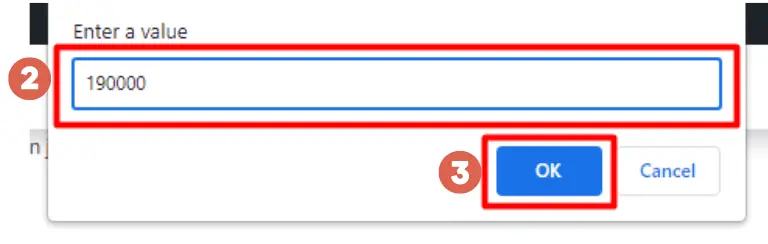
– Shipping: Set weight and dimensions that affect shipping calculations. - A pop-up window will appear asking you to enter the data. Since we chose a pricing option, we’ll enter the price and click OK.

- That’s it! The price will now be applied to all your product variations.
Advertisements
3. Step 3: Publishing the Product
At this point, you’ve finished setting up the product variations in WooCommerce. All that’s left is to publish or update the product to make it live on your website.
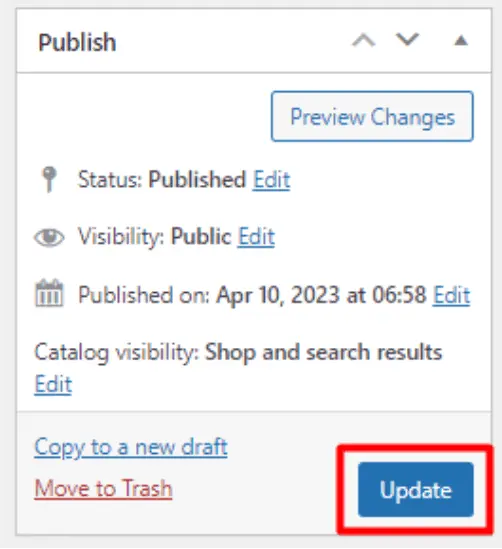
Additionally, make sure to assign the product to the correct categories and add relevant tags. This will help customers find it more easily on your site.
Advertisements
Successfully Added Your Product Variations?
That’s how you add product variations in WooCommerce to create a more user-friendly online store for your customers. This ensures a smooth experience for both you and your shoppers.
Beyond setting up product variations, you should also learn how to configure shipping settings in WooCommerce to manage your product delivery.
If you encounter any challenges while developing your e-commerce website, especially a WordPress-based one, feel free to contact our team at Tonjoo Studio via email at contact@tonjoo.com. We are happy to help you grow your business website.

For more articles on WordPress, WooCommerce, and web development, check out Tonjoo Studio Blog by Moch. Nasikhun Amin.
Last Updated on November 10, 2025 by Moch. Nasikhun Amin

Advertisements