Advertisements
Why you need to create a contact form in WordPress website? Having that feature on your site is an essential step to engage with your visitors. With the Gutenberg editor and popular plugins like Contact Form 7, this process has become remarkably straightforward.
Furthermore, by using an additional plugin like the Contact Form 7 Database Addon (CFDB7), you can save all form submissions directly to your WordPress database.
This tutorial will guide you step-by-step through creating a contact form in Gutenberg with Contact Form 7, from installing the plugins and building the form to adding it to a page and saving submission data.
Advertisements
What Is Gutenberg?
Gutenberg is the default content editor for WordPress, introduced in WordPress version 5.0. It replaced the classic TinyMCE editor with a modern, block-based approach.
The Gutenberg block editor simplifies content creation by allowing you to build your posts and pages by adding, rearranging, and customizing various types of blocks.
With Gutenberg, you can create more complex layouts without needing custom code or heavy third-party page builders.
How to Create a Contact Form in Gutenberg
Creating a contact form in Gutenberg involves several key steps, from installing the Contact Form 7 plugin to creating the form and adding it to a dedicated contact page. Here’s a detailed walkthrough.
Advertisements
1. Install the Contact Form 7 Plugin
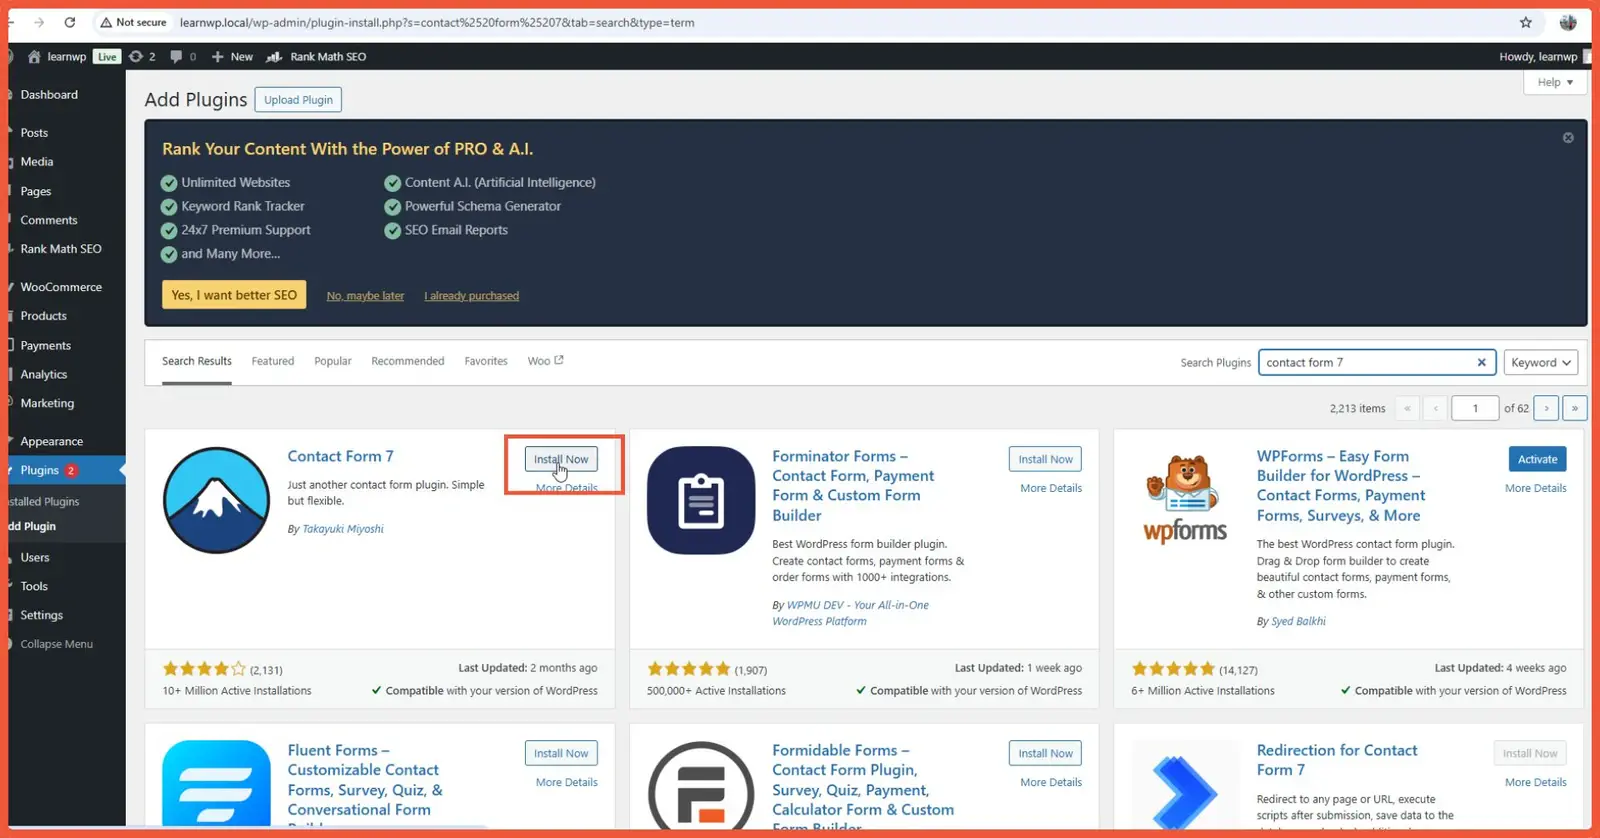
To start, you need a contact form plugin. In this tutorial, we will be using Contact Form 7 and install this WordPress plugin. Follow these steps to install it:
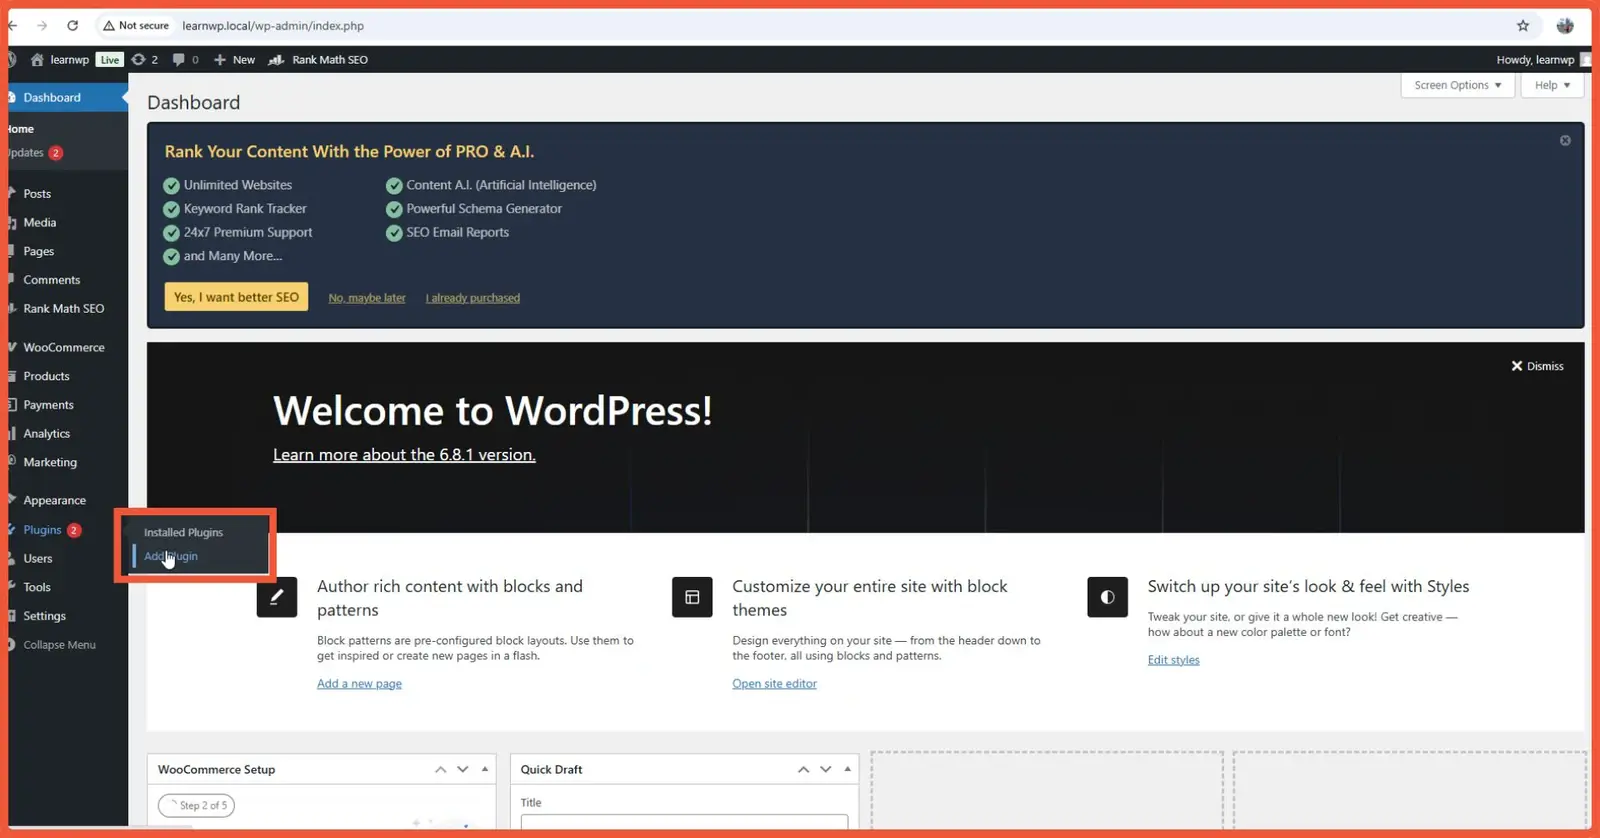
- From your WordPress dashboard, navigate to Plugins > Add New.

- Search for “Contact Form 7” in the search box. Once you find it, click Install Now.
- After the installation is complete, click Activate.


2. Create a Form Using Contact Form 7
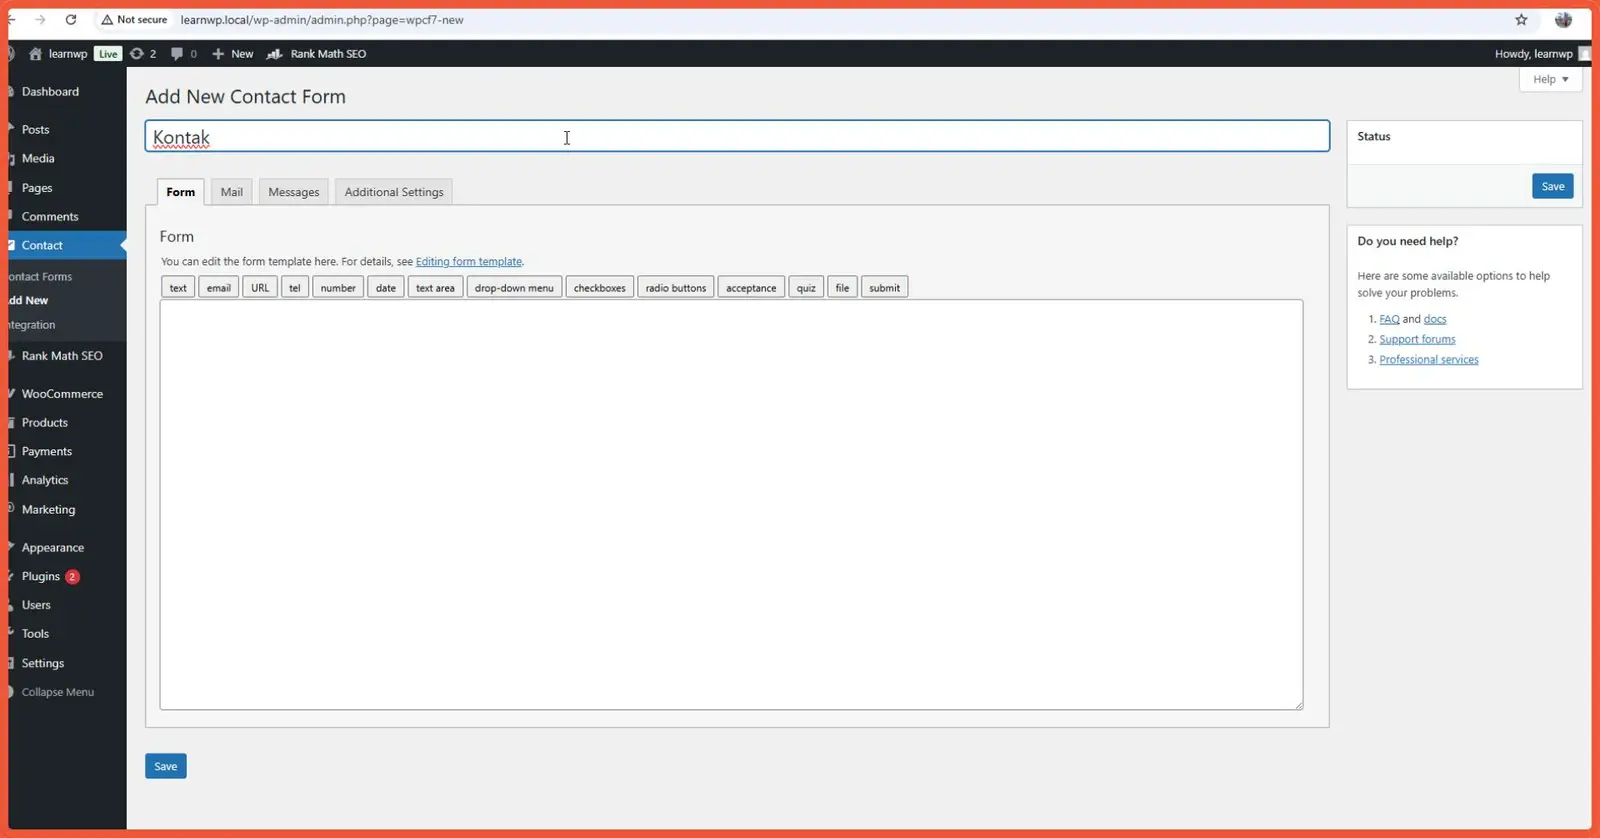
Once the plugin is activated, the next step is to set it up. Here’s how to create your new contact form:
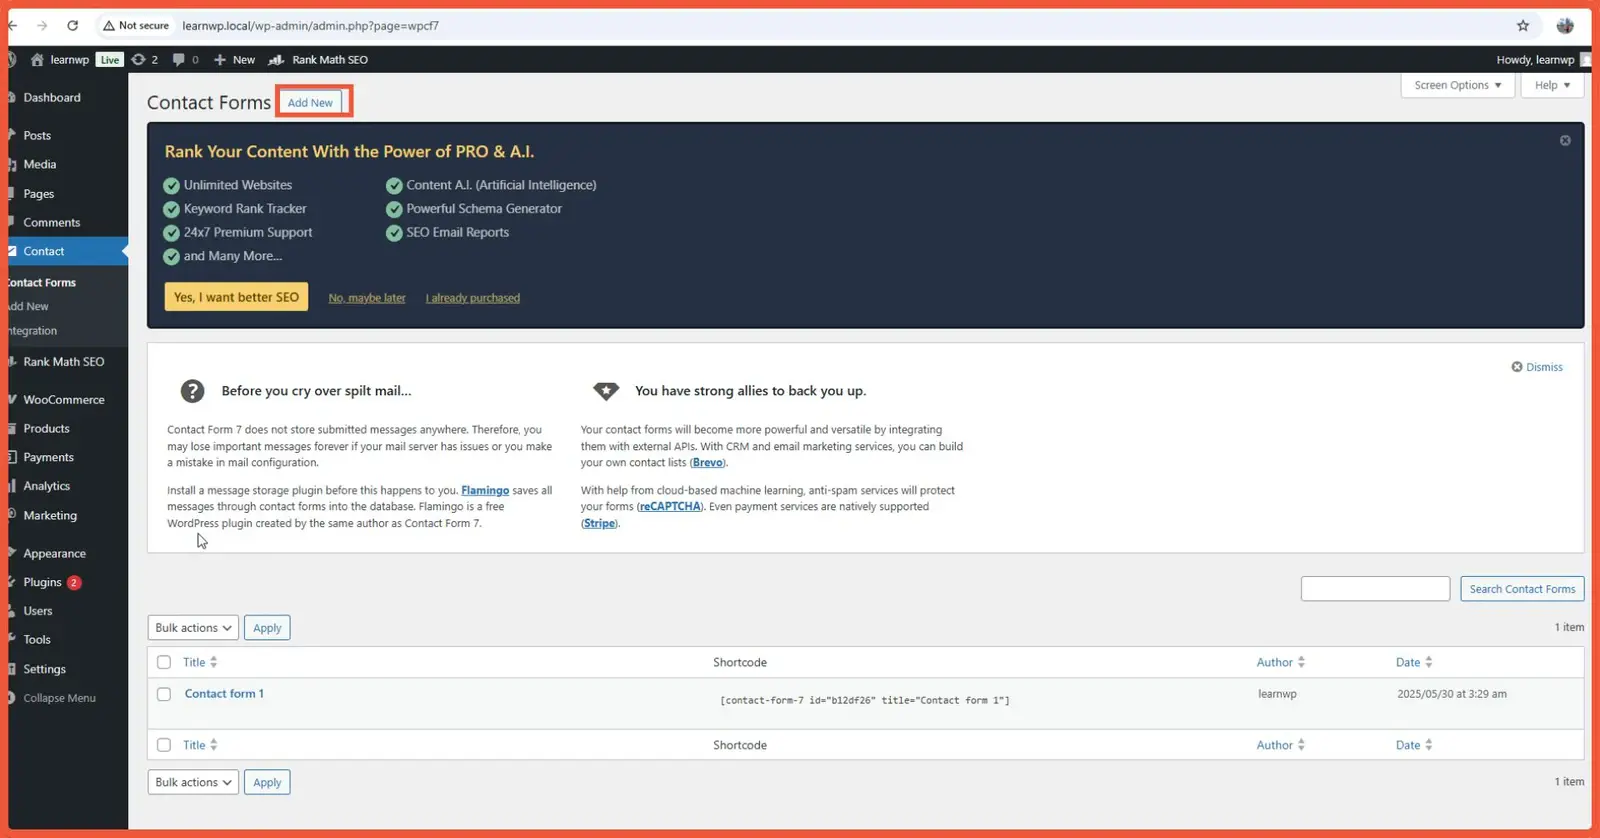
- From the Contact Form 7 dashboard, click Add New.
- You will be taken to the form creation page. Give your form a title. For this tutorial, we’ll name it “Contact“.
- Next, copy the HTML code here into the Form tab.
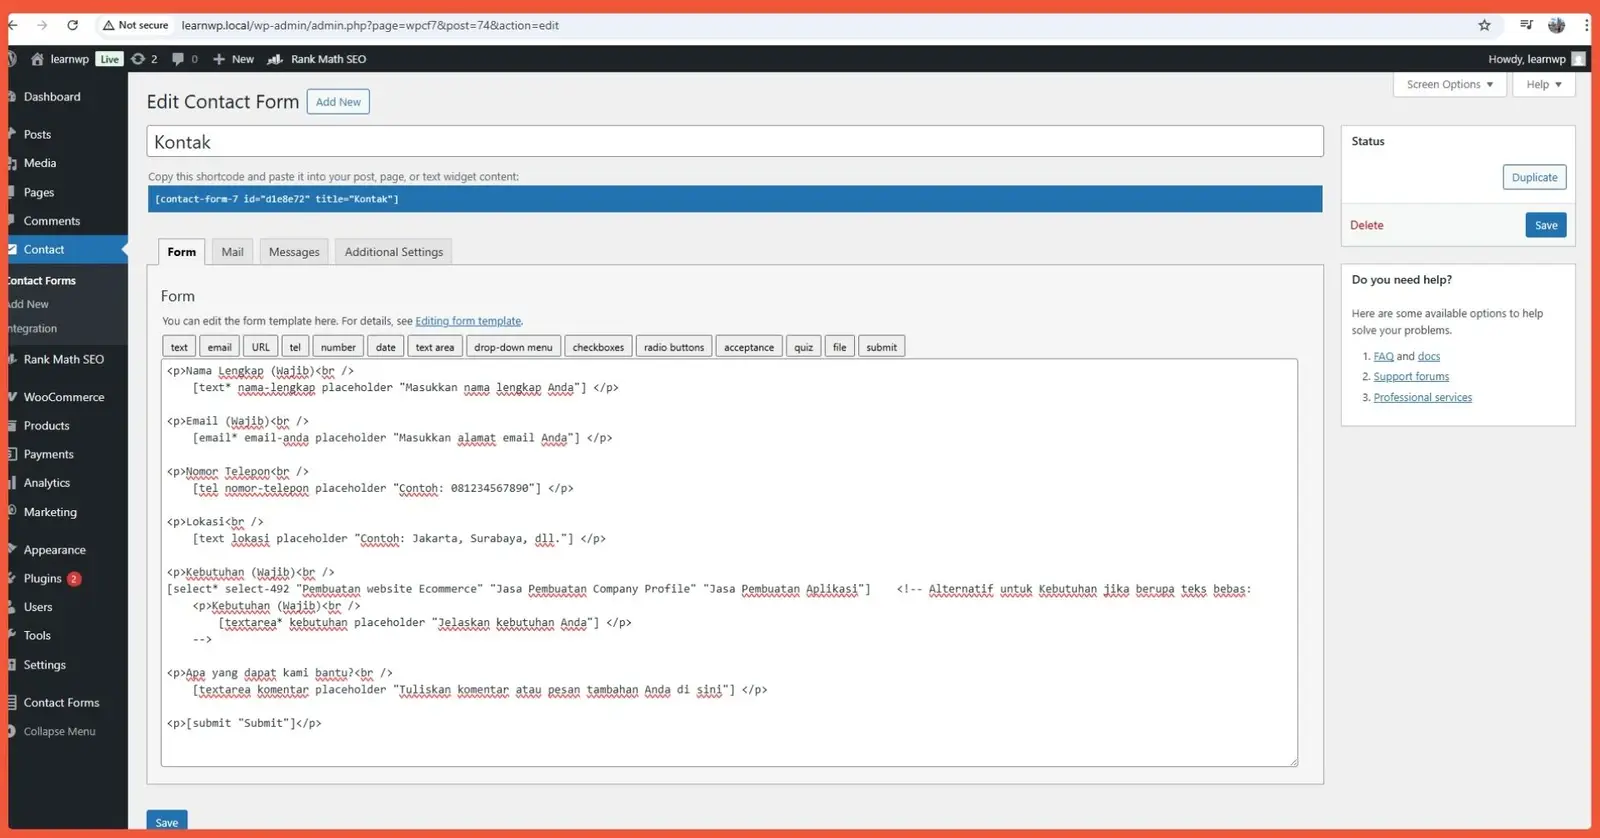
Here’s an explanation of the HTML tags used:
- [text* your-name]: A text field for “Full Name”. The asterisk (*) indicates that this field is required. your-name is the field’s name, which you’ll use in the “Mail” tab.
- [email* your-email]: An email field for “Email”. This is also a required field.
- [tel your-phone]: A dedicated field for a phone number.
- [text your-location]: A text field for “Location”.
- [select* your-needs …]: A dropdown menu for “Needs”. This is a required field.
- include_blank adds an empty option at the top.
- You can replace “Service A,” “Service B,” etc., with your relevant options.
- [textarea your-comments]: A larger text area for “Comments”.
- [submit “Send Message”]: The button to submit the form.
The next crucial step is to configure the email settings. This ensures that the data submitted by users is sent to your email address.
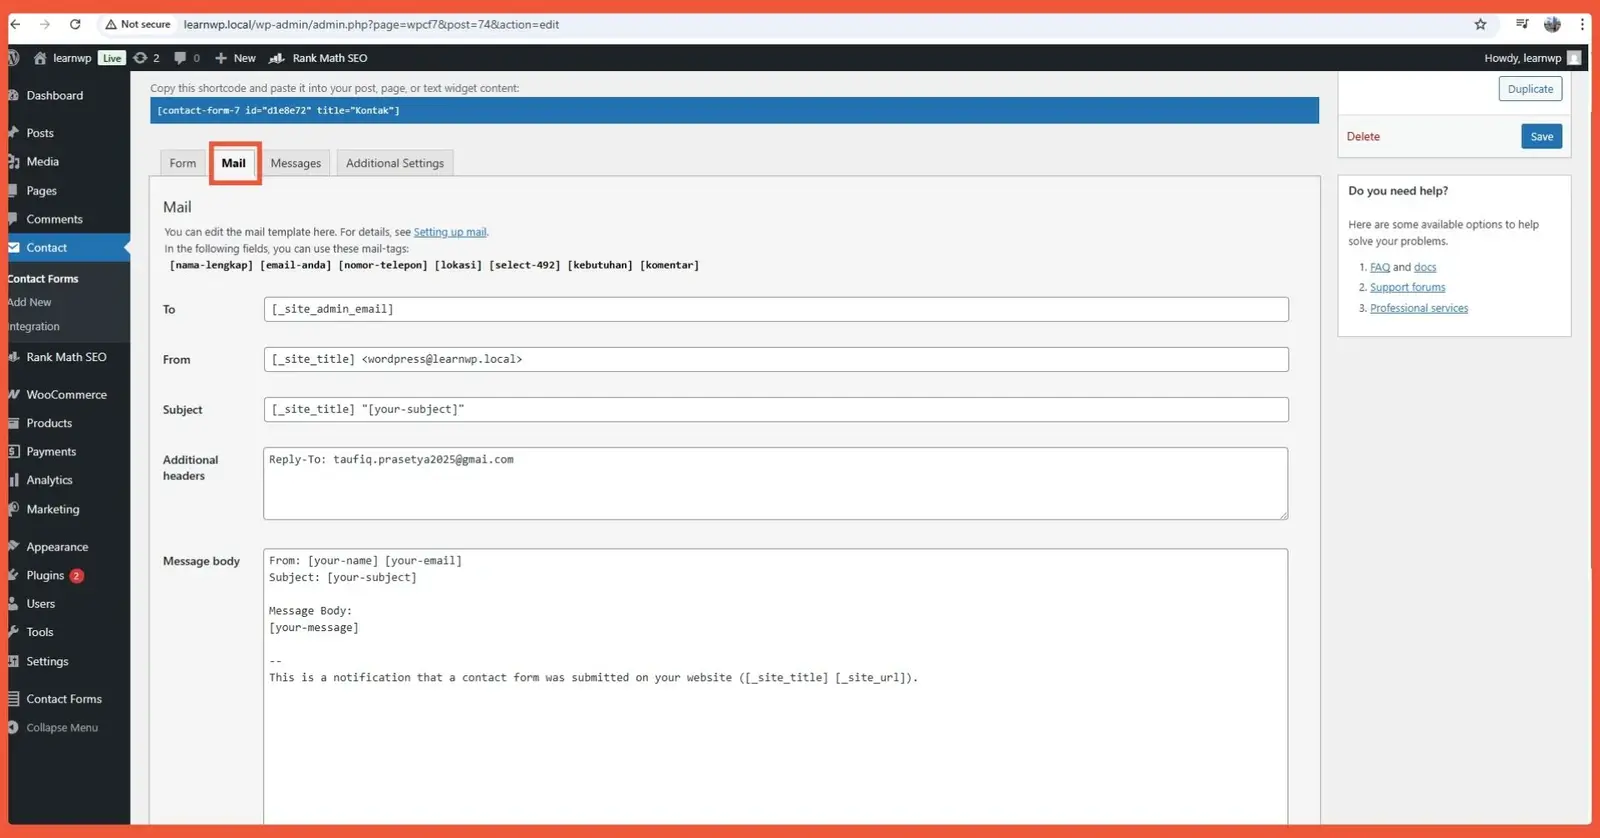
In the Mail tab, you’ll see fields like “To,” “From,” “Subject,” and “Messagebody.” You need to use the tags corresponding to the field names you created in your form.
Here are the fields you need to fill out in the Mail tab:
- To: [_site_admin_email] – This special mail tag sends the email to your website’s admin email address.
- From: [_site_title] <wordpress@yourdomain.com> – Replace yourdomain.com with your site’s domain. The [_site_title] tag will use your site’s name as the sender.
- Subject: [_site_title] “New Message from [your-name]” – Customize the subject line as needed.
- Additionalheaders: Reply-To: [your-email] – This allows you to reply directly to the user’s email address.
- Messagebody: From: [your-name] [your-email] – Fill in the message you want to tell your audience about.
- File Attachments: You can add tags for file uploads here if you have them in your form.
Once you are satisfied with the configuration, click Save.
Advertisements
3. Create a Contact Page in Gutenberg
After creating the form, you can add it to a contact page using Gutenberg. Here are the steps:
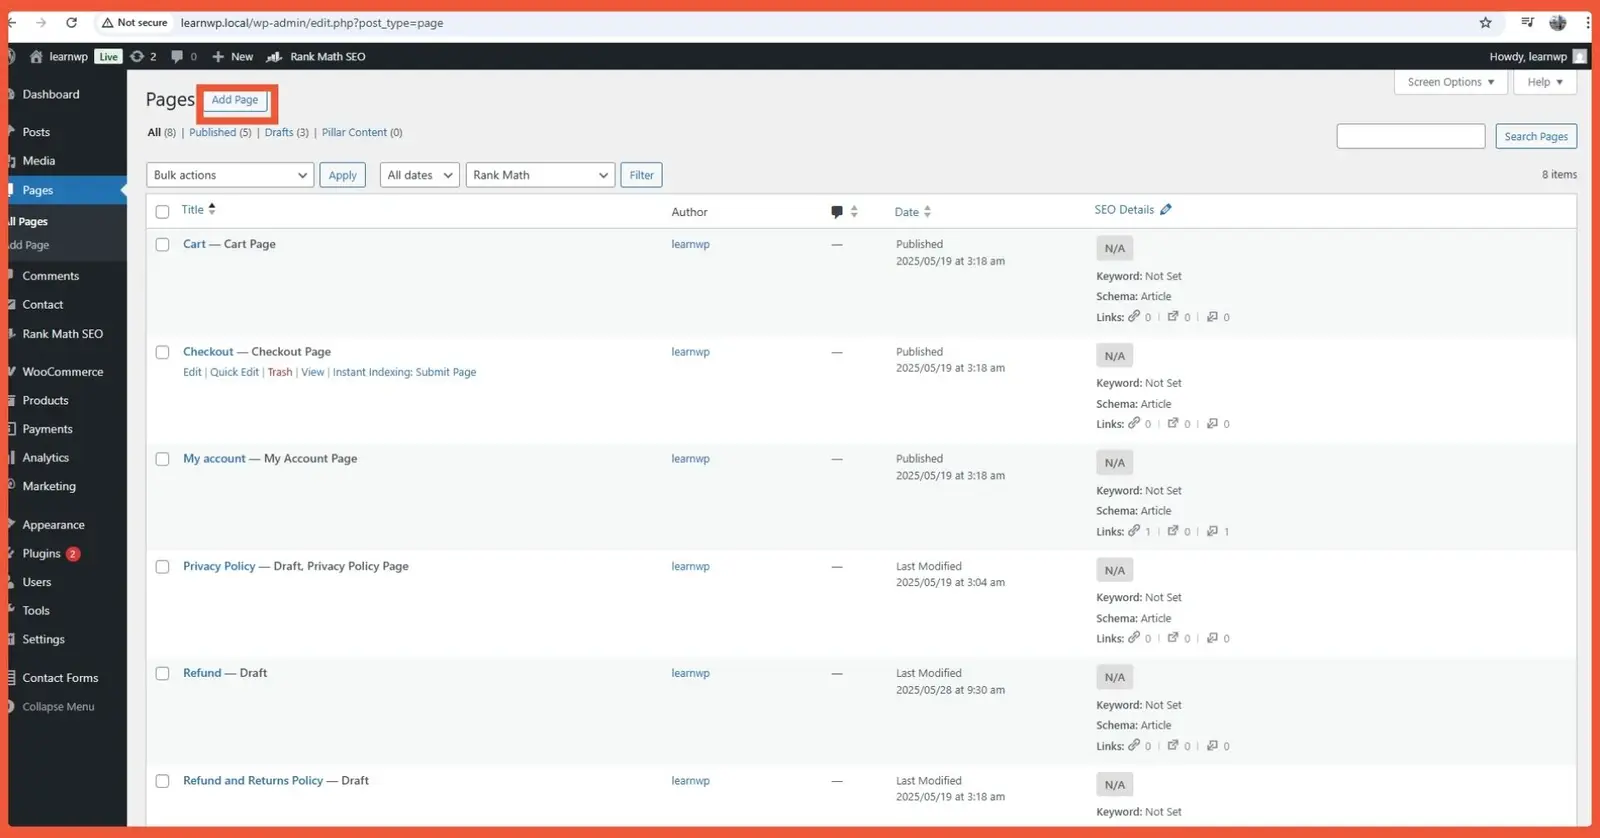
- From your WordPress dashboard, navigate to Pages > Add New Page.
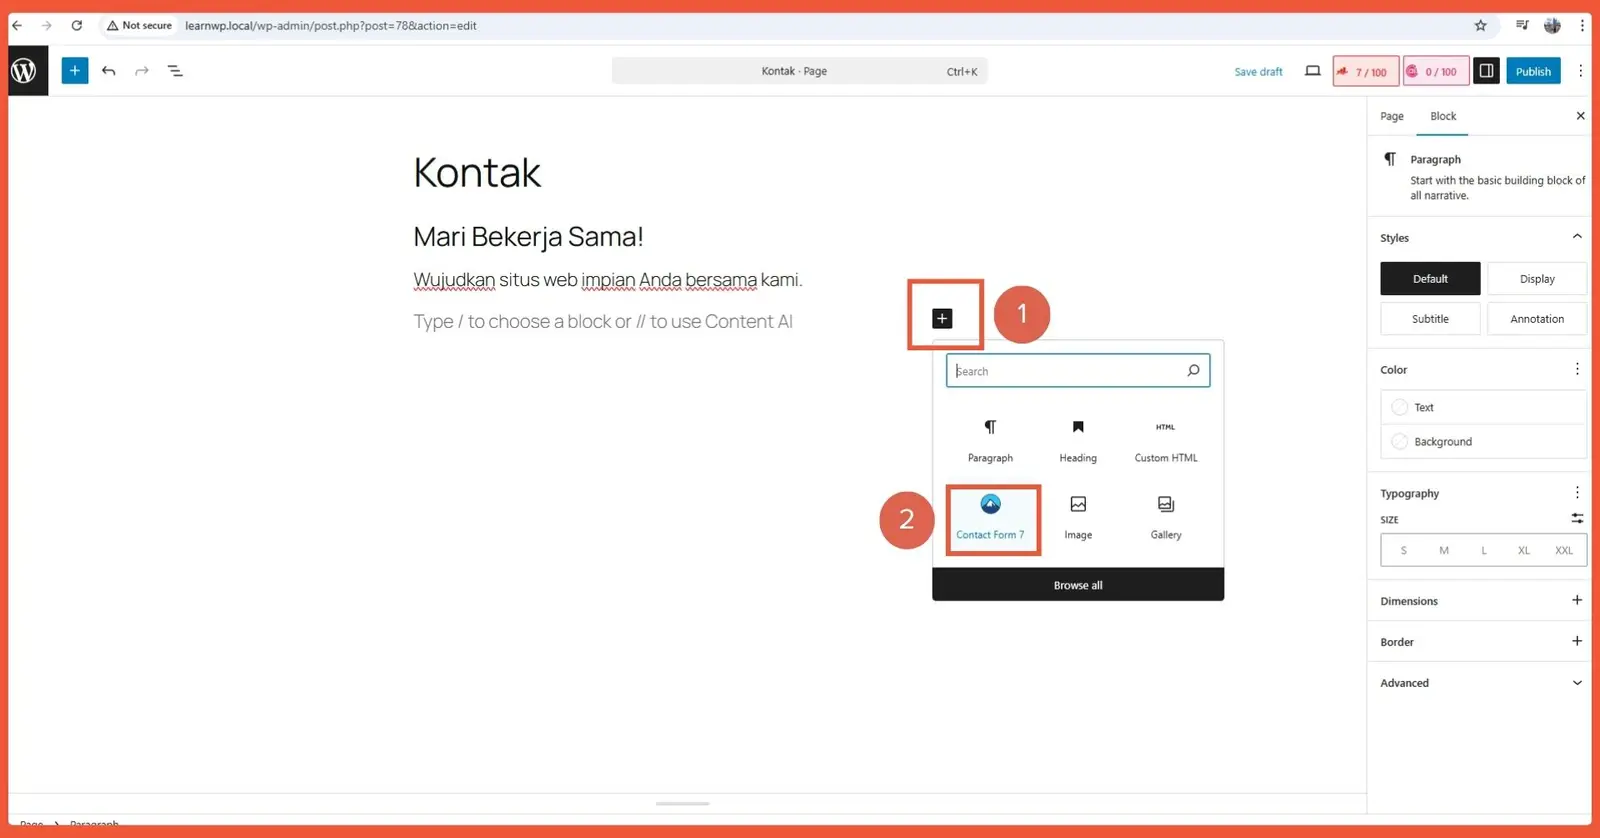
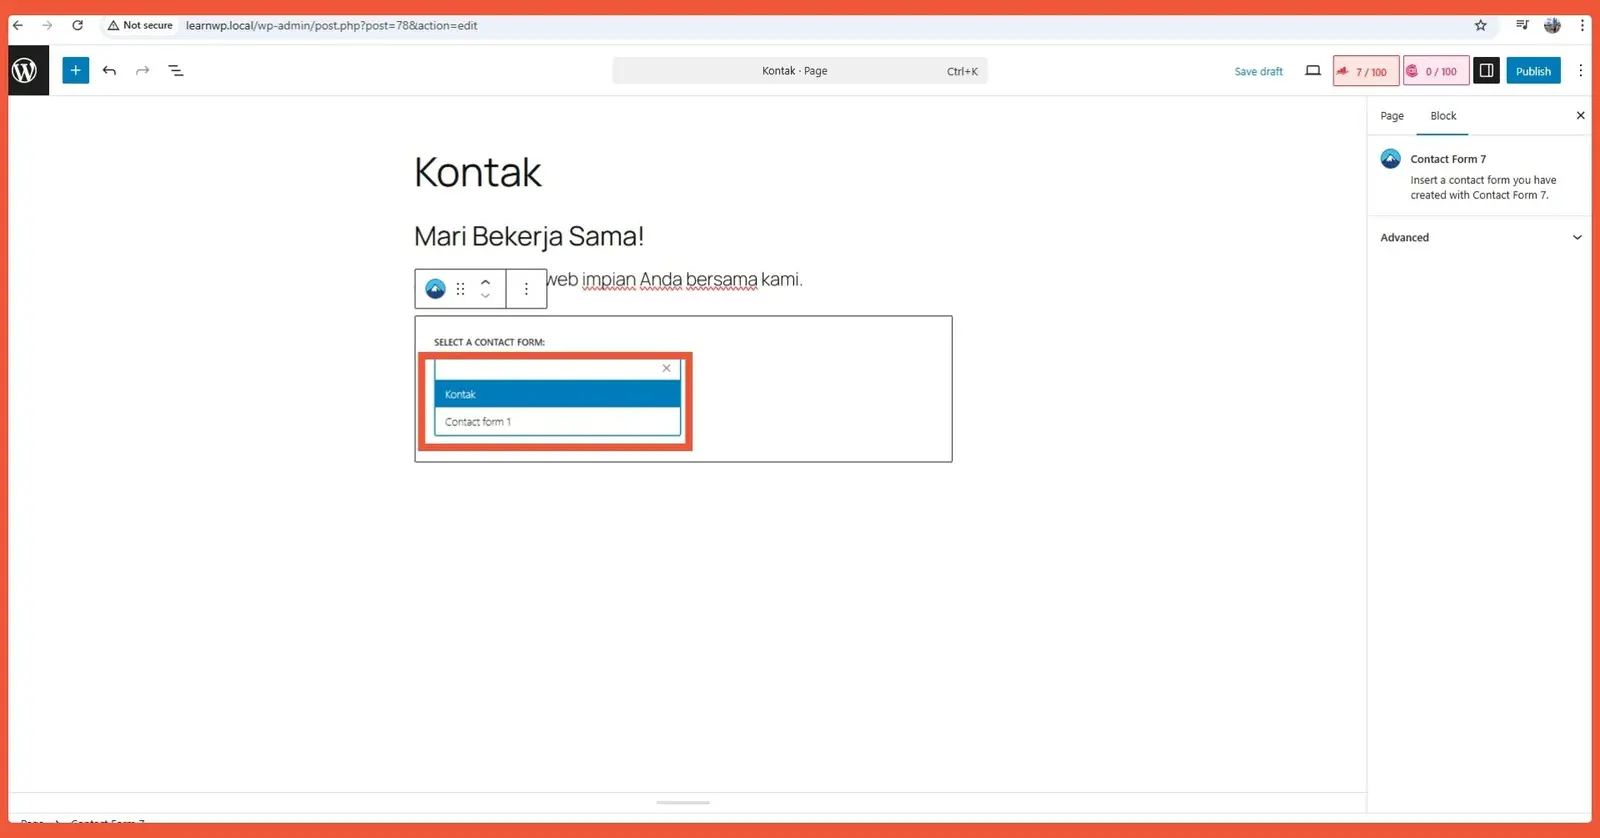
- Click the + icon to add a new block and search for Contact Form 7.
- Select the form you just created (in this case, Contact) from the dropdown menu and click Save.
Also Read:
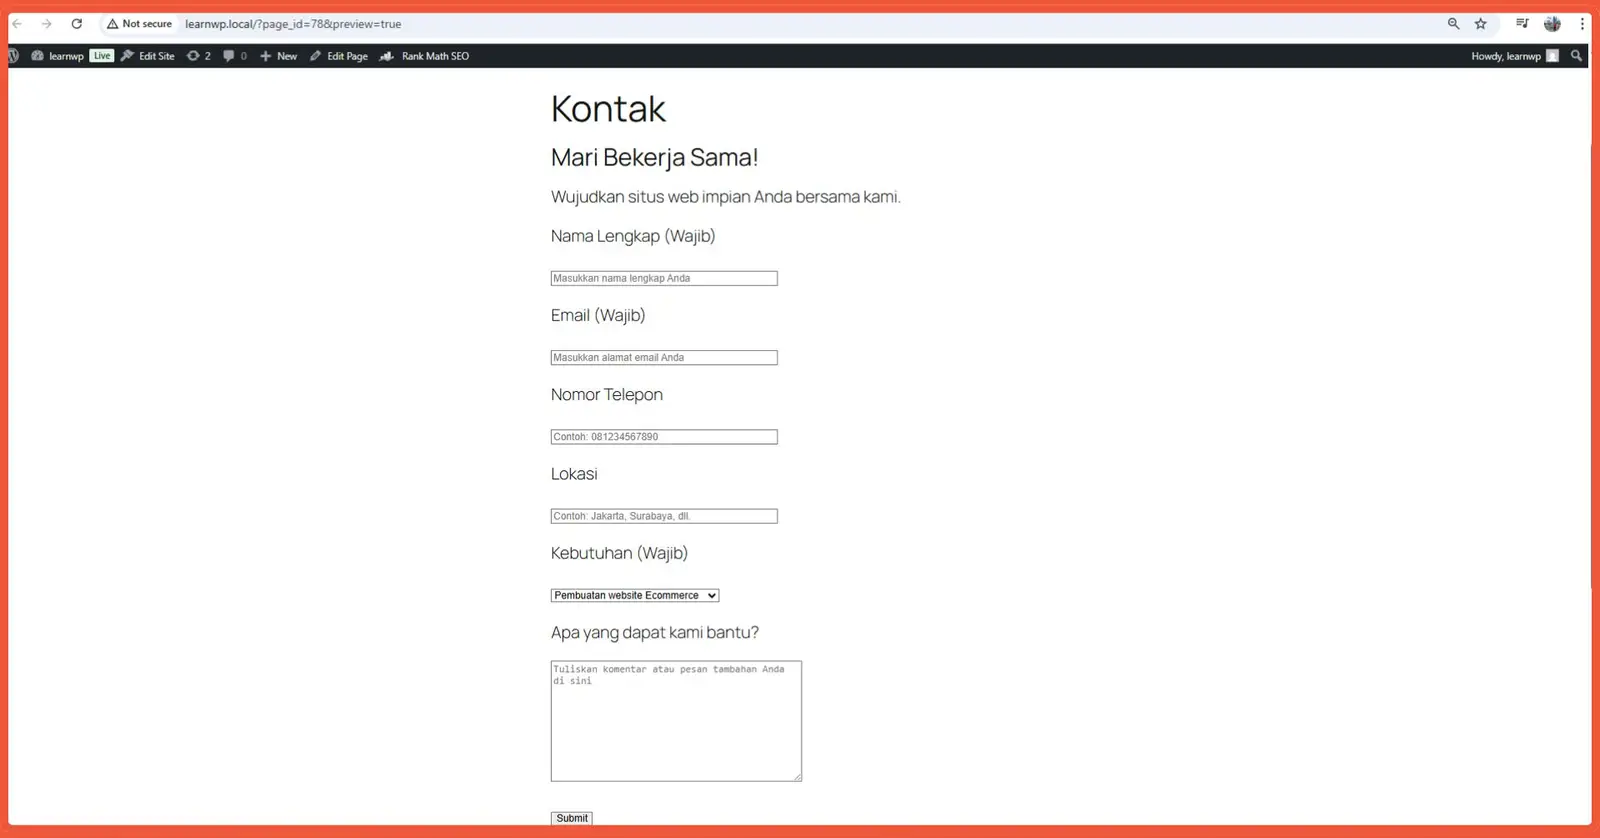
Here is what the finished contact form will look like on your page:
Advertisements
What to Do After Creating a Contact Form in WordPress
Advertisements
1. Save Form Submissions to the Database
By default, Contact Form 7 does not save submitted form data to your WordPress database; its primary function is to send the data via email.
However, you can easily save Contact Form 7 submissions to your database using an add-on plugin. For this tutorial, we’ll use CFDB7.
2. Install and Activate the CFDB7 Plugin
- From your WordPress dashboard, go to Plugins > Add New.
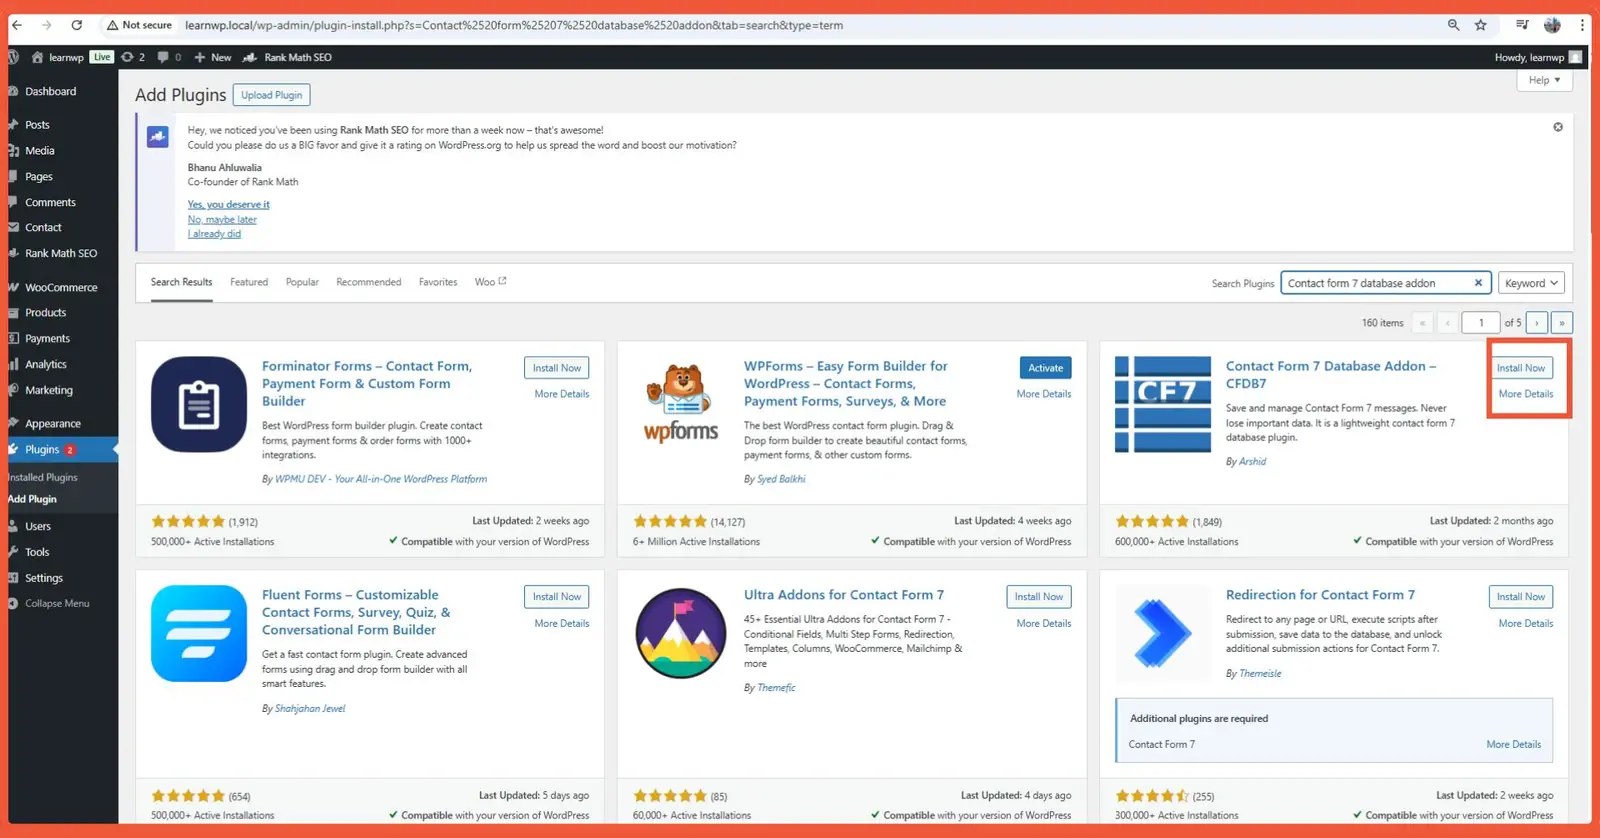
- Search for “Contact Form 7 Database Addon – CFDB7” and click Install Now.
- After installation, click Activate.

CFDB7 typically starts working immediately, saving form submissions right after activation.
3. View Saved Data
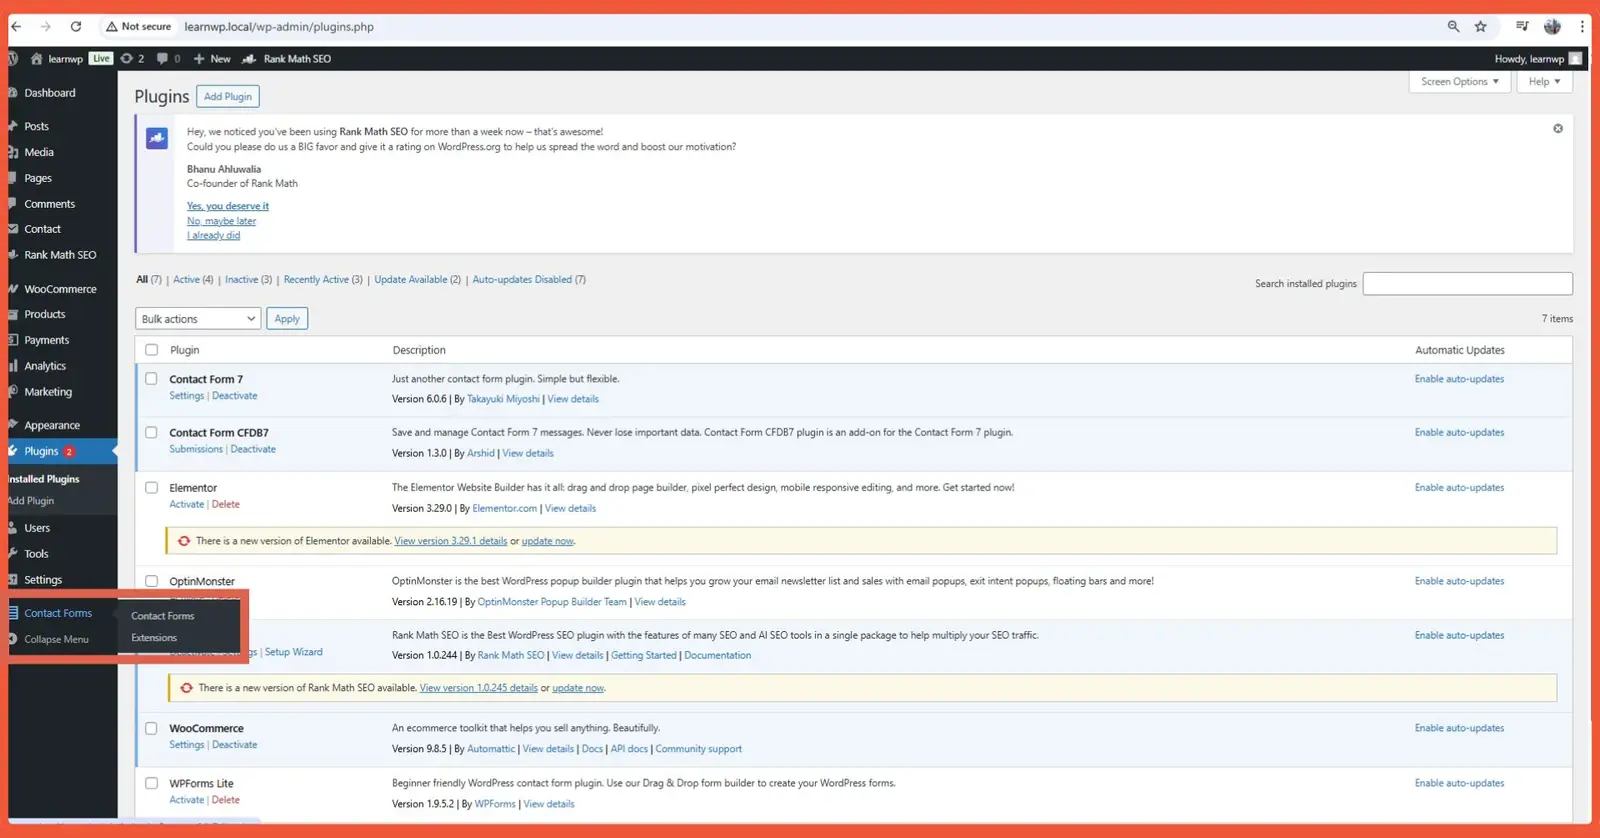
To view the saved data, look for a new menu item named Contact Forms in your WordPress admin sidebar.
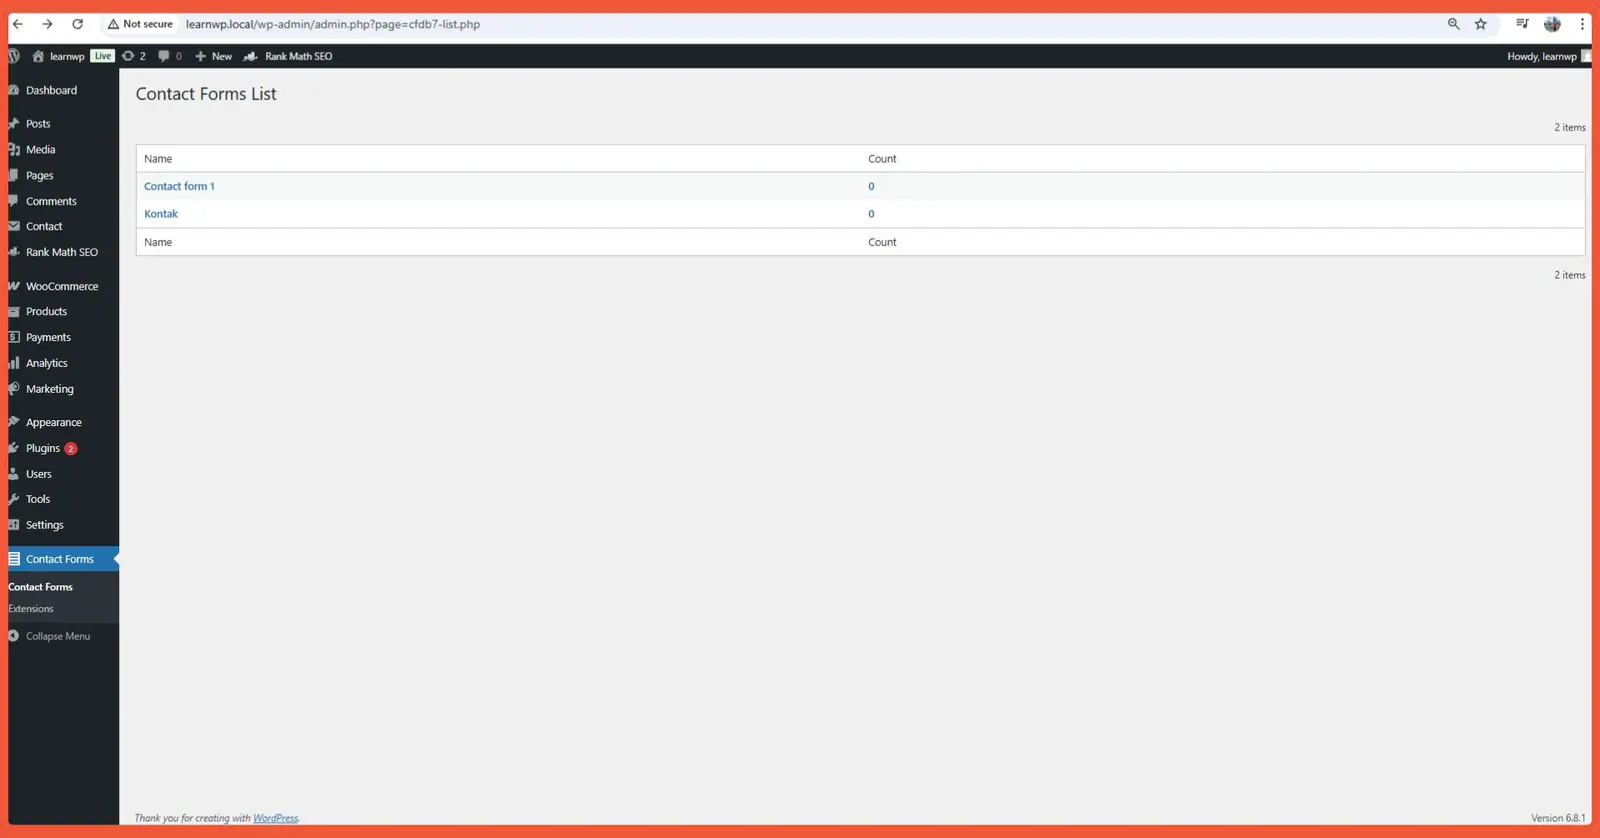
Here, you will see a list of your forms. Click on a form’s name to view all the submissions saved for that specific form.
Did You Successfully Create Your Gutenberg Contact Form?
That’s how you create a contact form in Gutenberg! Building a functional contact form in WordPress with Gutenberg, Contact Form 7, and CFDB7 is a relatively simple process.
Contact Form 7 gives you the flexibility to create forms tailored to your needs, while CFDB7 ensures that every submission is securely stored in your database.
Always remember to test your form after setting it up to confirm that emails are being sent correctly and that the data is being saved in CFDB7.
If you don’t want the hassle of managing a WordPress site and prefer to focus on growing your business, leave it to Tonjoo.
We are a professional custom website development service with hundreds of clients, including Gadjah Mada University, Polygon Bikes, and many others.
We are ready to create a functional and sophisticated website tailored to your specific needs.

For more articles on WordPress, WooCommerce, and web development, check out Tonjoo Studio Blog by Moch. Nasikhun Amin.
Last Updated on November 16, 2025 by Moch. Nasikhun Amin

Advertisements