Advertisements
You can install WordPress plugins on localhost manually, either online or offline. This allows you to choose the method that best suits your setup and needs.
There are two ways to do this: through the WordPress wp-admin dashboard or directly via your localhost’s web server folder. That way, you can take full advantage of top WooCommerce plugins and other essential tools.
So, how do you properly install a WordPress plugin? Let’s walk through the steps below.
Advertisements
How to Properly Install WordPress Plugins on Localhost
There are three main methods to install WordPress plugins on localhost: using the Add Plugin menu, the Upload option, or through your localhost’s web server folder.
1. Installing a WordPress Plugin via the Add Plugin Menu
This method requires an internet connection because you’ll use WordPress’s built-in plugin search feature.
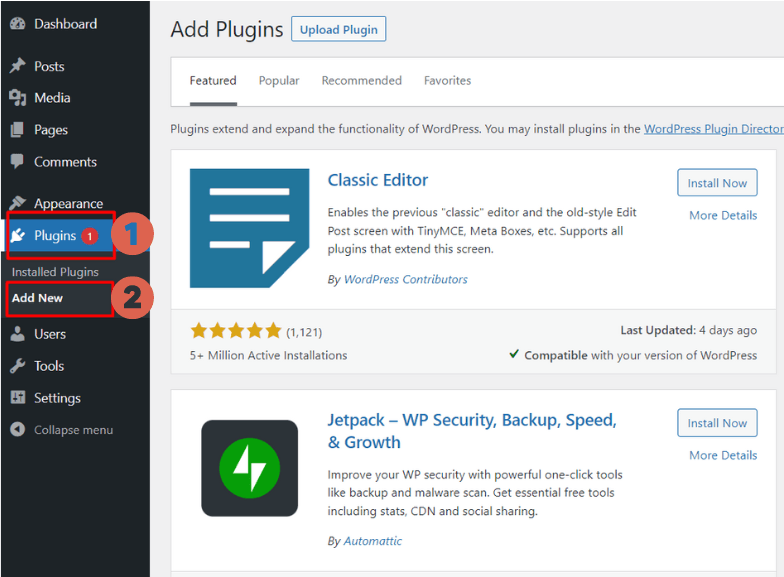
- Go to your WordPress dashboard.
- On the left-hand menu, click Plugins > Add New.

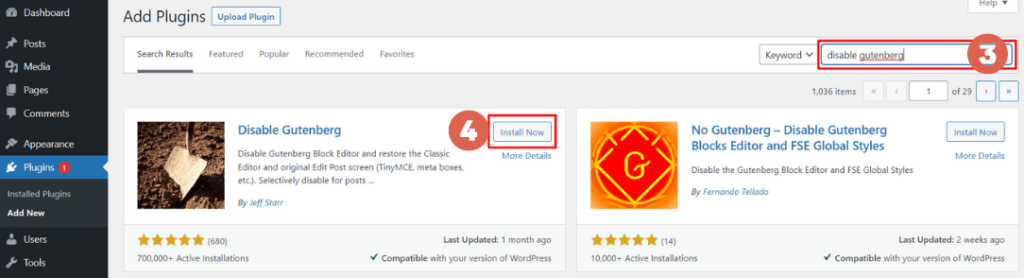
- In the plugin search box, type the name of the free plugin you want to install. In this example, we’re installing Disable Gutenberg. Then press Enter.

- When the plugin appears, click Install Now.
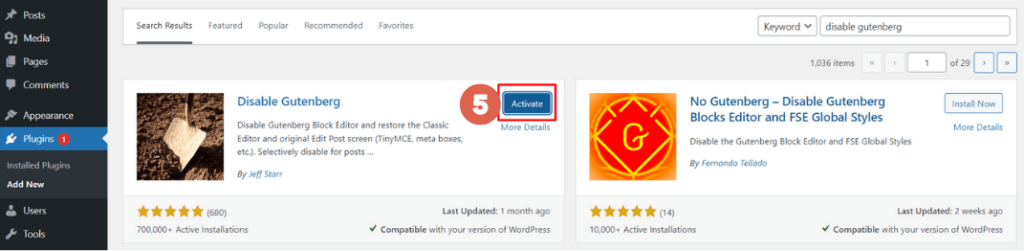
- Wait a moment, then click Activate.

Advertisements
2. Installing a Plugin via the Upload Menu
The second method allows you to upload a plugin manually. This can be done offline, as long as you already have the plugin file ready.
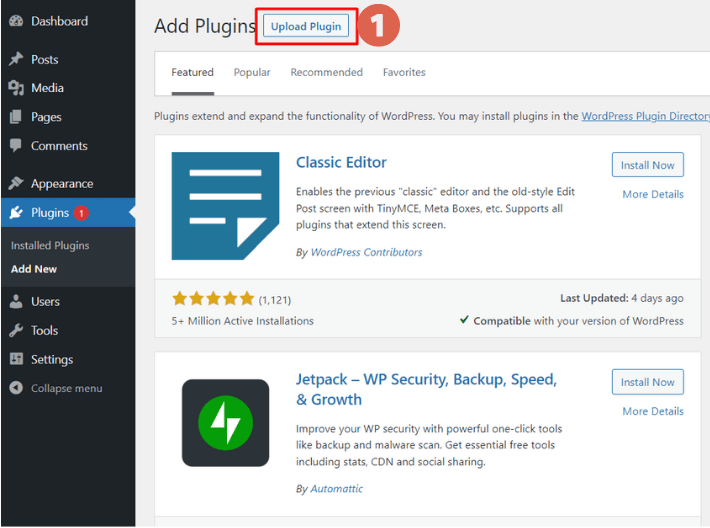
- Go to your WordPress dashboard.
- Click Plugins > Add New.
- Select Upload Plugin.

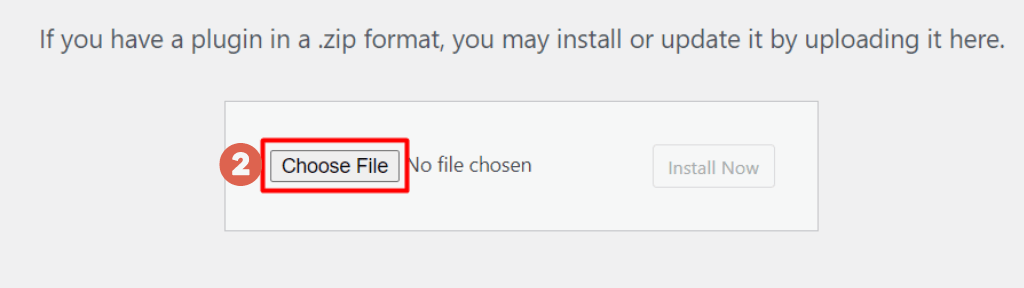
- Click Choose File.

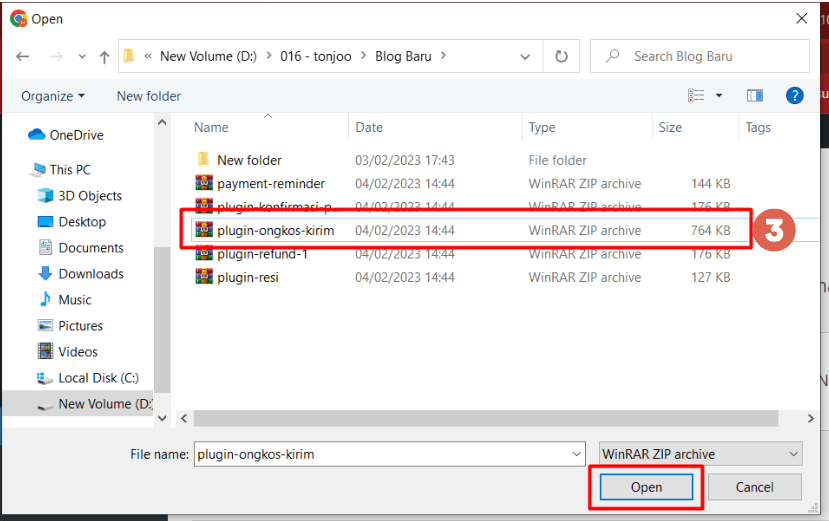
- Select the plugin file you want to upload (it must be in .ZIP format). In this example, we’re uploading a shipping cost plugin. Click Open.

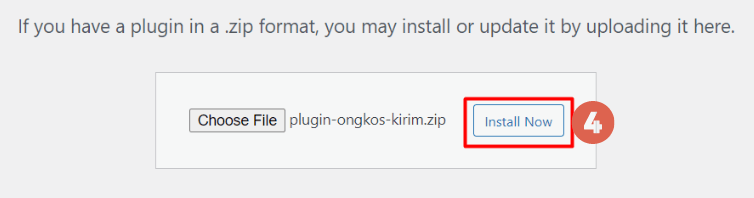
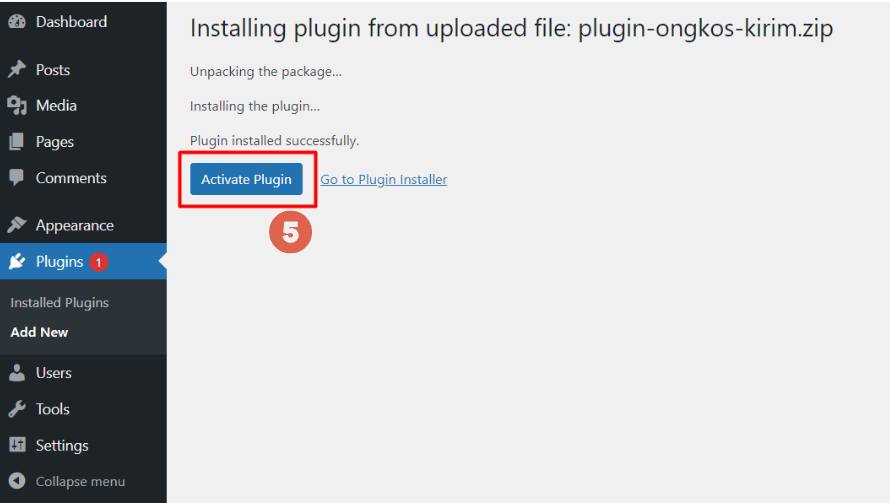
- Click Install Now.

- Wait a moment, then click Activate Plugin.

- Done! You’ve successfully installed the plugin manually.
3. Installing a WordPress Plugin via the Localhost Folder
Another offline method is to install a plugin through your localhost folder. In this tutorial, we’re using WampServer. The steps are similar if you’re using another web server.
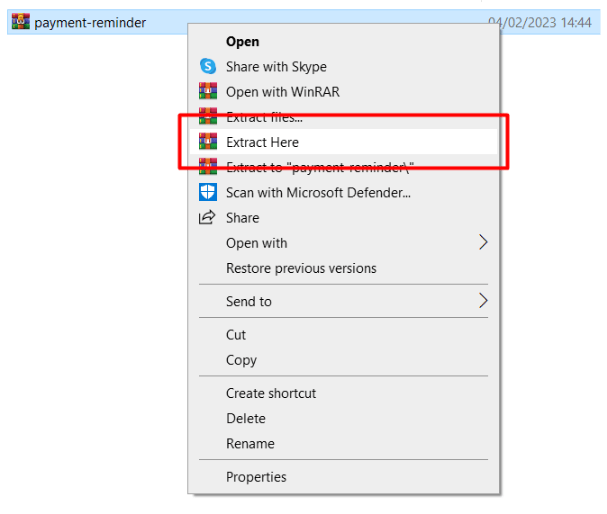
- Extract the plugin file you want to install.

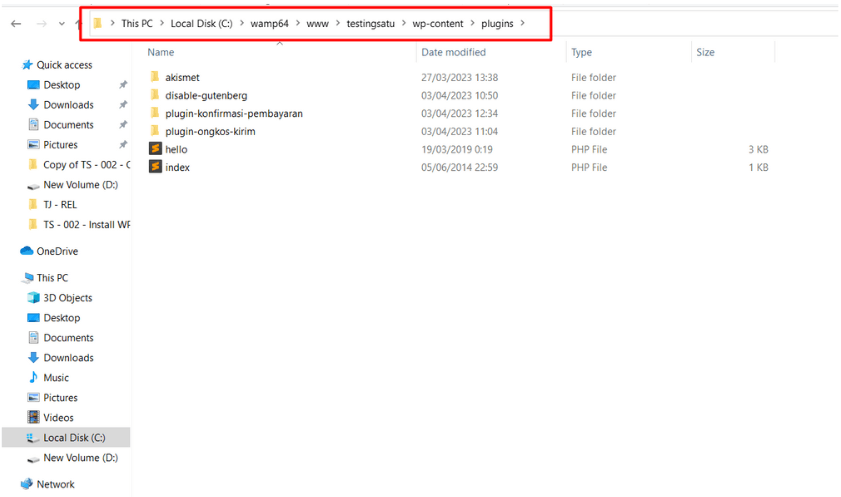
- Copy the extracted plugin folder to your local web server directory. For example: Copy to (C:) > wamp64 > www > [your WordPress folder – here, we use testingsatu] > wp-content > plugins.

- Paste the plugin folder into the plugins directory.
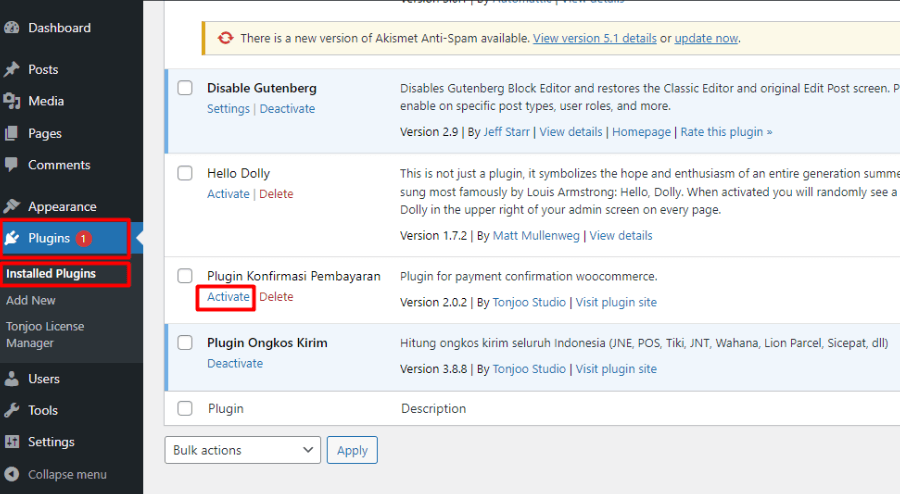
- Open your localhost WordPress site.
- Go to Plugins > Installed Plugins, find the one you just added, and click Activate.

Read this too:
Advertisements
Plugin Successfully Installed?
That’s how to easily install WordPress plugins on localhost both online and offline, it is perfect for local development.
In this tutorial, we used WampServer. If you’re using another server like XAMPP, check out our guide on how to install WordPress on XAMPP.
That said, building a website from scratch can come with its challenges, for instance, WampServer turning orange can be a frustrating issue.
If you don’t want the hassle of website development, leave it to the professionals at Tonjoo, a team with over 10 years of experience building everything from government websites to start-ups like UGM and Hipwee.
Let’s bring your dream website to life by reaching out through Tonjoo Contact Page.

Read more articles on WordPress, WooCommerce, plugins, and web development by Moch. Nasikhun Amin on the Tonjoo Studio blog.
Last Updated on June 7, 2025 by Moch. Nasikhun Amin

Advertisements